Why is it important to follow these steps?
It is important to balance out your Posted Payments Report with Cash Practice with your patient management software at the beginning and end of each business day to make sure all action items are addressed and all money collected and accounted for.
What to do at the: Beginning of Day
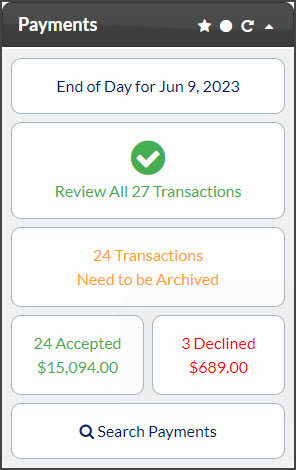
Step 1: Take action on any declined transactions from the [Payments Report].
- How to handle declined payments
- Determine why the transaction was declined before contacting the patient so that you can clearly communicate the matter and get new billing information.
- For declined auto-debit transactions, the system will email the patient a notice via email along with a secure payment link so that they can update their billing and reprocess the payment. However, if the patient has not taken action on their own, you will need to follow up with them.
Step 2: Investigate any auto-debits that display on the [Dashboard] as 'Not Paid Up'
- If a patient has any missing payments due to a declined auto-debit that was not re-scheduled (from Step 1) or collected some other way, the report will show which payment is missing from their payment agreement.
- The report should be investigated and action must be taken to collect payment or mark the payment as paid.
Step 3: Post accepted transactions from the [Posted Payment Report] into your patient management software.
- All accepted transactions will need to be posted into the proper patient ledger of your patient management software.
Integrated Patient Management Software? If you have an integrated EHR that requires you to download the payment file, use that method so that you do not have to manually post payments.
- ChiroHD: Auto-posts immediately, no downloading required
- ChiroTouch® (Server): Download & Import
- Eclipse® (Server): Download & Import
- Genesis®: Auto-posts immediately, no downloading required
- Genius Solutions/eTHOMAS: Auto-posts every 5 minutes, no downloading required
- PayDC: Auto-posts every hour, no downloading required
- Platinum System® (Server): Synchronize/Download
What to do at the: End of Day
Step 1: Take action on any declined transactions from the [Posted Payment Report].
- For all declined transactions, the system will email the patient a notice via email along with a secure payment link so that they can update their billing and reprocess the payment. However, if the patient has not taken action on their own, you will need to follow up with them.
- Determine why the transaction was declined before contacting the patient so that you can clearly communicate the matter and get new billing information.
Step 2: Investigate any auto-debits that display on the [Dashboard] as 'Not Paid Up'
- If a patient has any missing payments due to a declined auto-debit that was not re-scheduled (from Step 1) or collected some other way, the report will show which payment is missing from their payment agreement.
- The report should be investigated and action must be taken to collect payment or mark the payment as paid.
Step 3: Post accepted transactions from the [Posted Payment Report] into your patient management software.
- All accepted transactions will need to be posted into the proper patient ledger of your patient management software.
Step 4: Reconcile and clear out all of the payments from the day using the [Posted Payment Report].
- Access the [End of Day] report from the [Dashboard] and print it.
- Attach any signed receipts if the patient’s signature is not on file.
- Match up the transactions from the [End of Day] report to the payment report of your patient management software. Both reports must match up.
- Staple all balanced reports together and give them to the Office Manager for verification.
- Archive the transactions on your [End of Day] report.

