
What is the importance of downloading the Posted Payments Report into ChiroTouch®?
Eliminate manual posting and save valuable time by importing payments from Cash Practice® into ChiroTouch®! This will also ensure your patient's ledgers are synced up with the processed transactions from your Cash Practice® account. All of your one-time payments should be run through your patient's ledgers in ChiroTouch®. Any scheduled auto-debits, voids, refunds, and any other payments run through Cash Practice® should simply be downloaded from Cash Practice® and uploaded into ChiroTouch® each business day.
NOTE: All one-time payments processed directly within ChiroTouch® using the Cash Practice® integration are automatically posted into the patient ledgers. You will only need to follow these instructions to import the payment file from Cash Practice® into ChiroTouch® if you have any accepted auto-debits, voids, refunds & returns.
*The entire process of Exporting Payments from Cash Practice® to ChiroTouch® will take less than sixty seconds as long as you stay on top of it and keep it current.
SHORTCUT-FAST VERSION FOR TODAY'S PAYMENTS:
Step 1: Logged into CashPractice.com → From the Dashboard → Click on the [End of Day Summary Report].

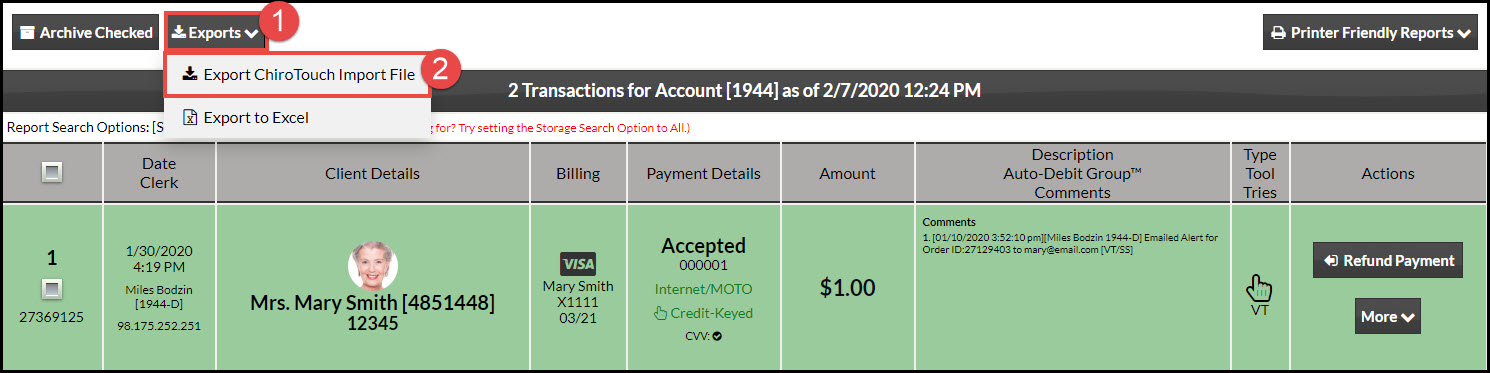
Step 2: Click the [Exports] button in the top left corner of the report, then select [Export ChiroTouch Import File]. This will generate the download file. Click [OK].

Step 3: Click the large gray button that says [Download File for ChiroTouch Import] and this will automatically open a window to save the file to the Downloads folder on your computer. You do not need to open the file.
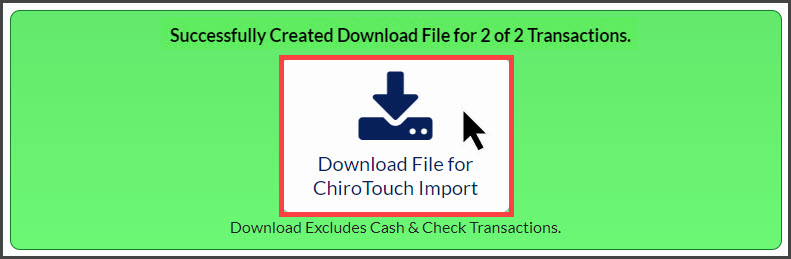
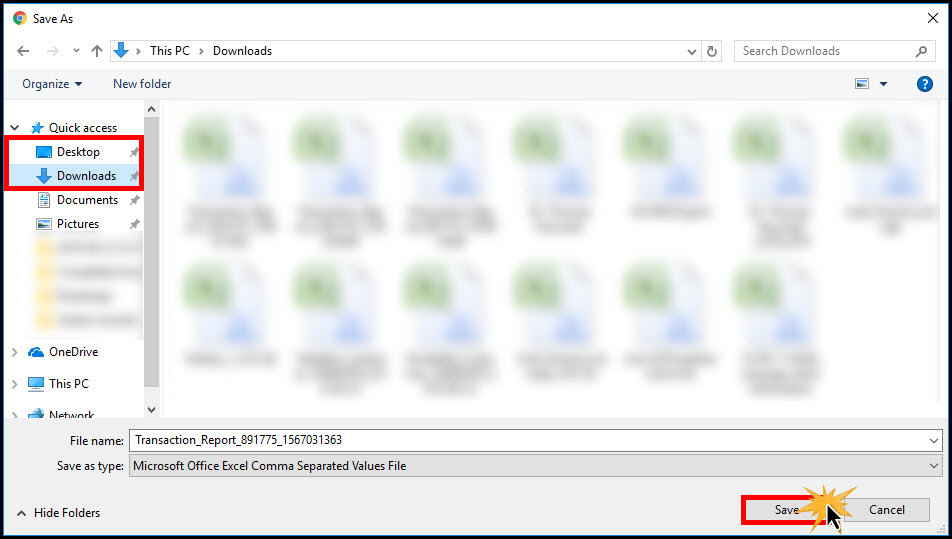
*Note: The image below is for Chrome only. Other browsers may display this differently.

You do not need to keep the report after it has been imported into ChiroTouch®.
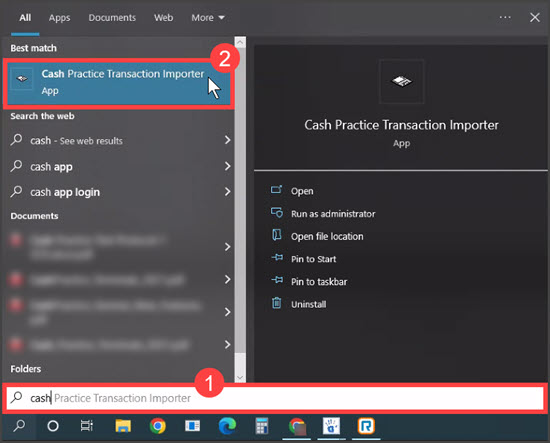
Step 4: Open the [Cash Practice® Transaction Importer]. This tool can be located on your computer by accessing your [Start Menu] → typing in the word "Cash" → then select [Cash Practice® Transaction Importer].
If the tool does not come up this way, from your [Start Menu], go to → [All Programs] → Locate the [ChiroTouch®] Folder → click [Utilities] → select the [Cash Practice® Transaction Importer].
*Note: The more you use this tool, it will automatically create a shortcut in your start menu. You can also drag the Transaction Importer tool to your home screen for easy access or pin it to your taskbar.

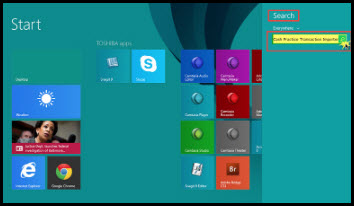
Windows 8 Users: In the [Search] tool → enter Cash Practice® Transaction Importer.

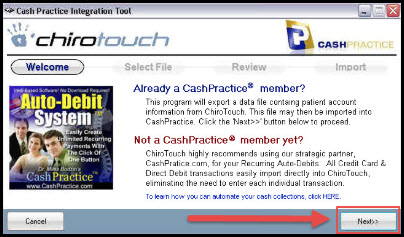
Step 5: Once the Cash Practice® Transaction Importer opens, click the [Next] button.
Step 6: Select [Import Payment Transactions].

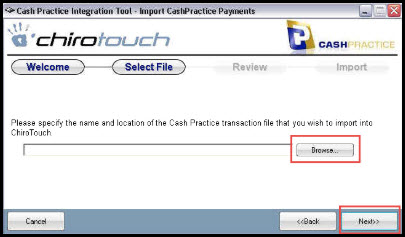
Step 7: Click the [Browse] button to locate the Transaction Report in the "Downloads" folder, or wherever you saved it. Then proceed to the [Next] step.

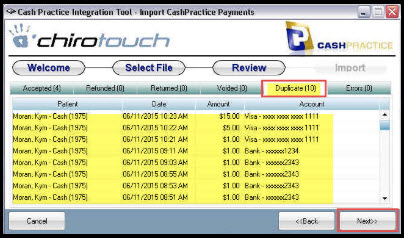
Step 8: Under each tab labeled Accepted, Refunded, Returned, Voided & Duplicate you can view the transactions about to be imported. Go to the [Next] step.

Under the [Duplicate] tab, any transactions already posted into ChiroTouch® will be listed. Do not panic....the [Duplicate] transaction will not double post. It's simply showing you the transactions that will not be uploaded since they are already posted. Most likely these were one-time transactions that were processed directly within ChiroTouch®. Go to the [Next] step.

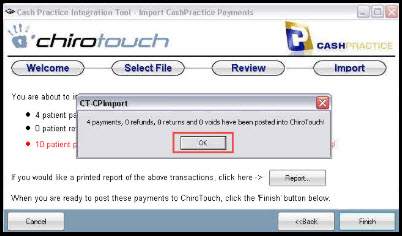
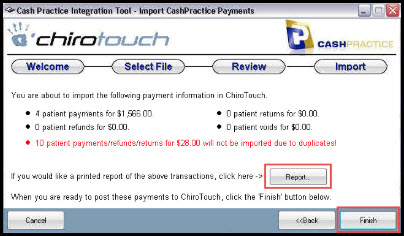
Step 9: Click the [Report] button to print a report of the transactions that have been posted to the corresponding ledgers. Then click the [Finish] button.

Step 10: You can now log into ChiroTouch® → Front Desk and view a patient ledger if you'd like to see the magic that just happened!
Follow these instructions if you're importing payments for a specific date range:
Step 1: To import past transactions, log into your CashPractice.com account.
Step 2: Click on the [Search Payments] button located on the right side of your Dashboard, under the "Payments" section.

Step 3: Define your report with the search options for the transactions you would like to download and click the [Search] button. Typically you will want to download the report for a specific date range. After entering the dates, be sure to change the [Storage] field to [All] in order to pull every transaction from that date range even if it has been archived.

Step 4: (If no missing CT ID's, skip to Step 5) Prior to downloading the report, you need to make sure each of your client's accounts has their ChiroTouch® ID# entered. Only clients with a ChiroTouch® account number will have transactions exported.
Example of missing CT ID#: As seen in the image below, a large box displays that the ID is missing.

To add the missing CT ID#, click on the Missing ID box → enter the missing info → [Save].

*NOTE: If you entered any missing CT ID's, you will need to refresh the report before downloading.
Step 5: Click the [Exports] button in the top left corner of the report, then select [Export ChiroTouch Import File]. This will generate the download file. Click [OK].
Step 6: Click the large gray button that says [Download File for ChiroTouch Import] and this will automatically open a window to save the file to the Downloads folder on your computer. You do not need to open the file.


*Note: The image below is for Chrome only. Other browsers may display this differently.

You do not need to keep the report after it has been imported into ChiroTouch®.
Step 7: Open the [Cash Practice® Transaction Importer]. This tool can be located on your computer by accessing your [Start Menu] → typing in the word "Cash" → then select [Cash Practice® Transaction Importer].
If the tool does not come up this way, from your [Start Menu], go to → [All Programs] → Locate the [ChiroTouch®] Folder → click [Utilities] → select the [Cash Practice® Transaction Importer].
*Note: The more you use this tool, it will automatically create a shortcut in your start menu. You can also drag the Transaction Importer tool to your home screen for easy access or pin it to your taskbar.
Windows 8 Users: In the [Search] tool → enter Cash Practice® Transaction Importer.
Step 8: Once the Cash Practice® Transaction Importer opens, click the [Next] button.

Step 9: Select [Import Payment Transactions].

Step 10: Click the [Browse] button to locate the payment report in the "Downloads" folder. Then proceed to the [Next] step.

Step 11: Under each tab labeled Accepted, Refunded, Returned, Voided & Duplicate you can view the transactions about to be imported. Go to the [Next] step.

Step 12: Under the [Duplicate] tab, any transactions already posted into ChiroTouch® will be listed. Do not panic....the [Duplicate] transaction will not double post. It's simply showing you the transactions that will not be uploaded since they are already posted. Most likely these were one-time transactions that were processed directly within ChiroTouch®. Go to the [Next] step.
Step 13: Click the [Report] button to print a report of the transactions that have been posted to the corresponding ledgers. Then click the [Finish] button.
Step 14: You can now log into ChiroTouch® → Front Desk and view a patient ledger if you'd like to see the magic that just happened!
