Getting Started: Your Auto-Debit System must be in LIVE mode before you can schedule recurring payments. See HERE if you're still in TEST mode.
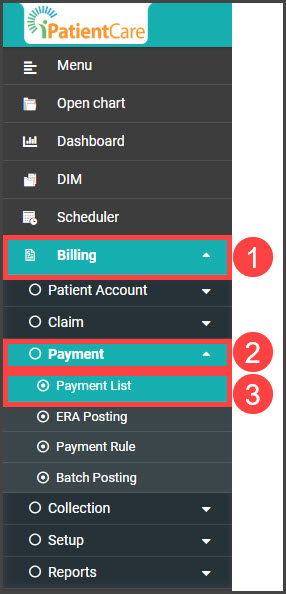
Step 1: From the menu on the left of the screen in iPatientCare, click [Billing] → [Payment] → [Payment List].
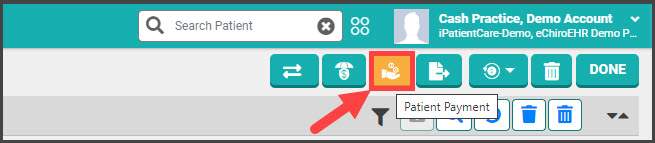
Step 2: Click on the [Patient Payment] button at the top right corner of the screen.
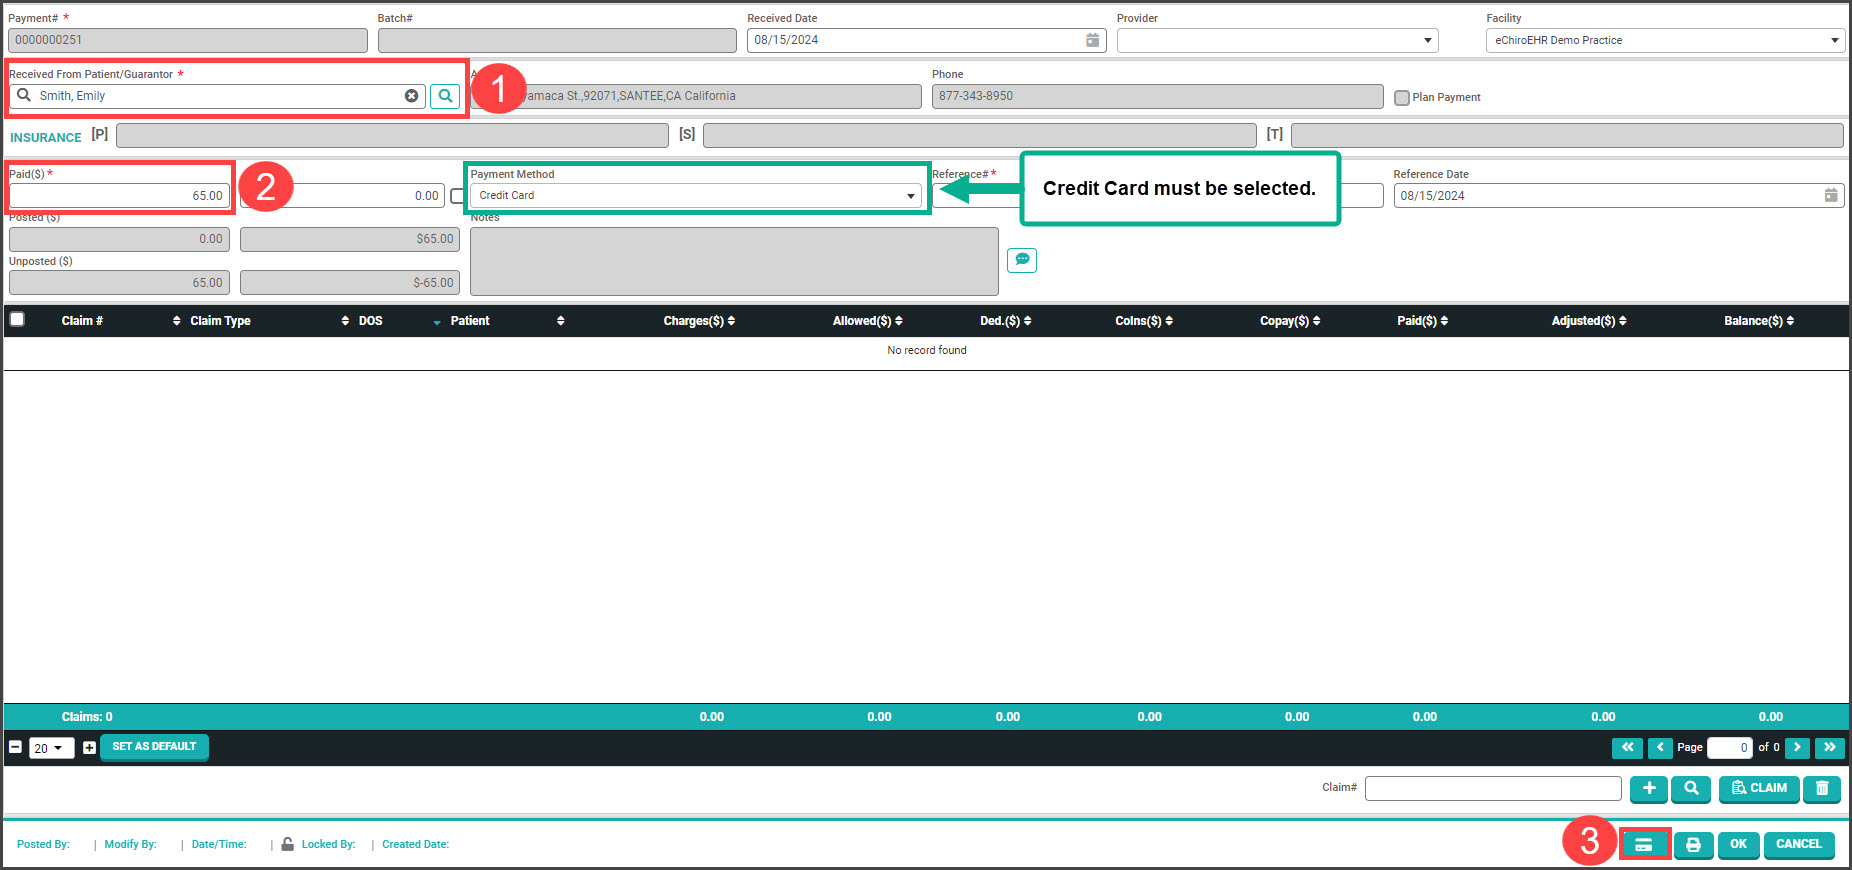
Step 3: On the next screen, search for the patient and select the match from the drop-down menu. Type the amount in the "Paid" field, then click the credit card button in the bottom right corner of the page. (Payment method must be selected as Credit Card.)
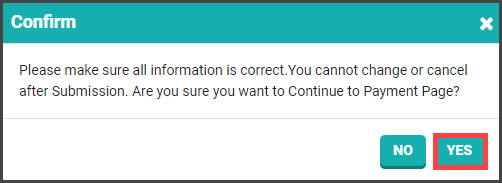
Step 4: In the pop-up window, click [YES].
Step 5: Transaction Details
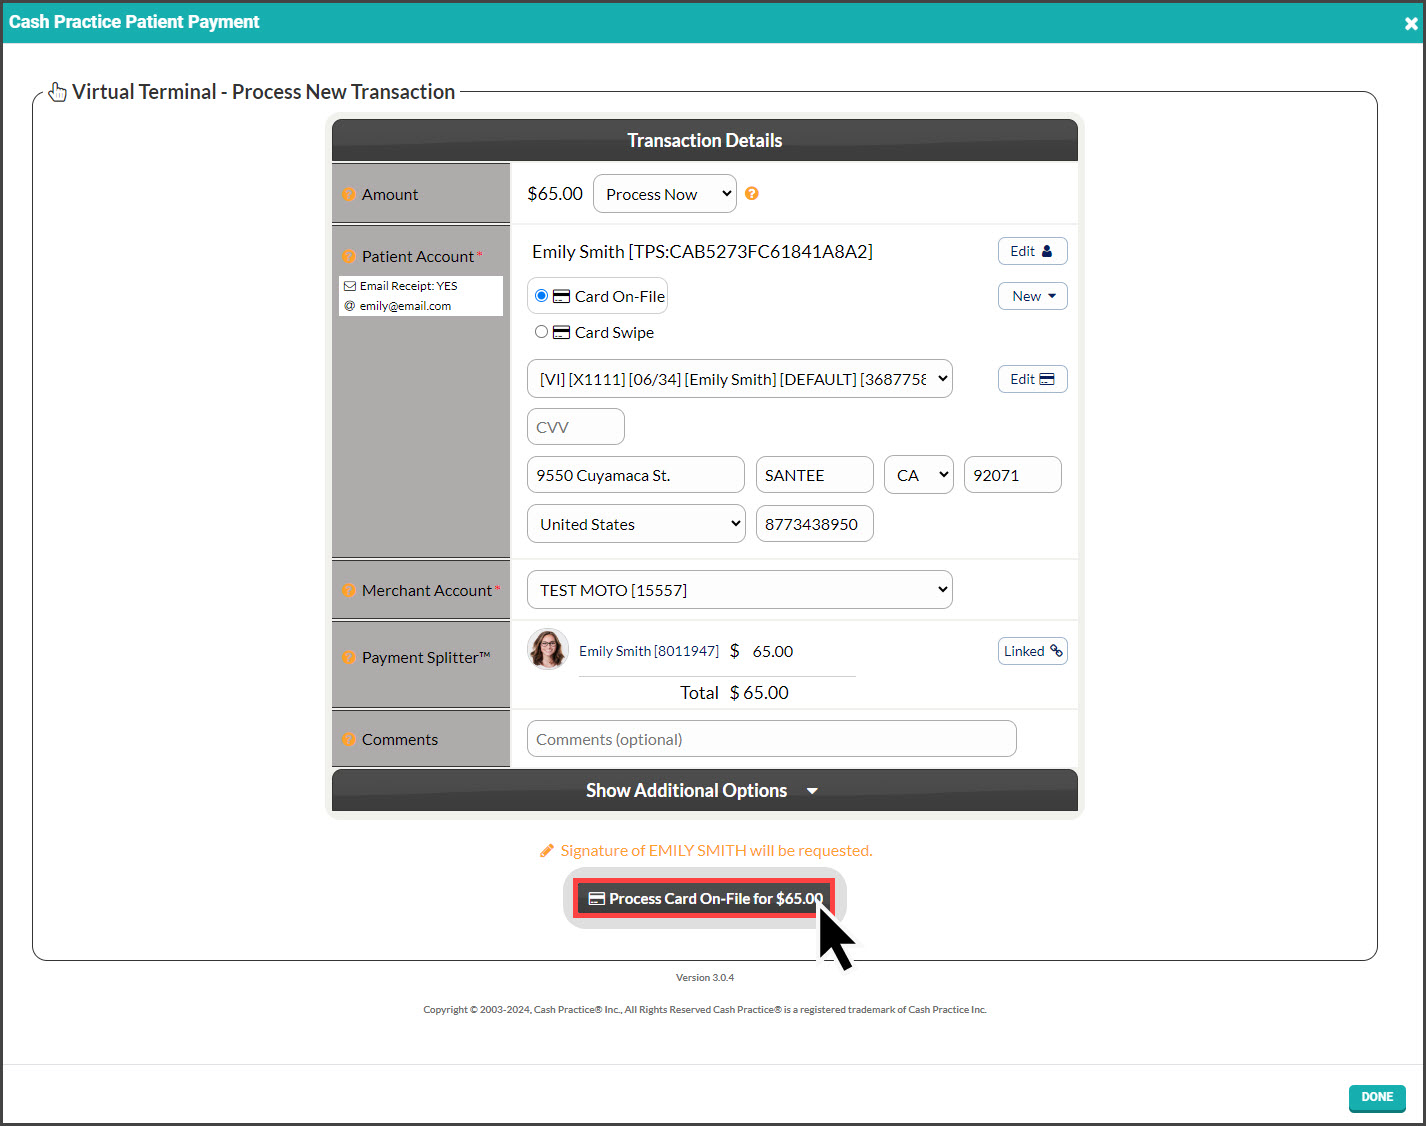
- Processing Method: Defaulted to "Process Now" with the option to select "Schedule Later" allowing for scheduling a one-time payment to run on a specific date.
-
Patient Account: The patient record will be pre-loaded based on the PatientCare account you're in.
- Amount/Payment Splitter: Enter the dollar amount for the patient here, or if you need to split the payment amongst multiple family members, follow the instructions HERE
-
Billing Type:
- Card On-File: Key-enter the credit card information OR pull stored credit card information previously saved on file in the patient account. Click the [New] button to add new information to the Billing Vault
- Card Swipe: Use a Cash Practice® USB Card Swiper or Scriptel Signature device to swipe a card and collect payment information for the payment.
- Card EMV: (not shown) Select this option if using one of our integrated EMV chip terminals. You will be prompted differently on how to process the payment.
- Merchant Account: The correct merchant account will be pre-selected by default. MOTO is for card-on-file or manually entered cards, and RETAIL is for physically swiped cards.
- If you use multiple merchant accounts with us, make your selection here. For more information, contact our Merchant Services Department by phone at (877) 343-8950 x105) or email MerchantAccounts@CashPractice.com
- Comments: (OPTIONAL) Add a comment for your team's eyes only. This will be displayed in the Posted Payments Report when the transaction details are reviewed in the future.
Step 6: Click the [Process] button at the bottom of the screen and click [OK].
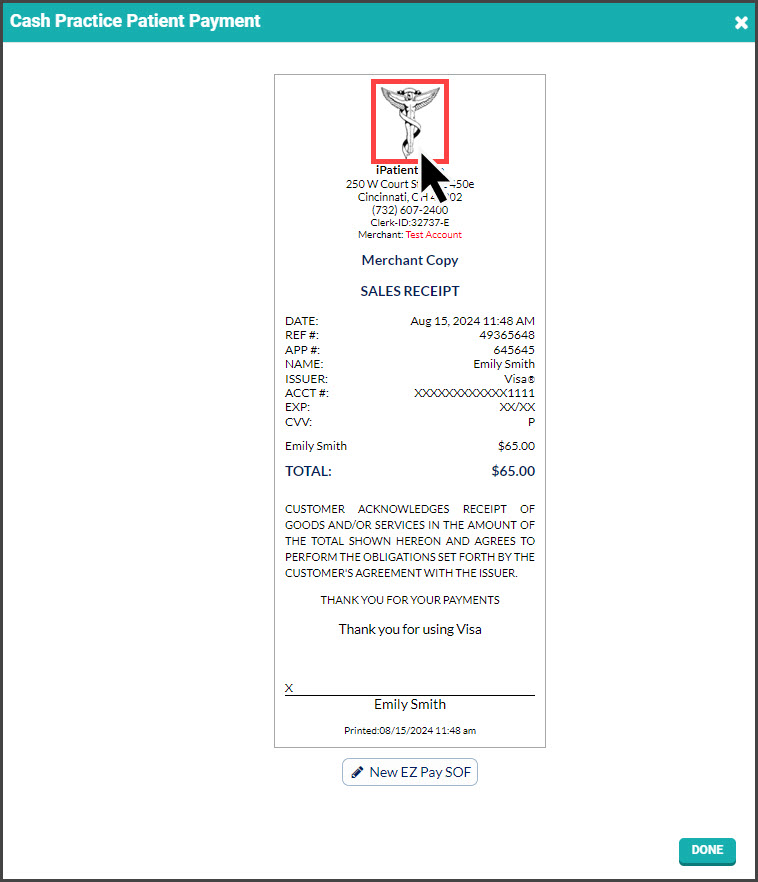
Step 7: (OPTIONAL) Capture the [e-signature] from the patient.
Step 8: If needed, print the receipt by clicking on the company logo at the top. Once finished, click on the X in the window's top right corner or the [Done] button at the bottom right. The transactions must be imported daily to post in the patient's account in iPatientCare, and the Dashboard of Cash Practice will automatically be posted.
- The receipt will be emailed to the patient depending on your Auto-Debit System Settings.