
This article outlines all the necessary settings to make sure that your patients are set to receive email notifications from the [ADS] Auto-Debit System®. These email notifications are used to alert the patient of accepted payments, and declined payments that need to be collected, or to update billing. The email alert notifications can be sent automatically or manually.
Summary:
-
Your [ADS Alert Emails] are turned on in the system setup, along with any additional email triggers.
- The patient [Account Status] is [Active].
- The patient has a valid email on file.
- The patient [Mailing List Status] is [On].
- The patients [Auto-Debit System Email Alerts] are set to [Yes].
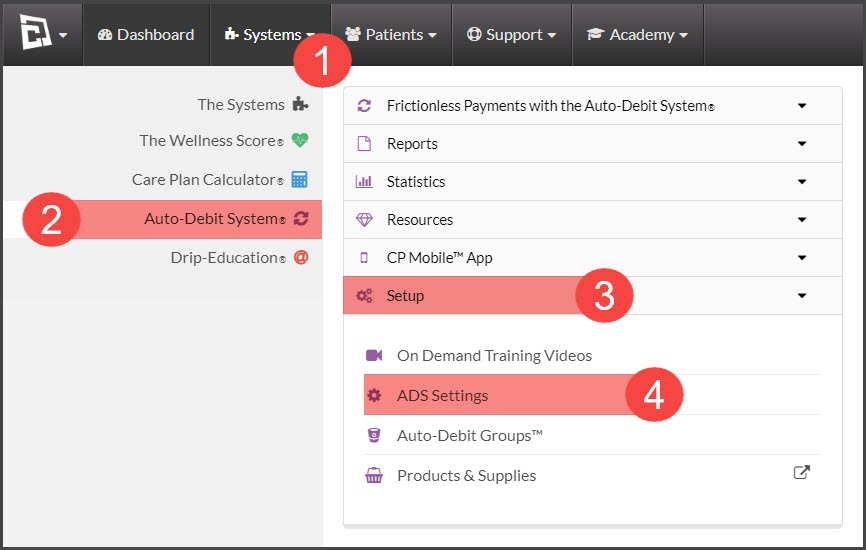
1: Turn on [Auto-Debit System® Alert Emails]
Hover over [Systems] → click on [Auto-Debit System®] → select the [Setup] drop-down menu → click on [ADS Settings] → [Step 2 Alert Triggers]: Select which types of events you want to trigger email notifications to the patient. (The image below displays the settings that we recommend.)

- Automated Email Alerts for Recurring Payments: Check which alerts you would like sent to your patients for their scheduled auto-debits.
- Automated Email Alerts for One-Time Payments: Check which alerts you want automatically sent to your patients for their one-time payments processed with the Virtual Terminal, EZ Swiper, or Simple Swiper.
Optional, but recommended: Add Button for Patient Open CP Online Form
- Select the CP Online Forms® to be triggered for Expired Cards and/or Declined Payments. We recommend using both as pictured below.

2: Patients need to have an active patient status and an email address and the Auto-Debit System® Email Alerts turned ON within their patient record. Click HERE for instructions on how to access this.
- The patient must have a valid email address stored in their patient record, as well as have the [Mailing List Status] set to [On (Send Emails)].
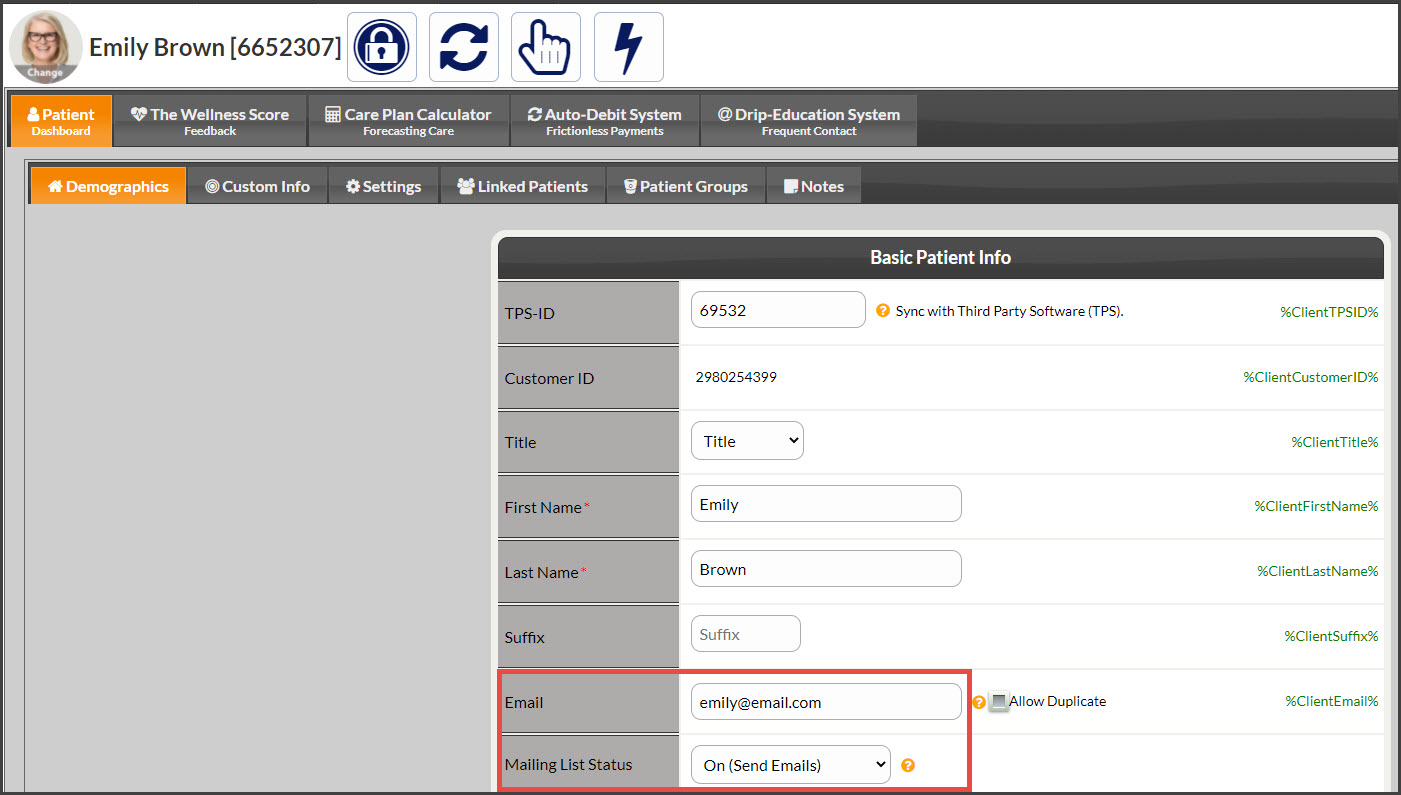
- The patient [Account Status] status must be [Active],
- The patient's One-Time and Recurring Alerts must be set to [On]. (These are automatically set to [On] by default.)
- Be sure to click on the [Save] button if you make any changes.
