NOTE: Before processing a payment, you must first complete the integration. See HERE for details.
Getting Started:
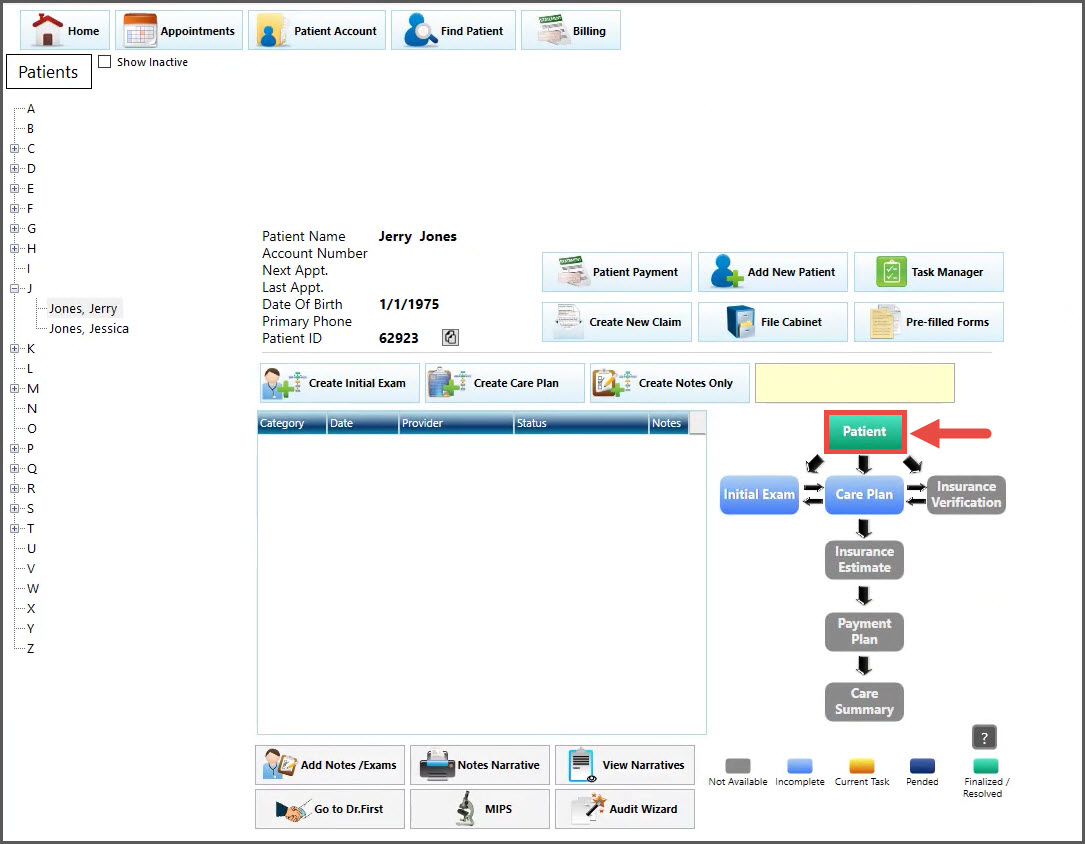
Step 1: Locate the patient by searching for them under [Patient Account].
Step 2: Select the green [Patient] button to launch Cash Practice and schedule the recurring payment.
Step 3:
- Select [Payment Details] on the left
- Provider: Select the Provider or Owner/Admin of the Cash Practice account needed to run the payment, if not already defaulted
- Select the [Click here to schedule Auto-Debit payments] button
Step 4: An internet window tab will open, and you will schedule the auto-debit using the following steps:
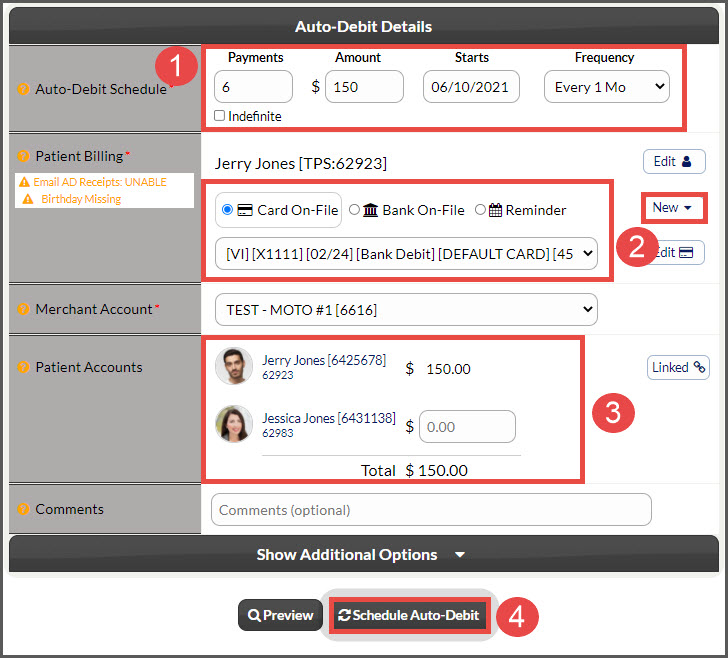
- Auto-Debit Schedule:
- Payments: Enter the number of payments for the scheduled auto-debit or check the [Indefinite] box to have the payments go forever
- Amount: Enter the dollar amount of what each payment will be
- Starts: Click on the date field to open the calendar and choose the start date. This is when you want the auto-debit to begin
- Frequency: Select the payment frequency. Monthly is the default, but choose from our many options in the drop-down menu
- Patient Billing: Select the type needed to schedule payments. OR click the [New] button to the right, to add in a new Credit Card or Bank Account.
- Patient Accounts: (optional) Link patients within Cash Practice by following the instructions HERE. This feature allows the team to split the auto-debit payment amongst multiple patients in a family or group of friends.
- Once finished, click the [Schedule Auto-Debit] button.
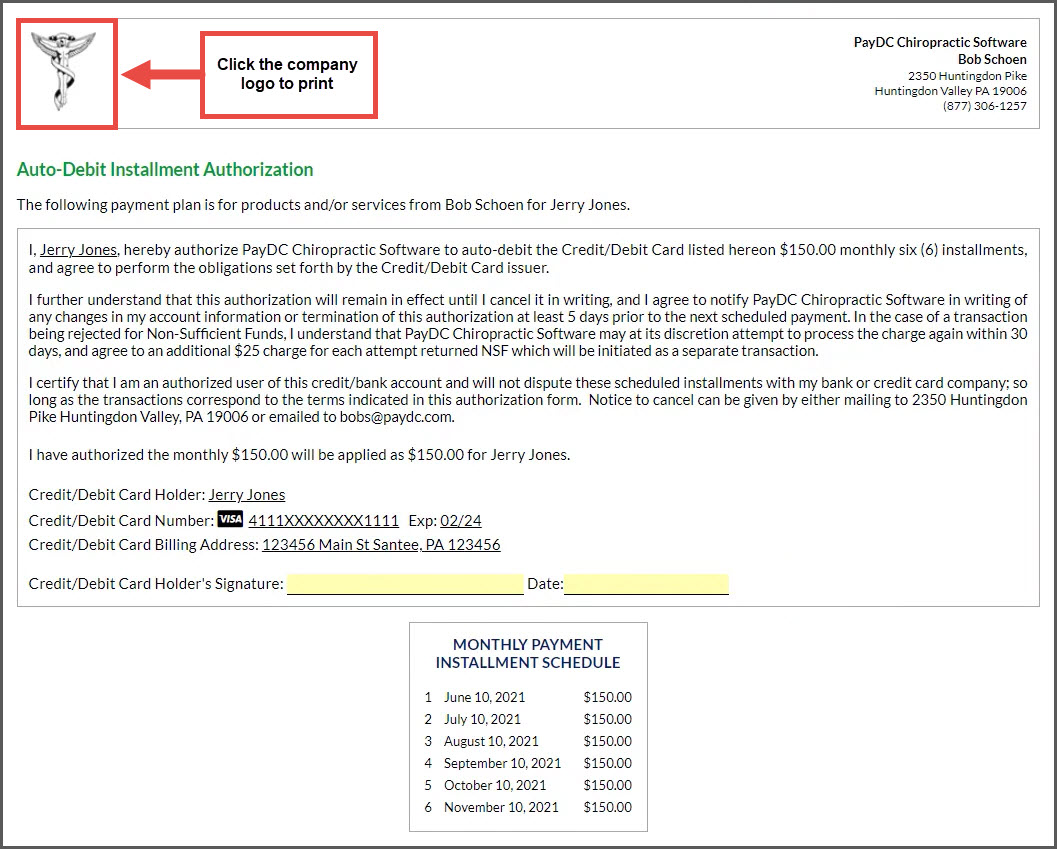
Step 5: This then produces the Auto-Debit Installment Authorization form. Print the authorization form by clicking on the [Logo] located on the left side of the page. The patient will need to sign and date this form. When the payments run, they will automatically post to this patient's ledger in PayDC.


