
Please follow these instructions for exporting your patients from Cash Practice® into Microsoft Excel.
Step 1: Hover your mouse over the [Patients] menu → hover over [Patlient Tools] → select [Export Patients].
Note: This is only seen by the administrator, or by users if they have permission granted. If you need to change your permissions, please contact the account administrator, and go HERE for instructions.

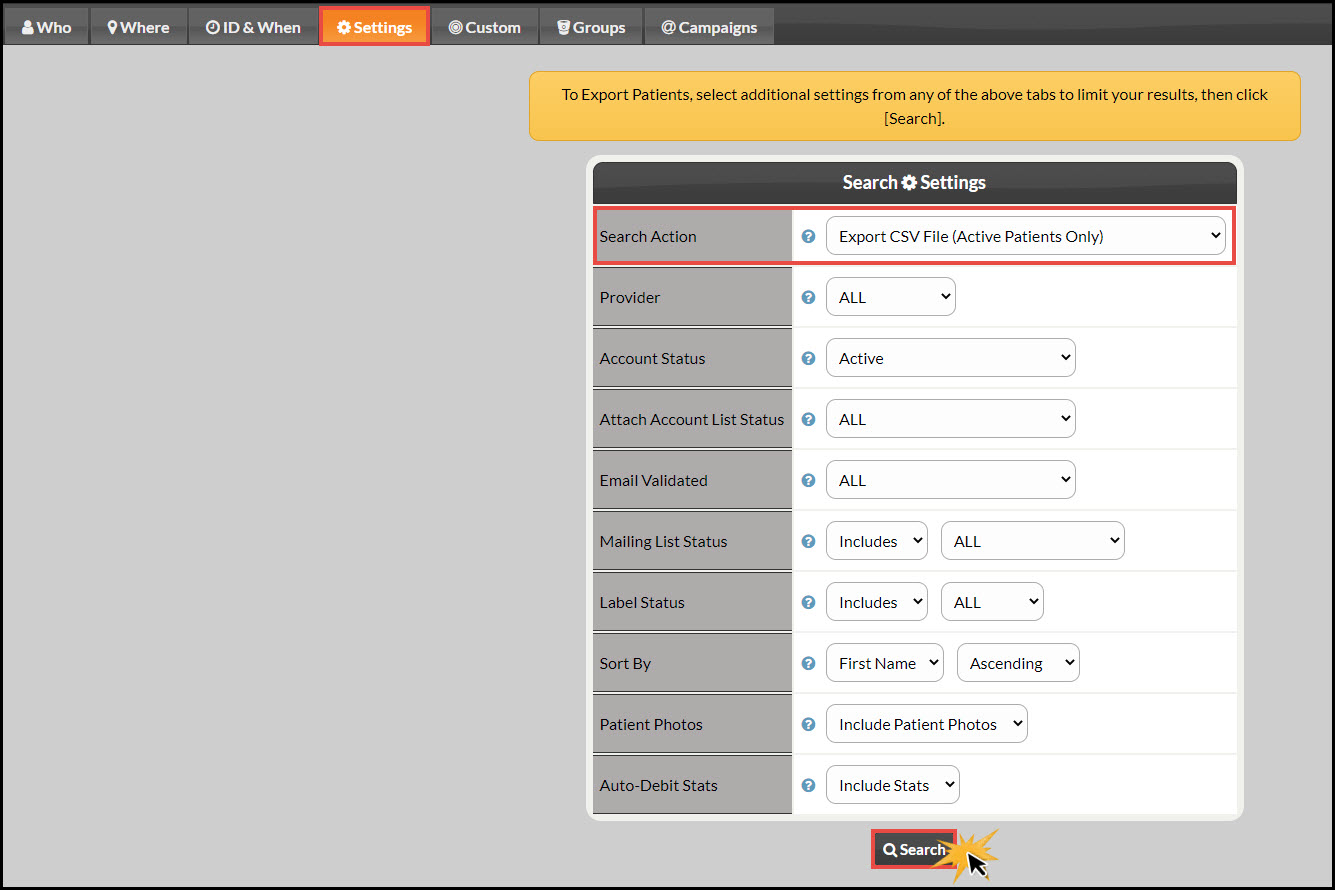
Step 2: Designate your search options. Please note that the "Search Action" field must be set to [Export CSV File (Active Patients Only)]. Then click [Search].
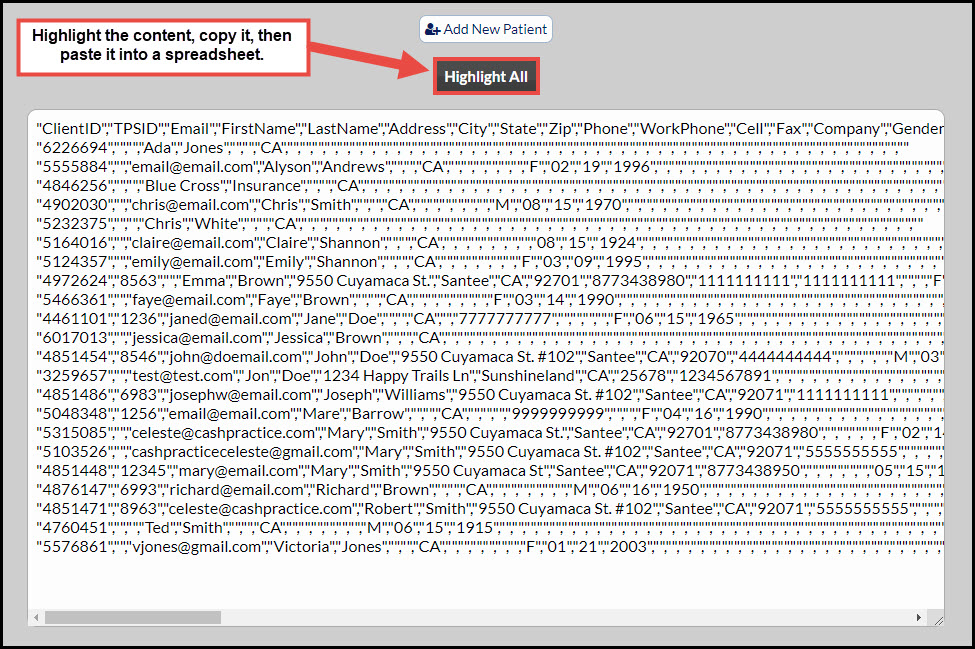
Step 3: From the export results, click on the [Highlight All] button to highlight the content, then copy and paste the data into a spreadsheet.
Step 4: (Using Microsoft Excel) Paste the data into the Excel spreadsheet and save the file to your computer.
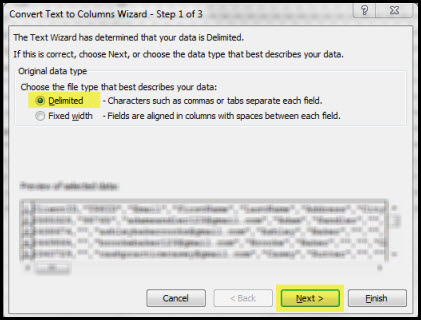
Step 5: Once the data is pasted into Excel, make sure Column "A" is selected. You will separate the data into columns by clicking on the [Data] tab→ select [Text to Columns].

Step 6: Choose the file type as [Delimited]→ Select [Next].
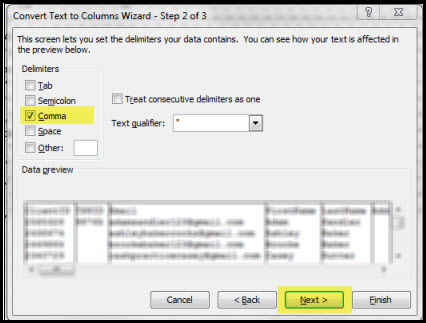
Step 7: Check the delimiter as [Comma]→ Select [next].
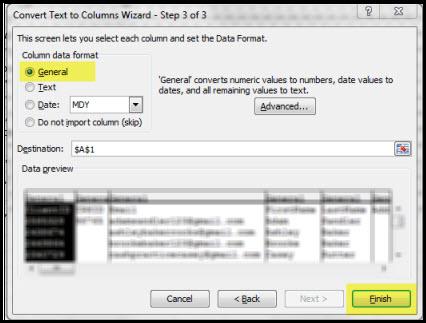
Step 8: For the Column Data Format, select as [General] → select the [Finish] button.
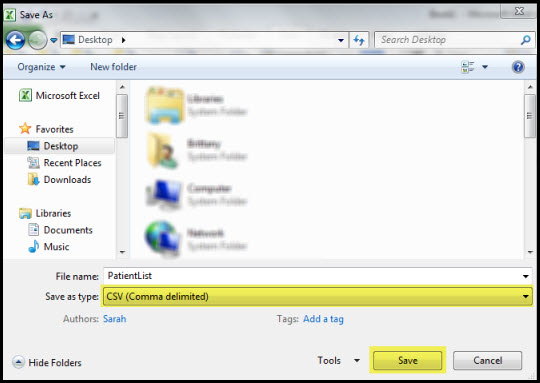
Step 9: The data will now separate the data into columns. Now you will save the file to your computer. On the spreadsheet, go to the [File] tab → click [Save As].
Step 10: Name the file → choose to [Save as Type] as [CSV Comma Delimited] → click [Save].
Note: You can choose to save the file where ever you like, preferably the desktop since it is the easiest place to locate
Ta-Da! You have successfully Exported your Patient List from your Cash Practice® account.