

- Before importing your patients, please make sure that you have enough space in your Cash Practice® account to accommodate the file. (Most accounts have a database size of 500 patients.) You can also inactivate patients to free up space first. Learn how HERE.
- We do not recommend that you import inactive patients unless you are using the Drip-Education® Email Marketing System.
- If you're only using the Auto-Debit System® or Cash Plan Calculator® System, there is no reason to import a huge list of patients when only a handful of them will be on a payment plan.
NOTE: Eclipse® will export ALL patients. If you DO NOT need your entire patient database in your Cash Practice account, then do not proceed.
The Export File created by the Eclipse® Cash Practice Transporter is ALREADY in the proper format for immediate importing. Required: Eclipse Version 11 or Higher.
Step 1: In Eclipse go to [File] → [Data] → [Export]
Step 2: Choose [Export] → [3rd Party Format]
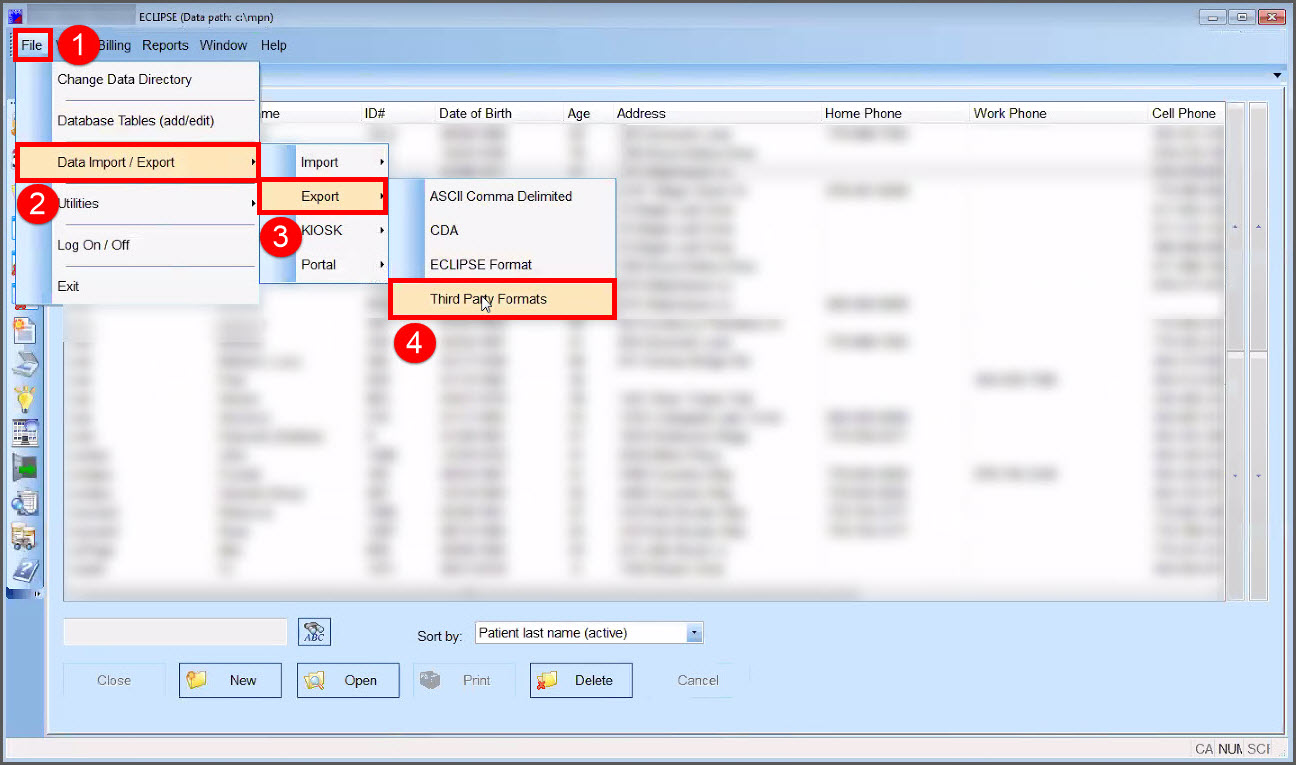
Step 3: In the Data Export Window use the "down arrow" and select [Cash Practice].

Step 4: The exported file will be a text file located in the MPN folder on your hard drive. The path to the folder is displayed at the top of the screen.
To make sure your Excel file is in the correct format please follow the steps below:
Step 5: Click on the first box on the Excel sheet (A1) so that box is selected.
Step 6: Click the "Data" tab at the top of the Excel sheet.
Step 7: Select the "Text to Columns" and in the first step make sure "Delimited" is selected and hit "Next".
Step 8: Under "Delimiters", the only box checked should be "Comma" then hit "Next".
Step 9: Under "Column Data Format" make sure "General" is selected and hit "Finish". Remember: save the file as a CSV (comma delimited) file.
Note: Steps 10-14 are performed in your Cash Practice® account.
Step 10: When ready to do so, go to [Patients] → [Patient Tools]→ [Import Patients]
Step 11: On the Patient Importer Screen, click the [Choose File] button to locate the exported file that you saved to the MPN folder named Eclipse® to Cash Practice®.
Step 12: Click the [Upload] button.
Step 13: When the file has been uploaded, you will have a message box letting you know the file is processing.
Step 14: You may check on the status of your upload by going to [Patients]→ [Patient Tools]→ [Import Patients]→ [Import Results] Tab