IMPORTANT!

- Before importing your patients, please make sure that you have enough space in your account to accommodate the file. *Additional fees may incur to increase your Cash Practice® patient database size.
- We do not recommend that you import inactive patients unless you are using the Drip-Education® Email Marketing System.
- If you're only using the Auto-Debit System® or Care Plan Calculator® System, there is no reason to import a huge list of patients when only a handful of them will be on a payment plan.
- The file type must be a Comma Separated Value (CSV) file format.
- Your CSV file must have the following as the first row (header) of data or it will not import:
- "ClientID","TPSID","Email","FirstName","LastName","Address","City","State","Zip","Phone","WorkPhone","Cell", etc.
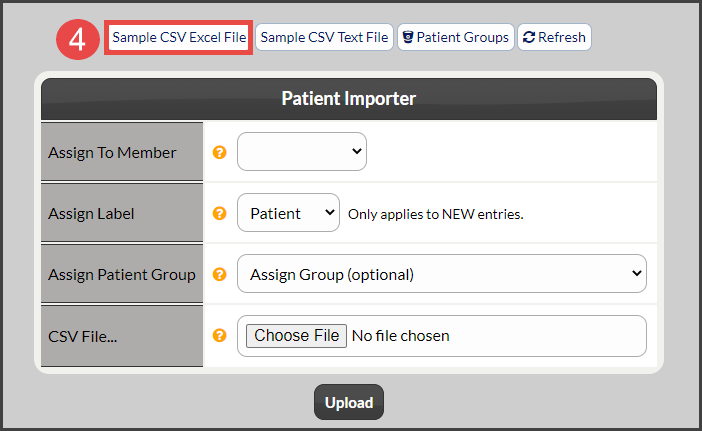
- In Step 4 see the button [Sample CSV Text File] for the full header
- You only have to include the fields your data contains.
- If you need any assistance, please email Support@CashPractice.com.
Step 1: Download the sample file and save it to your computer → Log into your Cash Practice account → Hover over the [Patients] menu (it might say "Clients" or "Practice Members" depending on which one you set up your account to say) → Hover over [Patient Tools] → Click on [Import Patients] → Click on the [Sample CSV Excel File] button located near the top middle of the page. This will save the sample as a download, onto your computer.

Step 2: Insert your patient's information into the corresponding columns (i.e. First name, Last name...).

Important: To make sure your Excel file is in the correct format please follow the steps below:
- Click on the first box on the Excel sheet (A1) so that box is selected.
- Click the "Data" tab at the top of the Excel sheet.
- Select the "Text to Columns" and in the first step make sure "Delimited" is selected and hit "Next".
- Under "Delimiters", the only box checked should be "Comma" then hit "Next".
- Under "Column Data Format" make sure "General" is selected and hit "Finish". Remember: save the file as a CSV (comma delimited) file.
Step 3: Save the file to your computer where you can easily find it. Save the file as a CSV (comma delimited) file.

Step 4: Log into your Cash Practice account and go to the [Patients] menu → Click on [Patient Tools] →[Import Patients].

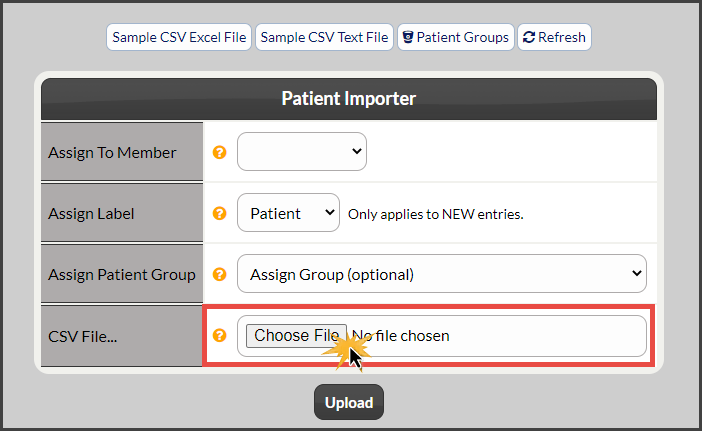
Step 5: Scroll down to the [Patient Importer] and click the [Choose File] button to find the CSV file on your computer.
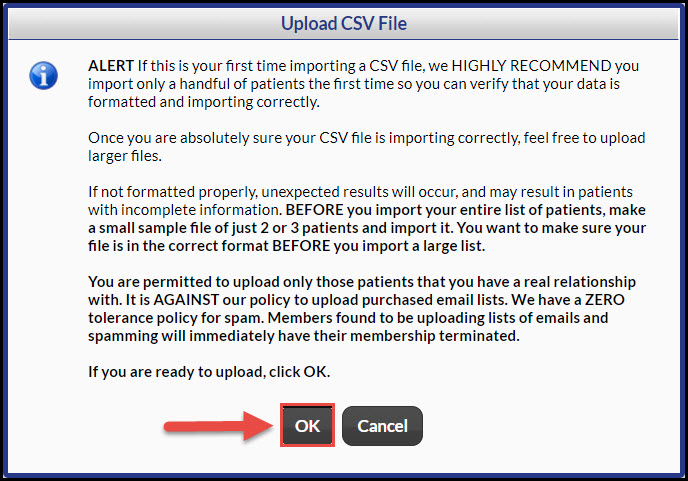
Step 6: Select the file and click [Upload]. A warning box will appear and click [OK]. Your file is now being processed for upload and will be in the system shortly.

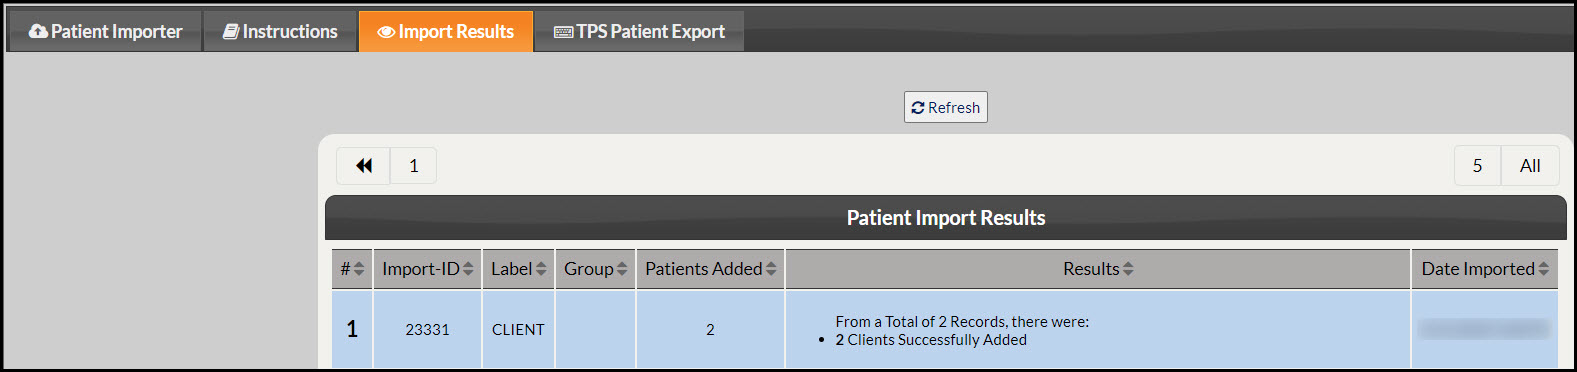
Step 7: To check on the status of your upload, go to [Patients] menu → click on [Import Patient List] → click on the sub-tab that says [Import Results].