Getting started:
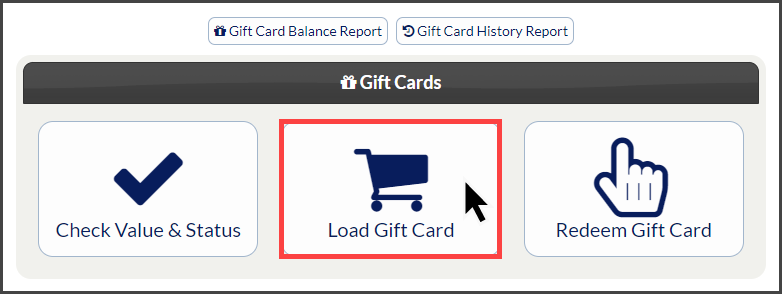
Step 1: In the top right region of your account, click on the [Gift Card] icon.
Step 2: Select the [Load Gift Card] button.
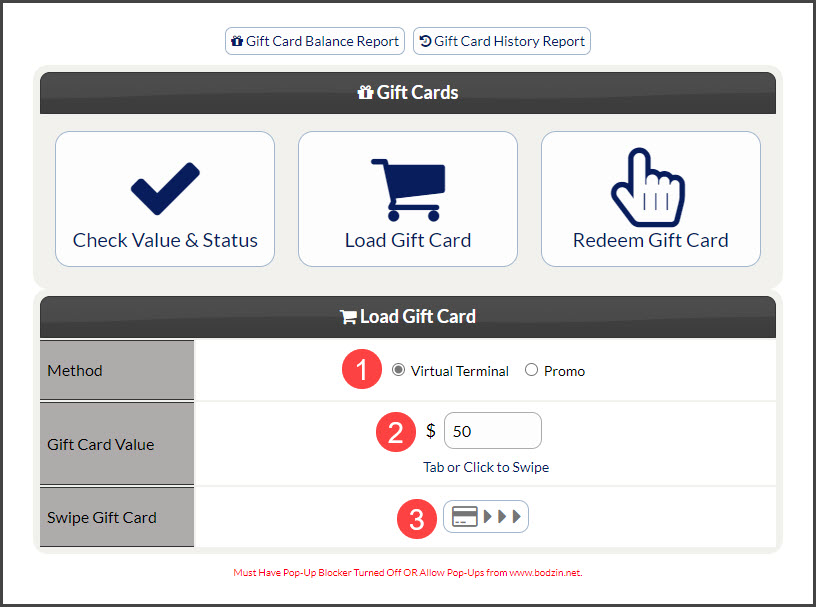
Step 3: Choose the payment method as [Virtual Terminal] and enter the Amount to be loaded.
Step 4: Select the [Tab] key on your keyboard or click your mouse on the screen to produce the Swipe Loader. Then swipe the Gift Card through a Cash Practice® USB card reader.
*Note: You must have pop-up blockers turned OFF or allow pop-ups from www.bodzin.net in order for this feature to function.
Click HERE for more information.
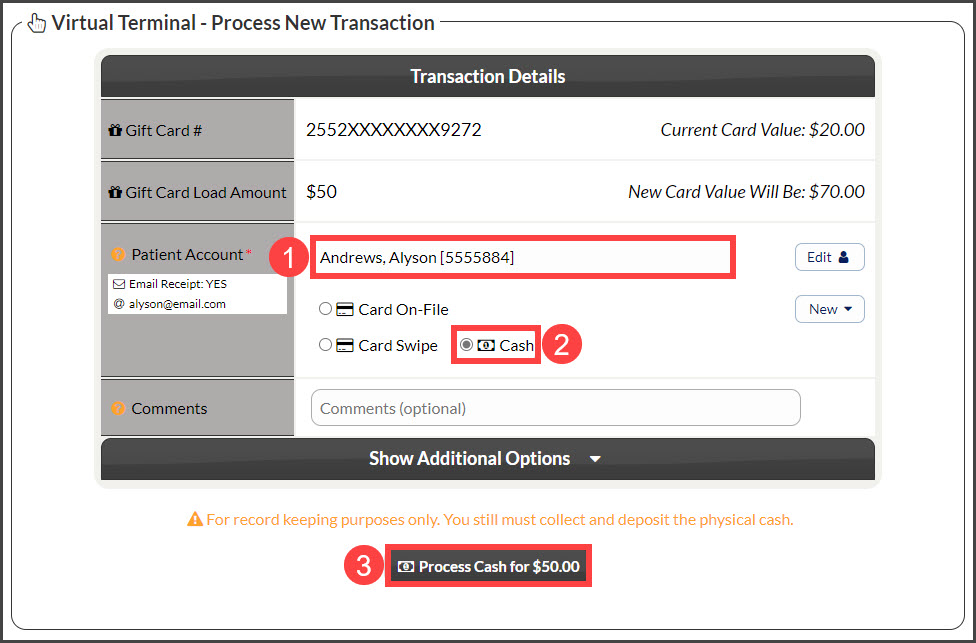
Step 5: The page will load with the Virtual Terminal.
- Patient Account: Assign a patient to the transaction, or select the [Add New Patient] button to the right. All that is required to create a new patient account is a first and last name.
- Billing Type: Choose [Cash]
- Comments: (optional) Comments are not seen by the patient and cannot be deleted.
- [Show Additional Options] menu:
- Patient Groups: (optional): If this patient needs to be assigned to an existing Patient Group, select the correct group from the drop-down menu.
- Assign a Drip-Ed™ Campaign: (optional) We highly recommend you use this feature to continue to educate and market to your patient. Campaign Start Date is the date you want the Drip-Ed™ Campaign you selected to start. By default, today’s date is pre-selected.
- Auto-Debit Groups™: (optional) If this payment needs to be assigned to an existing Auto-Debit group, select the correct group from the drop-down menu.
- Care Plan Options: (optional) If this is a payment for an existing cash plan created with the Cash Plan Calculator® System, indicate the payment option (i.e. Option 1, 2, or 3). This will keep your stats more accurate.
Click on the [Process Cash for $X] button, then click [OK].
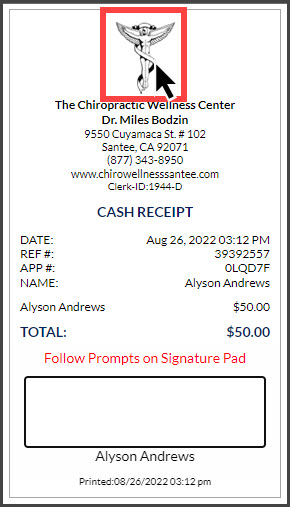
Step 6: Print receipt by clicking the [Logo].
If you are denied access to use this feature, please contact your Account Administrator to request permission. Instructions on how to locate and edit permissions are HERE.


