Option 1:
Step 1: Hover over [Systems] and click on → [Drip-Education® ] → [Search Campaigns & Broadcasts].

Step 2: From the [Search] page, simply click [Search] to display all campaigns or narrow down your search by entering the campaign name you want to locate. 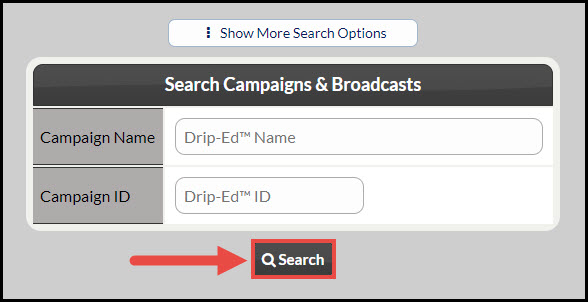
Step 3: Locate the campaign and click the [Assign & Send Campaign] button.

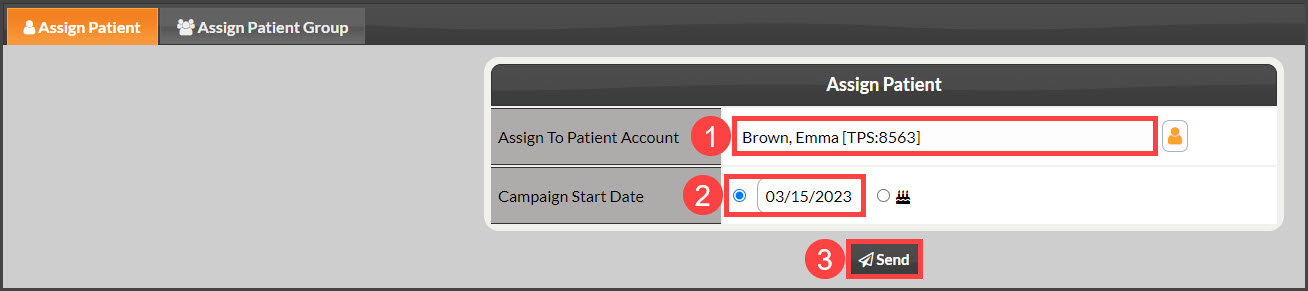
Step 4: From the [Assign Patient] tab, enter the name of an existing patient, company, or TPS ID. If this is a new patient, click on the [Add New Patient] icon to the right, and proceed with instructions HERE. Once finished, select the Campaign Start Date → and click the [Send] button.
Option 2:
Step 1: From the Dashboard, in the top-right corner, begin typing the patient's first or last name in the [Search Patient] bar and select their patient record from the drop-down menu. This will bring you to the patient's record.

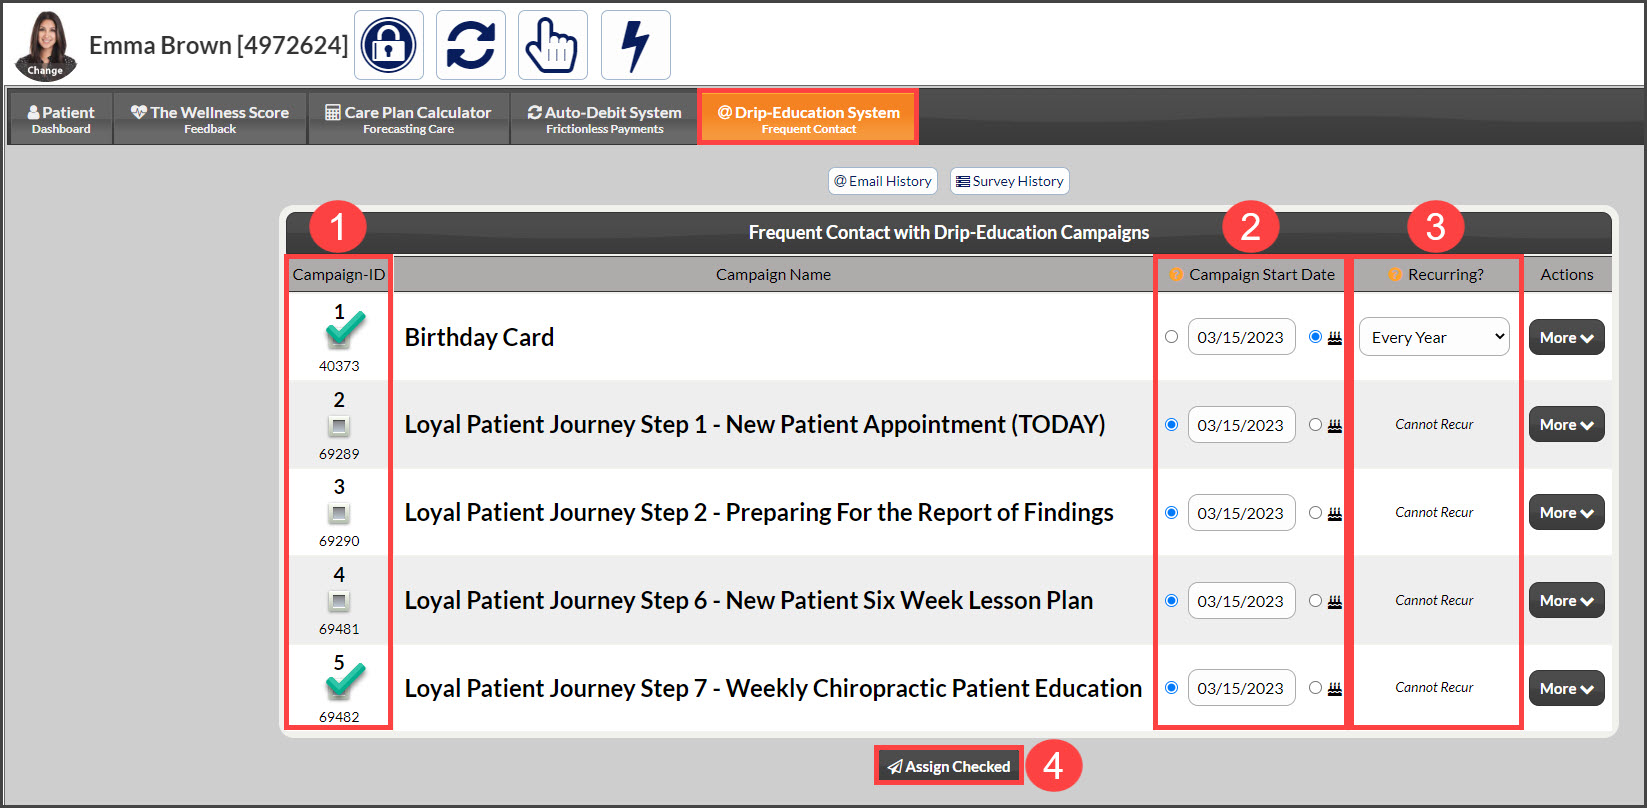
Step 2: Click on the [Drip-Education System] tab at the top.

Step 3: Select the checkboxes under the [Campaign ID] column, for the campaigns you'd like to assign to the patient. If you are assigning the birthday campaign, be sure to select the [Birthday Cake] bubble icon under the "Campaign Start Date" column so the system knows to send that campaign on the patient's birthday. Also, for the birthday campaign, be sure to change the [Recurring?] drop-down menu to "Every Year" so your patient will receive a birthday card each year on their birthday. → Click [Assign Checked] once you are ready to assign the campaign(s).