Example Tracking Clicks & Sales:
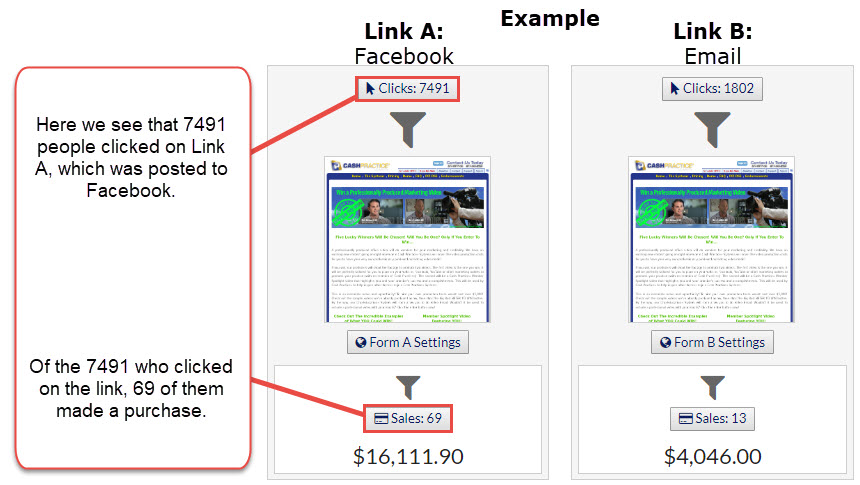
In the example below, a Link Tracker is being used to track clicks and sales. 2 links were used. Link A was posted on Facebook & Link B was in an email blast:
We can clearly see that the link placed on Facebook got more clicks and resulted in the most sales.
Example Tracking Clicks & Leads:
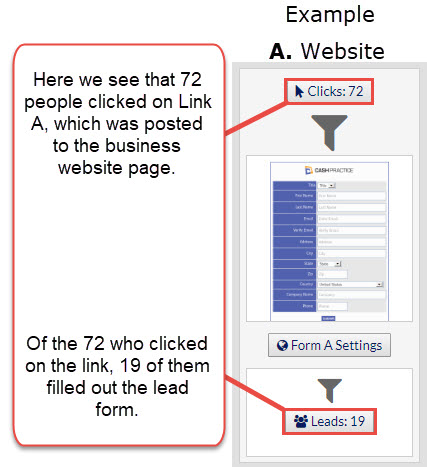
In the example below, we see a Link Tracker is being used to track clicks and leads. Only 1 link is used. Link A. was posted to the Website:
We can see that the link on the business website page got 72 clicks that resulted in 19 leads filling out a form.
Getting started:
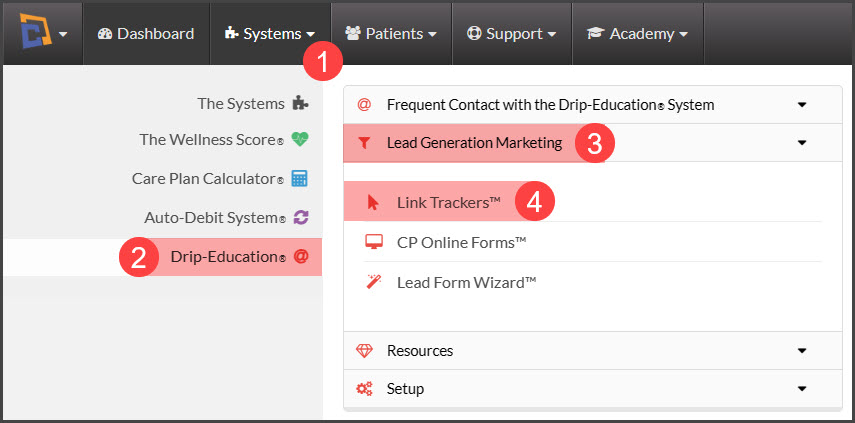
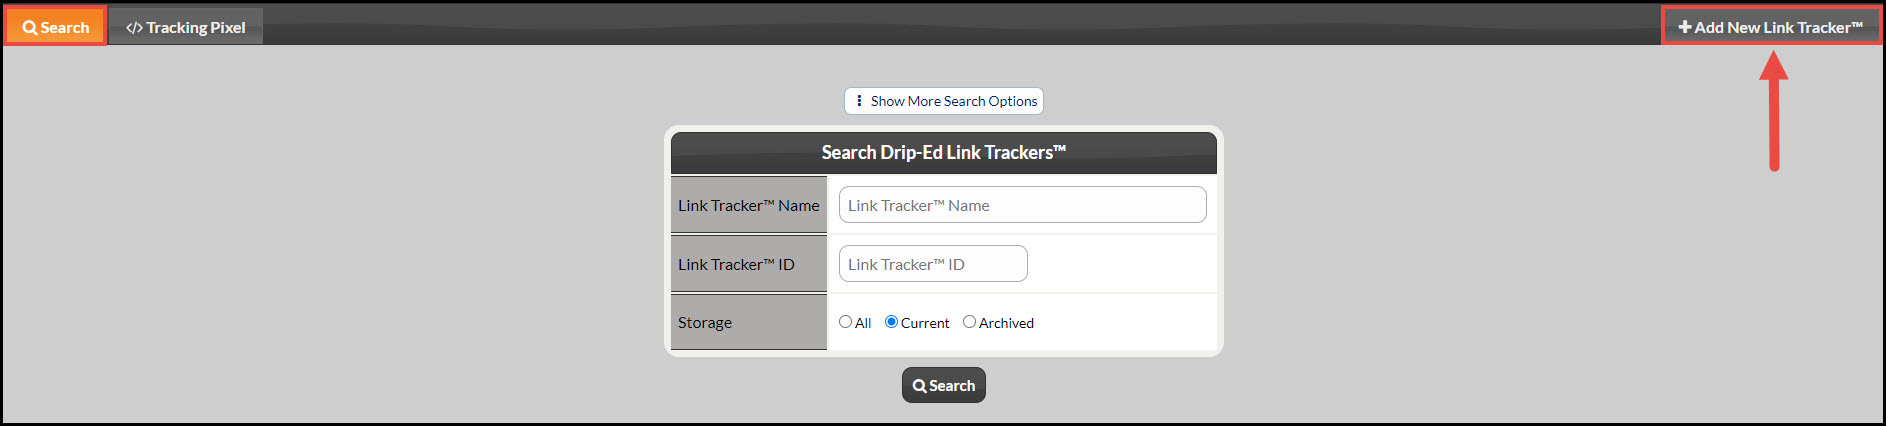
Step 1: From the [Systems] menu, select [Drip-Education®] → [Lead Generation Marketing] → [Link Trackers™].
Step 2: Click on the [+Add New Link Tracker™] tab → then click [OK].
Step 3: Editing your Link Tracker™
1. Settings:
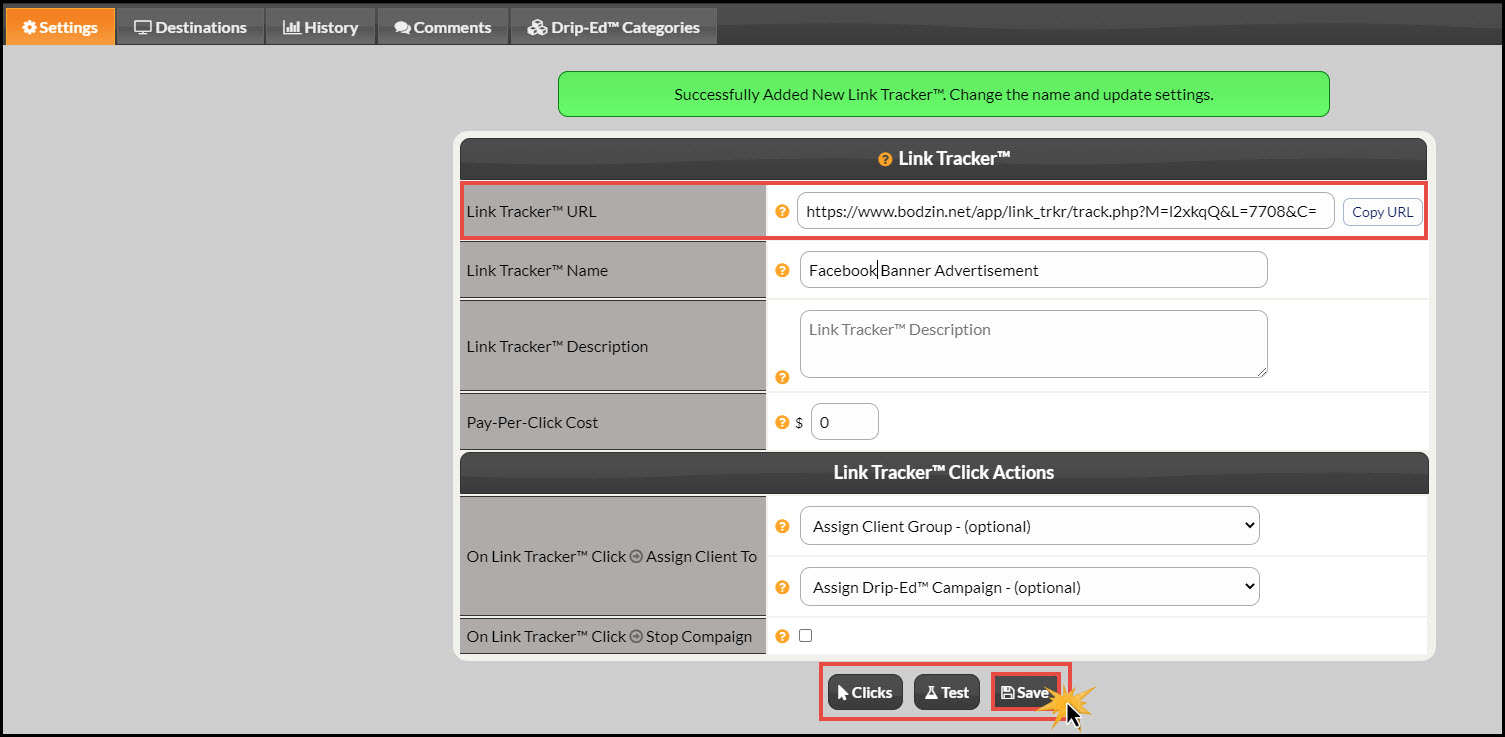
- Link Tracker URL: This is the Web Address (URL) for the Link Tracker. Pasting the URL into the address bar of a browser will trigger the link tracker. Typically a URL will be pasted into an email for the recipient to click on.
- Link Tracker™ Name: Enter a title for the Link Tracker™. We recommend using a title that identifies how the link will be used. For example, if the link will be used with a Facebook banner advertisement for a service you provide, you could call the link Facebook Banner Ad.
- Link Tracker™ Description: Enter a description for the Link Tracker™ to help you better identify the link.
- Pay-Per-Click Cost: If this Link Tracker™ will be placed within a Pay-Per-Click web page (Ex: Google Ad words, etc.), enter the pay-per-click fee so you can see if your Return On Investment (R.O.I.) is good or not.
- On Link Tracker™ Click Assign Patient To:
- Assign Patient Group (optional): If an existing patient clicks this Link Tracker™, the patient will be assigned to the selected Patient Group. NOTE: The only way the Link Tracker™ knows if the patient exists, is if the Link Tracker™ is used within a Drip-Ed™ Campaign.
- Assign Drip-Ed™ Campaign (optional): If an existing patient clicks this Link Tracker™, the patient will be assigned to the selected Campaign. NOTE: The only way the Link Tracker™ knows if the patient exists, is if the Link Tracker™ is used within a Drip-Ed™ Campaign.
- On Link Tracker™ Click Stop Campaign: By checking this box, if an existing patient receives this Link Tracker™ from a Campaign and clicks it, the Campaign that sent the Link Tracker will be Stopped. For example, the Campaign is a series of marketing emails and by clicking on the link they no longer will be marketed to because they already showed interest, this would turn the rest of the campaign off for the Patient.
- Buttons:
- [Clicks]: This button loads a modality window that displays the following tabs:
- A-B-C Split Test Results
- Clicks From Code
- Clicks By Unique Visitors
- Actual Clicks
- [Test]: This button opens a new tab in your current browser which displays the link in the web address bar
- [Save]: Save all changes
- [Clicks]: This button loads a modality window that displays the following tabs:
2. Destinations
The URL Destination is where you would like the Link Tracker™ to redirect to.

1. Select either http:// or https:// (must have SSL) and enter the URL of the destination. For example, if you wanted the Link Tracker™ to point to your business page at http://www.facebook.com/cashpractice, you would select http:// and enter www.facebook.com/cashpractice in the URL Destination.
2. Up to three URL destinations can be designated for Split Testing. For example, you want to track visits to 3 pages: Facebook, Your Website, and an Email Campaign. You would list each page address in rows A-B-C.
- 2A: Check the box to activate the URL
Each time a Link Tracker™ is triggered, it will rotate to the next URL destination. This allows you to split-test the results of each URL Destination with one Link Tracker™. The purpose of this is to give you the ability to test the results of different web pages. For example, you may have a Link Tracker™ redirect to three different online lead forms. You would then be able to see how many of the clicks each filled out the online form they landed on.
2A: Once you see which form is getting the best completion rate, you could inactivate the other two destinations (un-check them) and only send clicks to the one online form that gets the best results. You can see the number of times that URL destination was redirected to/Total Clicks.
3: Buttons:
- [Clicks]: This button loads a modality window that displays the following tabs: A-B-C Split Test Results
- Clicks From Code
- Clicks By Unique Visitors
- Actual Clicks
- [Test]: This button opens a new tab in your current browser which displays the link in the web address bar
- [Save]: Save all changes
3. History: This tab demonstrates the number of clicks displayed in a bar graph

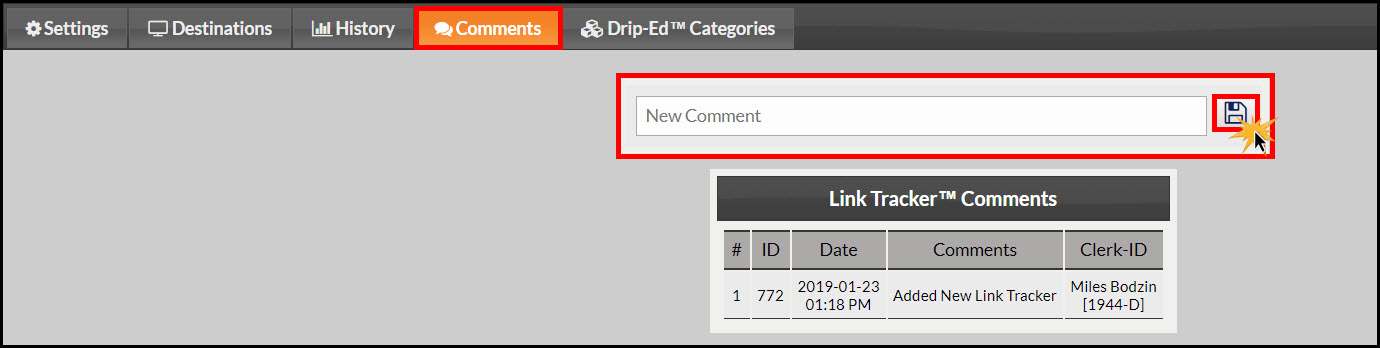
4. Comments: The Comments section, by default, adds a comment of when the form was created. This can be used to document pertinent information for this specific Link Tracker™ by the Admin or Account Users creating or editing the tracker. To use, simply type a comment in the New Comment box and click the [Save] button.
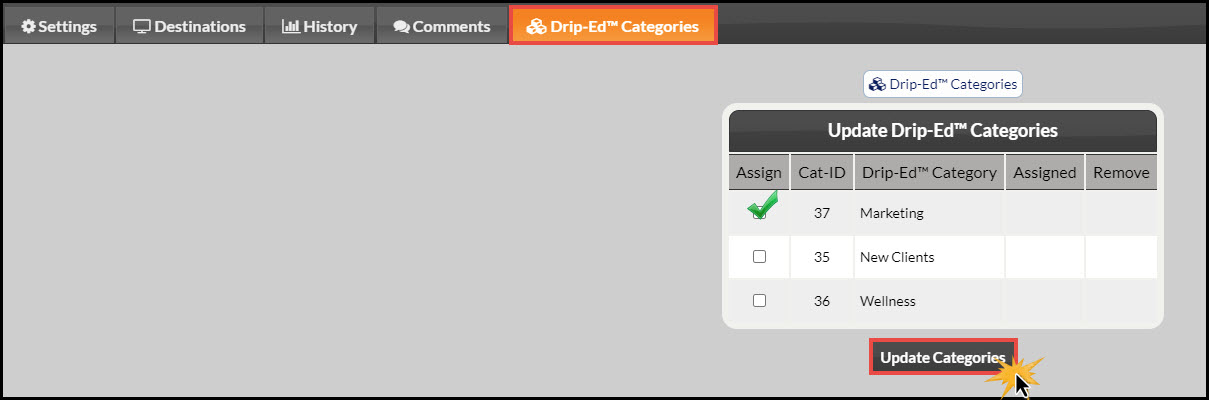
5. Drip-Ed™ Categories: This tab allows you to categorize your Link Tracker™ for easy searching later. To learn how to create a new Drip-Ed™ Category, click HERE. To assign a category, check the box in the Assign column and select the [Update Categories] button.