
The way it works is that you upload a video onto a video hosting site (like YouTube) and place a "screenshot" (image) of the video in the email, with the link to the video attached to the image, the recipient will click on the image and the link to the video will open up. Most computers come with a "Snipping Tool", which can be used be used to capture a screenshot or image. This is typically found in the Accessories section of your basic computer programs. You can also use a free service such as TechSmith Screencast®
Note: You can also upload a GIF to your email, the same way you would upload an image. We do not provide support for creating GIFs.
Getting started:
Step 1: After you have uploaded your video to the web hosting site of your choice, have your screenshot or image ready and saved on your computer first.
Step 2: From the campaign editor composition screen, you will have the ability to add a link to your email content. For steps on how to access the campaign editor, click HERE.
Step 3: Upload the saved image to the email. Click HERE for instructions on how to upload an image.
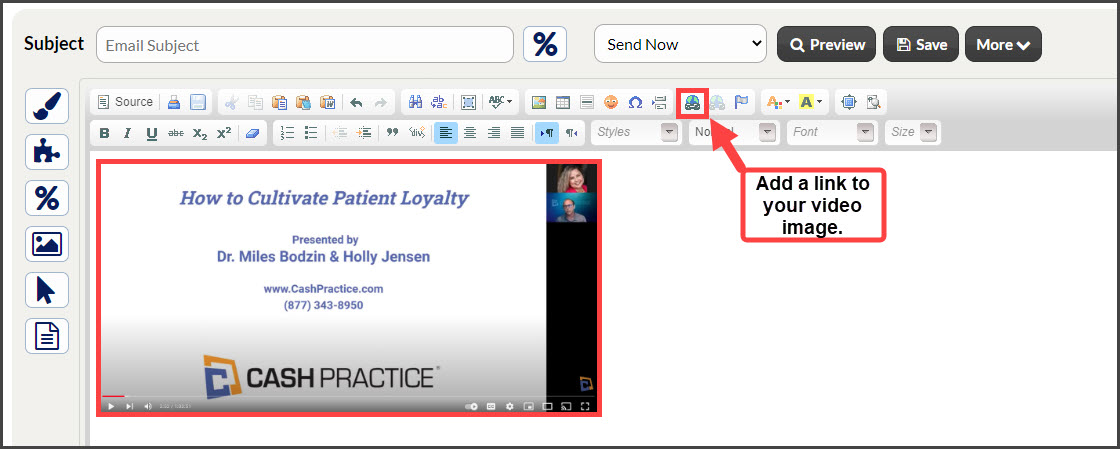
Step 4: Click on the image you've just uploaded to the email.
Step 5: Next, click the "link" icon in the email editor to attach the link to the image of your video.
Step 6: Enter the URL address that the image link will redirect the patient to once it is clicked in the email, and click [OK].

Optional: You also have the ability to designate whether the link opens into a new window when clicked. Using the same link properties window, click on the [Target] tab. From here, change the settings from [<not set>] to [New Window (_blank)]. Click [OK] when finished.

Step 7: To test the link, click the [Preview] button.
Step 8: Click the image in which you've inserted the link to test that the web address was entered correctly.
Step 9: Select the [Save] button to save all of your changes.
When you or your patient clicks the image, it will immediately redirect them to a new web page to start watching your video!
