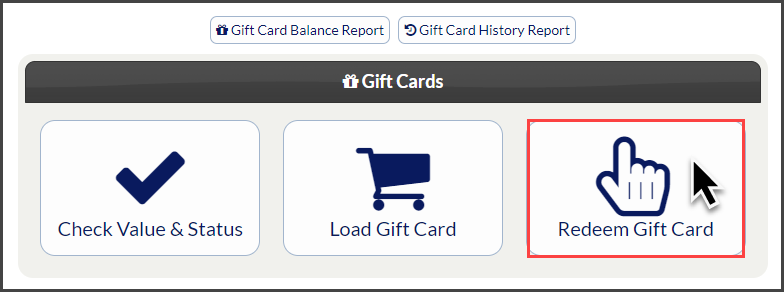
Step 1: At the top right of the navigation menu, click on the [Gift Card] icon.
Step 2: Select the [Redeem Gift Card] button.
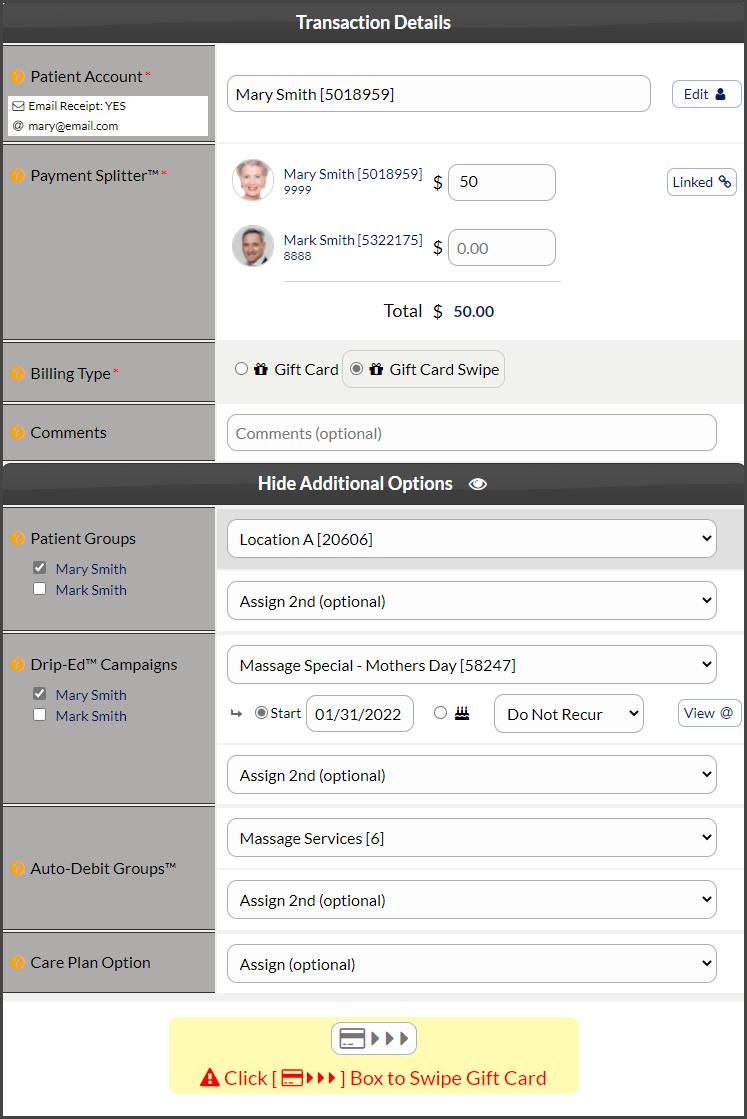
Step 3: Select the Gift Card transaction options:
Patient Account: Begin typing either the patient's first or last name, company, patient ID or TPS ID. The menu will search for patients that match the information entered into the field. Then select the Patient Account from the menu.
New Patient Account: If this is a new patient and they have no Patient Record saved in Cash Practice® yet, select the [Add New Patient] button to the right. All that is required to create a new patient account is a first and last name.
Amount/Payment Splitter: Enter the dollar amount for the patient here, or if needing to split the payment amongst multiple family members, follow the instructions HERE.
Billing Type: Select how you would like to process the Gift Card. Choose either Gift Card (which will allow you to type in the gift card number) or Gift Card Swipe (which will allow you to swipe the physical gift card if you have a Cash Practice swiper).
Comments: (OPTIONAL) Add a comment for your team's eyes only. This will be displayed on the Posted Payments Report when reviewing the transaction details in the future.
Show Additional Options: (OPTIONAL) By clicking the drop-down, you have the capability to assign auto-debit groups (to label & track payments), Drip-Education campaigns (for frequent contact), and Patient Groups (to better organize your patient lists).
Step 4: If you chose to type in the gift card number, type it into the field. If you chose to swipe the gift card, click inside the box with the card icon to tell the system you are ready to swipe the gift card.

If you are unable to access or use the Gift Cards feature, please contact your Account Administrator to request permission. Instructions on how to locate and edit permissions are located HERE. Make sure to click over to the Auto-Debit System® section to locate the Gift Cards permissions.


