Getting started:
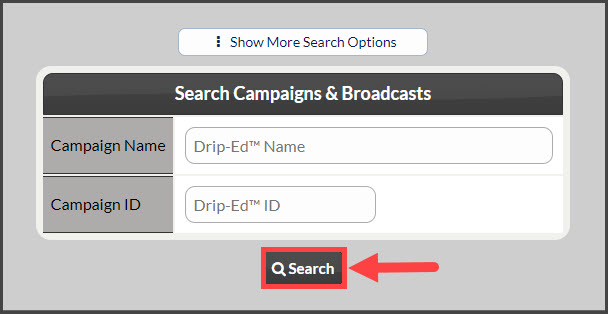
Step 1: Go to the [Systems] menu→ [Drip-Education®]→ click [Search Campaigns & Broadcasts]

Step 2: Use the search options to refine the campaign you are looking to edit→ click the [Search] button.
Step 3: Click the [View/Edit Campaign] button or click on the [Edit] button on the individual email.
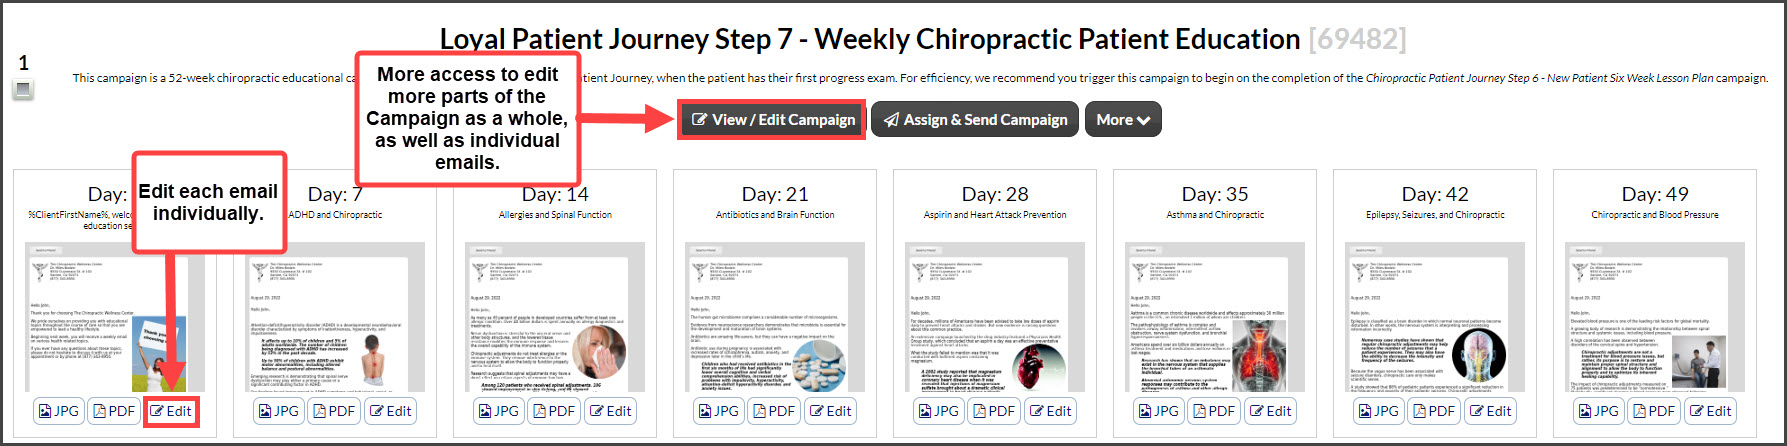
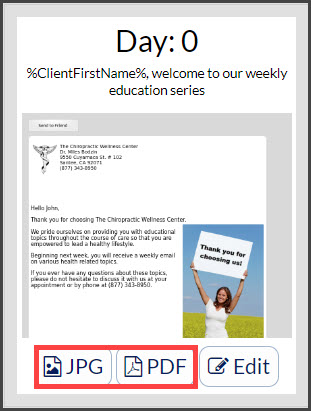
Tip- If you would like to save your emails as a jpeg or PDF, click on the corresponding buttons on the email images to save these to your computer. These can then be used to promote your business on social media platforms, or even print out the content for an in-office newsletter or flyer.
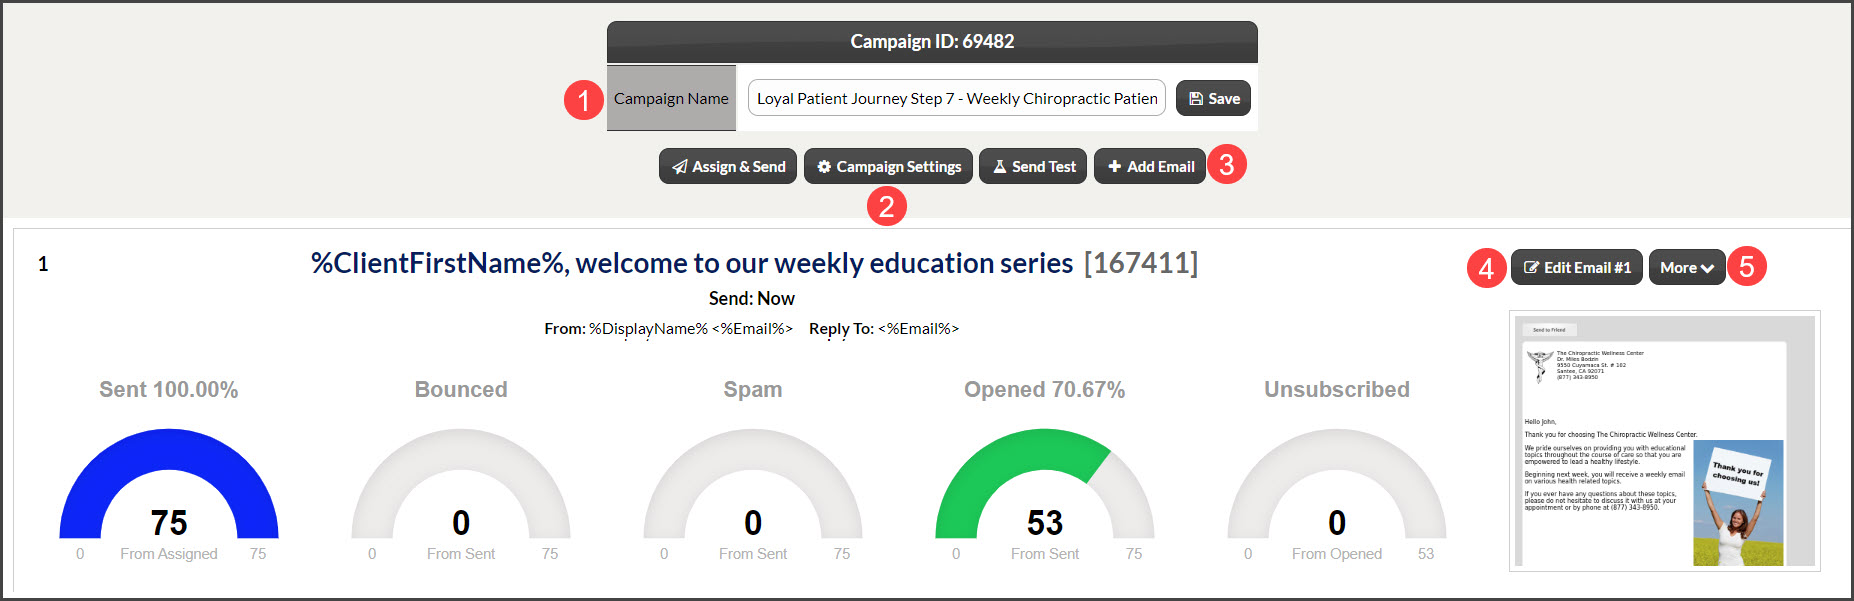
Step 4: The campaign will display → from here, you can edit the campaign and its settings. (Use the image diagram below)
- Campaign Name: Change/edit, be sure to click [Save] when completed.
- Campaign Settings: Update/change the current settings. These include:
- Adding a Description
- Allow Repeat Assignment: Set to ON if you want to allow this Campaign/Broadcast to be assigned to the same patient more than once
- Allow Assignment with ADS Tools: For users with ADS this turns on/off the capability to have this listed as an option to assign/send when processing payments or scheduled auto-debits for patients
- On Complet Assignment Actions
- + Add Email: Add more emails to the campaign. All Campaigns start with 1 email
- Edit Email #: Edit the actual content of the email. Click HERE and skip to Step 4.
- More:
- Copy
- HTML
- Download as an image/jpeg - Great for creating dual-purpose marketing messages for Social Media
- Download as a PDF - Turn your email into a flyer to put up around the office or give personally to patients
- Delete - You know, as in gone forever!