Using a Lead Form that offers something of value for free is a great way to at least get their contact info so you can continue to follow up with them. However, getting their email is just part of the process. You then need a way to automatically follow up with them. That's why the Drip-Ed™ Lead Form automatically assigns a Drip-Ed™ Campaign. It does the marketing for you!
Imagine creating a customized form on your website that visitors can fill out to request an e-book, a product sample, or anything you can think of!
<< In the example to the left, we've used the Drip-Ed™ Lead Form Wizard to create a form that we've placed on our website so visitors can request a free consultation. We've also used the Drip-Education Email Marketing System to automatically assign a campaign that emails the lead directions to our office and emails the front desk to call and schedule the appointment! It's so easy and effective!
We made it so easy for you to use this. This article will walk you through creating your own Drip-Ed™ Lead Forms.
Step 1: Hover over the [Systems] menu → Click on [Drip-Education]→ [Lead Generation Marketing]→ Lead Form Wizard].

Step 2: Enter/Select the information below to display on your form.
- Header: Create the header of the form. The header will display at the top of the form
- Background Color: Customize the colors of the lead form
- Submit Button: Customize the submit button content and colors
- Form Inputs:
- Include First Name: Include or exclude an input field for the First name on the Optin Form. For the highest signup rate, asking for the email only is recommended. But if you need a first name, then include it
- Include Last Name: Include or exclude an input field for the Last name on the Optin Form. Asking for the last name tends to reduce the number of people who fill out the form. So unless you really need/want it, leave it off
- Include Phone: Include or exclude an input field for the Phone Number on the Optin Form. Asking for a phone number is only recommended if you really need it. For example, you want to call them at some point to offer something. Once again, the more info you ask for, the fewer people will fill out the form
- Survey: Choose to include a Survey the person will complete upon filling out the lead form. More information on our Survey Builder HERE

- Assign Lead To...
- Provider: Select the Cash Practice®, Provider, you want the people who fill out the form to be assigned to
- Patient Label: Select the Label you want to assign the patient to when they submit the Optin Form. The Label is a good way to identify your Patients vs. Leads vs. Prospects
- Patient Group: Select the Patient Group you want to assign the patient to when they submit the Optin Form. We recommend you create a Patient Group such as an Opt-in Form on the Website. This way you know where they signed up. Create a group for each location you plan to place an opt-in plugin. This way you can see who came from where
- Drip-Ed™ Campaign: Select the Drip-Ed™ Campaign you want to be assigned when the patient submits the Opt-in Form
- Form Thank You:
- Success Message: Only used with the ‹iframe› method. You will want to have a confirmation message appear when your visitor submits the Lead Form
- Error Message: Only used with the ‹iframe› method. If the submission fails, what do you want to be displayed?
Step 3: Click the [Create Lead Form] button at the bottom of the page.
Step 4: The [Demo] tab will display. Here, you will be able to see the demo of the lead form you just created.
- If you want to edit the lead form after viewing the demo, click the [Lead Form Wizard] tab at the top of the page

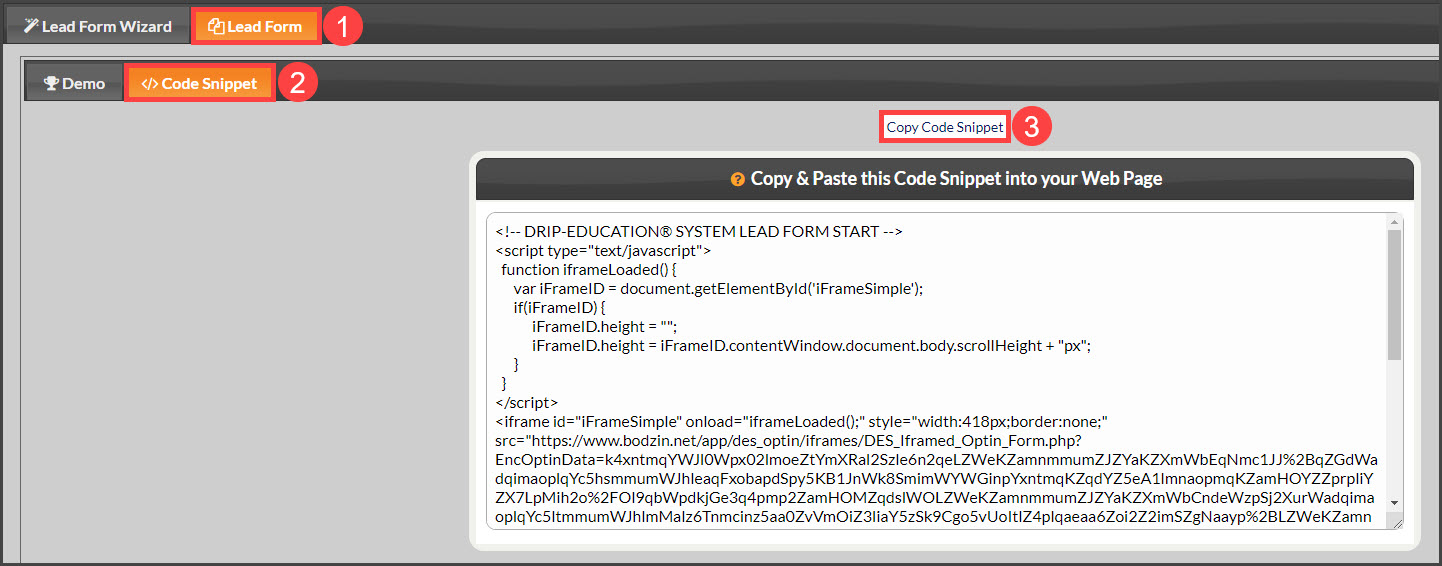
Step 5: Click the [Code Snippet] tab. The code that displays on this page is the HTML code you will place on your website to use the lead form. Use the [Copy Code Snippet] button at the top of the page to select all the code then right-click to copy.
Place these Lead Forms anywhere you can place HTML.