
Effective 2019 - Present:
To process transactions within the app, our Retail merchant account is required and has merchant fees associated with it. There is a $5/mo gateway access fee added to your subscription dues. These fees are waived with memberships that are $199/mo and up. In the event you cancel your CP Mobile™ Gateway (for Android and Apple devices), there will be a $25 fee each time reactivate the gateway.
When we designed CP Mobile™ we made it a point to keep it as simple to use as possible. Simply process and go! No need to worry about selecting a patient from your patient database.
However, you do need to sign in to your CashPractice.com account and Assign the transactions to a Patient. Why? So the transaction will be associated with the correct person. Otherwise, you won't be able to sync the transaction with your third-party software (i.e. ChiroHD, Genesis, Platinum, etc.) or be able to archive the transaction.
After you run a transaction in CP Mobile™, the payments will appear in your Payments Report. Before you can sync/upload payments to your patient management software or archive them, you must assign the transaction to a patient.
The payments will still be processed whether you assign them to a patient or not. We recommend doing this before balancing it out.
Example: You are at an event on Saturday and process mobile payments. You come into the office on Monday morning. The next step should be to review your payments and assign them to the correct patient account or create a new one if the person is not yet entered as a patient.
It's really easy to assign CP Mobile™ transactions to patients.
Step 1: On the right side of your Dashboard, under the [Payments] section, click on the button indicating the number of transactions that need to be assigned.

Step 2: The Payments Report will open with just the transactions needing to be assigned to patients. Click on the [Assign Patient] button.
Note: Under the [Type, Tool, Tries] column, you will see if the transaction was done with an iPhone, iPad, or Android phone.

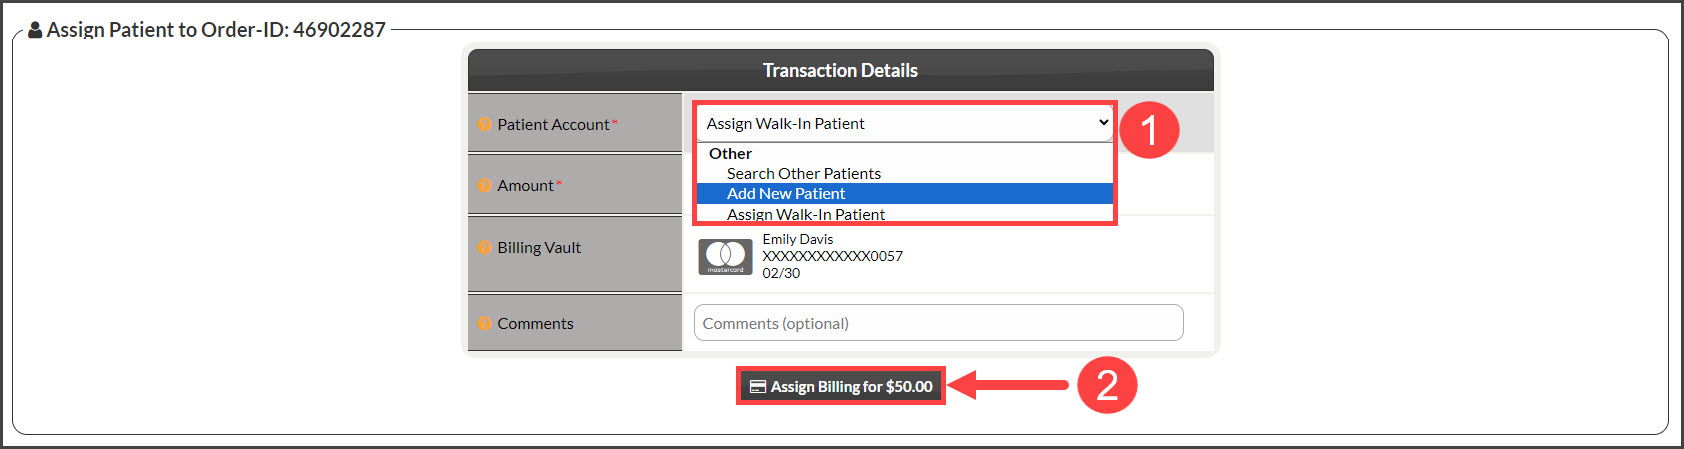
Step 3: The Transaction Details page will open. From the drop-down menu select from:
- Search Other Patients: Search for an existing patient by first or last name. Select the match from the provided menu.
- Add New Patient: Enter any missing information like TPS ID, email, or additional contact information
- Assign Walk-In Patient: This will assign the payment to a generic patient. This is a good option if you will not be seeing this patient again, or they were a true walk-in patient
Proceed with clicking the [Assign Billing for $] button.
Repeat these steps until all mobile transactions have patients assigned to them.