To access the Payment screen from the Ledger:
Step 1: From the Patient Flow screen, click the [Patient Mgmt] button.
Step 2: Select your patient from the list and click the [Ledger] button.
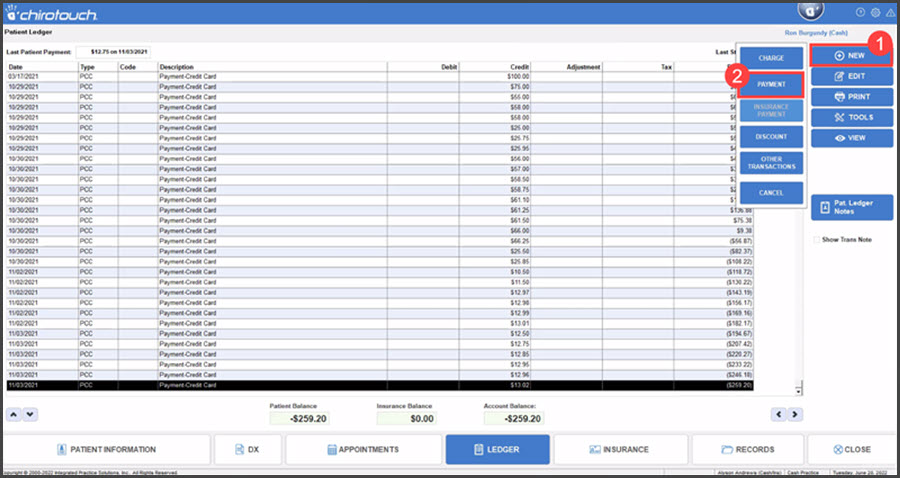
Step 3: Click [New] then → [Payment].
To access the Payment screen when checking out a patient:
A. Select a patient who is checked in and click the [Check Out] button.
B. From the Patient Check Out screen, click the [Payment] button.
Step 4: In the [Amount Collected] field, enter the payment amount and click the [OK] button.
Step 5: Click the [Credit Card] button (if not already defaulted).
Step 6: [Check] the box labeled "Process Payment Online" (if not already defaulted).
Step 7: Click the [Post Payment] button.

Step 8: If you are set up to choose your Cash Practice® Provider on a payment-by-payment basis then select the Cash Practice® Provider drop-down menu. If you chose a default Cash Practice® Provider in the Payment Setup screen, this dialog box will not appear. Please skip to the next step.
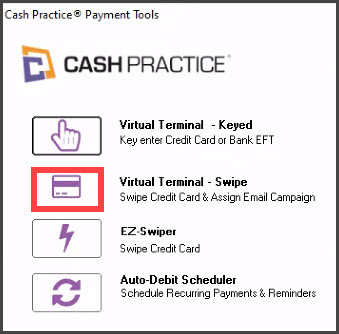
Step 9: Select [Virtual Terminal - Swipe].
Note: If this is the first transaction for a new patient and a patient account has not yet been created inside Cash Practice® the action of you processing this payment will automatically pre-populate the patients demographics into Cash Practice, creating their patient record.
Step 10: Select Transaction Options
- Save Billing:
Check the box if you want to save the swiped card as Default Billing for futureCard-Not-Present Transactions. Checkingthe box will allow you to add the billing address to the next step.
- CPC Payment Option: (optional) If this is a payment for an existing cash plan created with the Cash Plan Calculator® System, indicate the payment option (i.e. Option 1, 2, or 3). This will keep your stats more accurate.
- Auto-Debit Group™:(optional) If this payment needs to be assigned to an existing Auto-Debit group™, select the correct group for the drop-down menu.
- Assign a Drip-Ed™ Campaign: (optional) (Requires Drip-Education® Email Marketing System). We highly recommend you use this feature to continue to educate and market to your client. Campaign Start Date is the date you want the Drip-Ed™ Campaign you selected to start. By default, today’s date is pre-selected.
- Comment: (optional) Comments are not seen by the client and cannot be deleted.
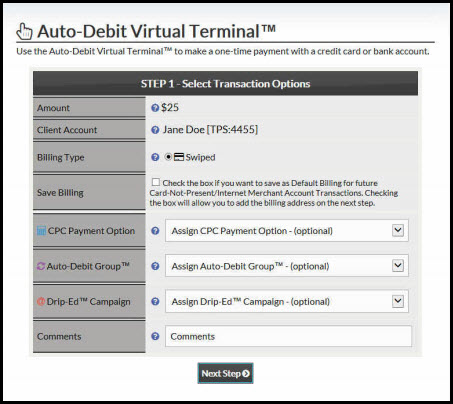
Step 11: Click [Next Step].
Step 12: Verify billing address & phone. For security purposes, this will be the address where the clients' bank mails their statements.
Step 13: (Optional) If you selected to add new in the Billing Options you will need to enter the new billing information. If you would like this billing information to be saved as default for future use, be sure check the box to "save as clients default account". on [step 3 Enter Credit Card Info]
Step 14: Click [Next Step].
Step 15: Swipe the card to process payment.
Step 16: (Optional) Capture the [e-signature] from the client. [Skip] this step if not using [e-sign].
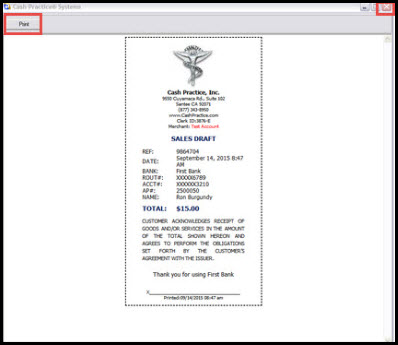
Step 17: The patient's receipt will display on the next screen. Click the Print button to print this receipt, or the Close button to close this dialog box.
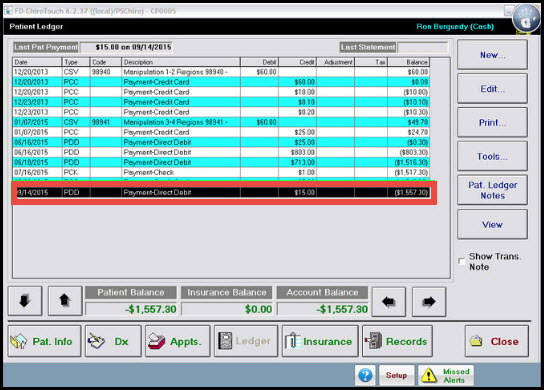
Step 18: This payment will be reflected in the patient's ledger.