To access the Payment screen from the Ledger:
Step 1: From the Patient Flow screen, click the [Patient Mgmt] button.
Step 2: Select your patient from the list and click on the [Ledger] button.
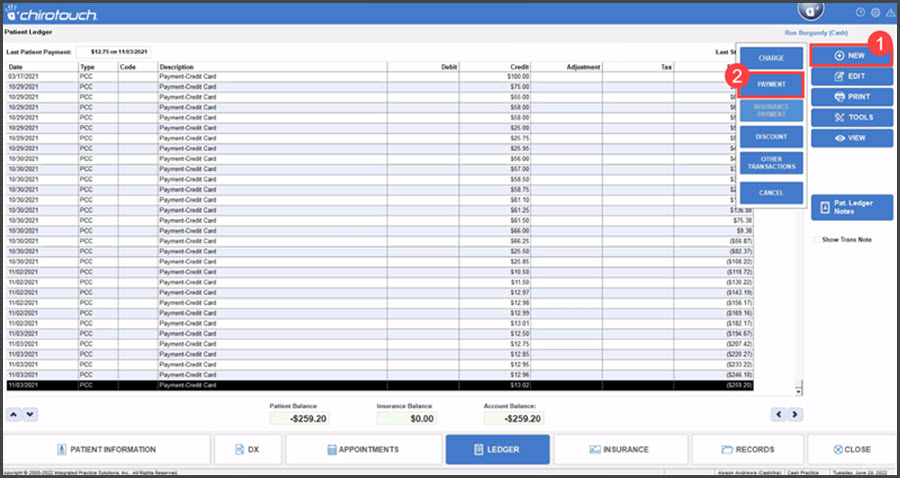
Step 3: Click [New] then → [Payment].
To access the Payment screen when checking out a patient:
A. Select a patient who is checked in and click the [Check Out] button.
B. From the Patient Check Out screen, click the [Payment] button.
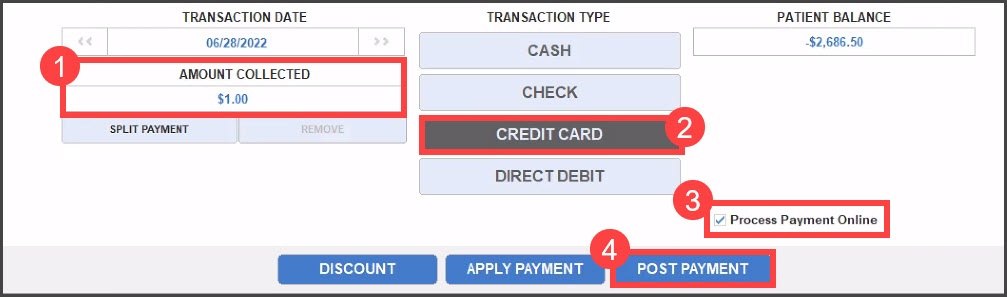
Step 4: On the Payment screen, click on the "Amount Collected" field → enter the payment amount → click the OK button.
Step 5: Select the [Credit Card] button (if not already defaulted).
Step 6: [Check] the box labeled "Process Payment Online" (if not already defaulted).
Step 7: Click the [Post Payment] button.
Step 8: If you are set up to choose your Cash Practice® Provider on a payment-by-payment basis then select the Cash Practice® Provider drop-down menu. If you chose a default Cash Practice® Provider in the Payment Setup screen, this dialog box will not appear. Please skip to the next step.
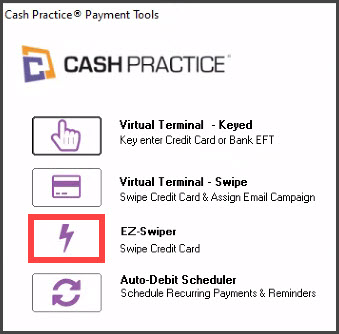
Step 9: Select the EZ-Swiper=.
Note: If this is the first transaction for a new patient and a patient account has not yet been created inside Cash Practice® the action of you processing this payment will automatically pre-populate the patients demographics into Cash Practice, creating their patient record.
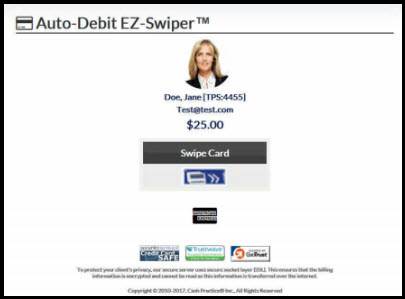
Step 10: Swipe card
Step 11: (Optional) Capture the [e-signature] from the client. [Skip] this step if not using [e-sign].
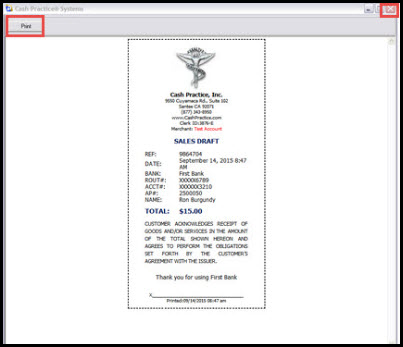
Step 12:The patient's receipt will display on the next screen (be sure to wait for it to fully load). Click the [Print] button to print the receipt, or [Close] button to close the receipt window. The payment will then automatically post the patient's ledger.