Getting Started:
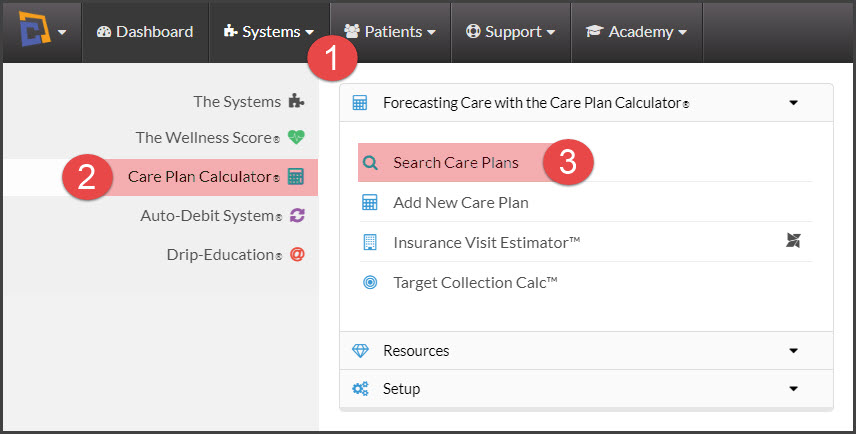
Step 1: To access your plans, click on the [Systems] menu →[Care Plan Calculator®] → [Search Care Plans].
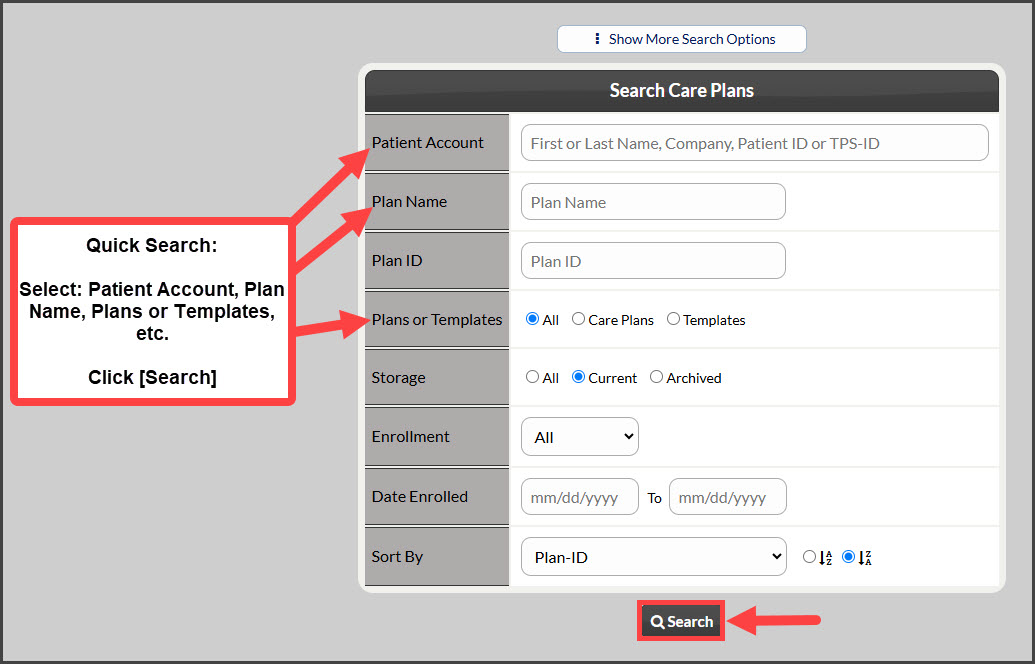
Step 2: The [Search] page will load, narrow your search by entering as little or as much information about the plan that you are looking for OR click the search button at the bottom of the page to view all [Current] plans.
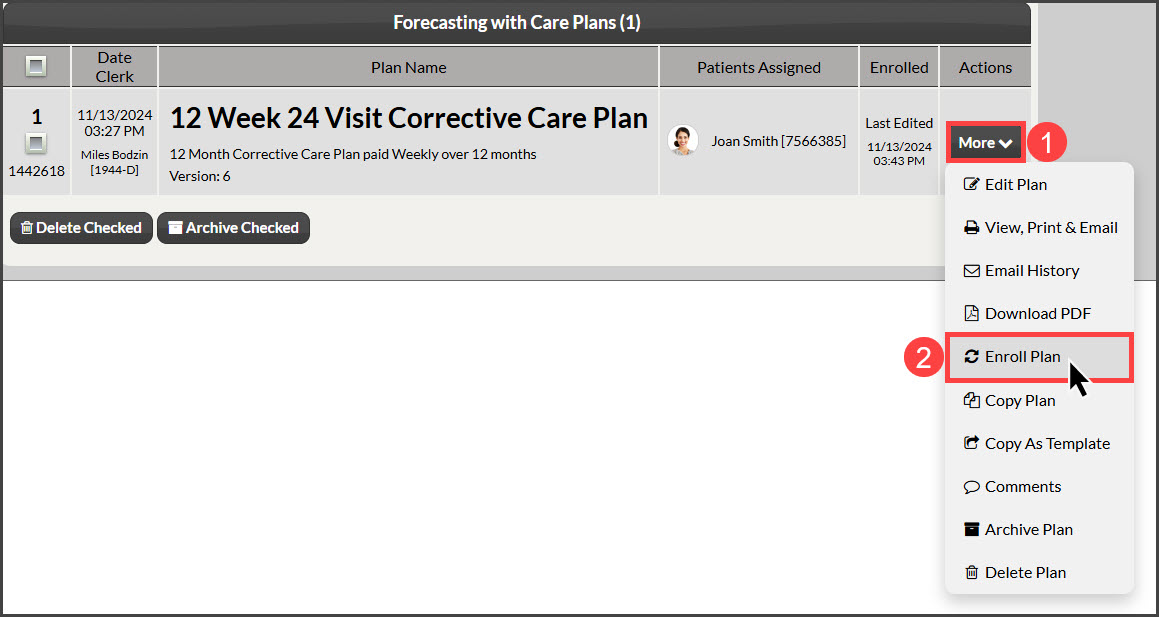
Step 3: From the search results click on the [More] button and click on [Enroll Plan] to enroll the patient in the plan.
Step 4: Select the correct Select Auto-Debit Options.
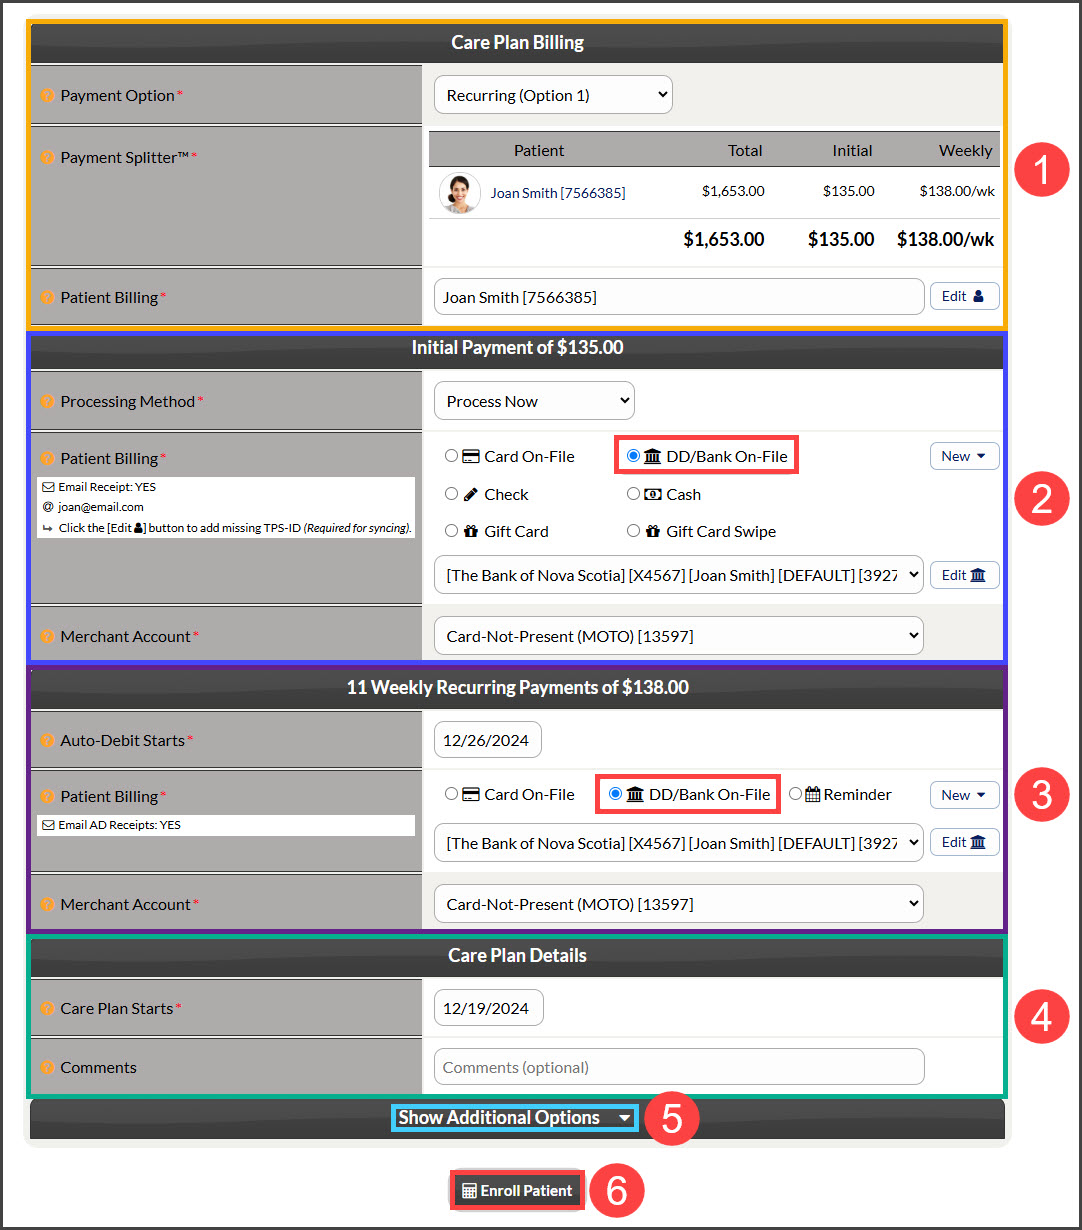
- Care Plan Billing (orange):
- Select which Payment option the patient said yes to from the drop-down menu
- See the attached patient and view the payment amounts
- Initial Payment $ (dark blue):
- Select the Processing Method for the Initial Payment:
- Process Now: Run/collect the payment today during plan enrollment
- Schedule Later: Choose from our calendar the exact date the patient prefers this payment to run
- Skip (Collect Manually): If you have already swiped their card through the Virtual Terminal, Simple Swiper, or another processor, choose this option as it will skip the need for collecting this payment
- Patient Billing: Choose DD/Bank-On-File on-file information or add new information by clicking the [New] button to the right (highlighted yellow).
- The defaulted MOTO merchant account will be displayed, but if using multiple merchant accounts with us, make the correct selection here. For more information, contact our Merchant Services Department by phone at (877) 343-8950 x102) or email MerchantAccounts@CashPractice.com
- Select the Processing Method for the Initial Payment:
- Scheduling Recurring Payments (purple)
- Auto-Debit Start: Select the date your patient would like their second to run from the calendar. This will set up payments on that date of the month for the remaining payments
- Patient Billing: Choose DD/Bank-On-File on-file information or add new information by clicking the [New] button to the right (highlighted yellow).
- The defaulted MOTO merchant account will be displayed but if using multiple merchant accounts with us, make the correct selection here
- Care Plan Details (green):
- Choose the start date of the care plan, usually when the patient has their first visit as a part of the plan. This may or may not be the date you are enrolling the patient. This is used to calculate the correct end date for the plan as well
- Comments: Optional, and not seen by the patient
- Show Additional Options (light blue):
- (OPTIONAL) By clicking the drop-down, you have the capability to assign auto-debit groups, Drip-Education campaigns for frequent contact, and Patient Groups to better organize your patient lists.
- Once all the above fields are completed, click the [Enroll Patient] button.
Step 5: (OPTIONAL) Capture the [e-signature] and [e-initials] from the patient.
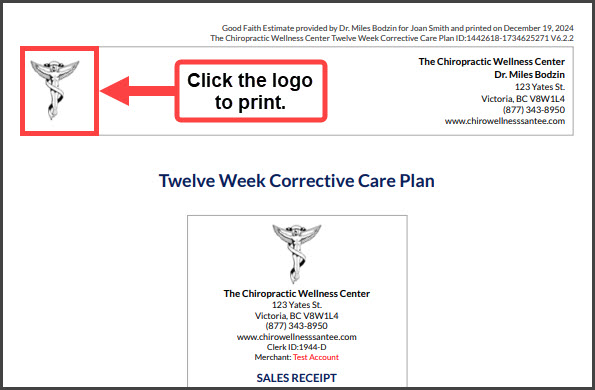
Step 6: Click the logo at the top of the plan to print.