
Automation is key for collections in almost any business these days, and yours is no different! We've made it easy for your team to follow up with patients to collect on declined payments, with a click of a button. This triggers an email to be sent that brings your patient to a customized webpage to make that payment. The instructions below walk through the process for your team on sending these emails as well as being aware of which ones are already running. Let's take a look!
Tips:
- Be sure to have email addresses in your account for each one of your patients. These can be added directly to their Patient Record. Click HERE on how to update this information.
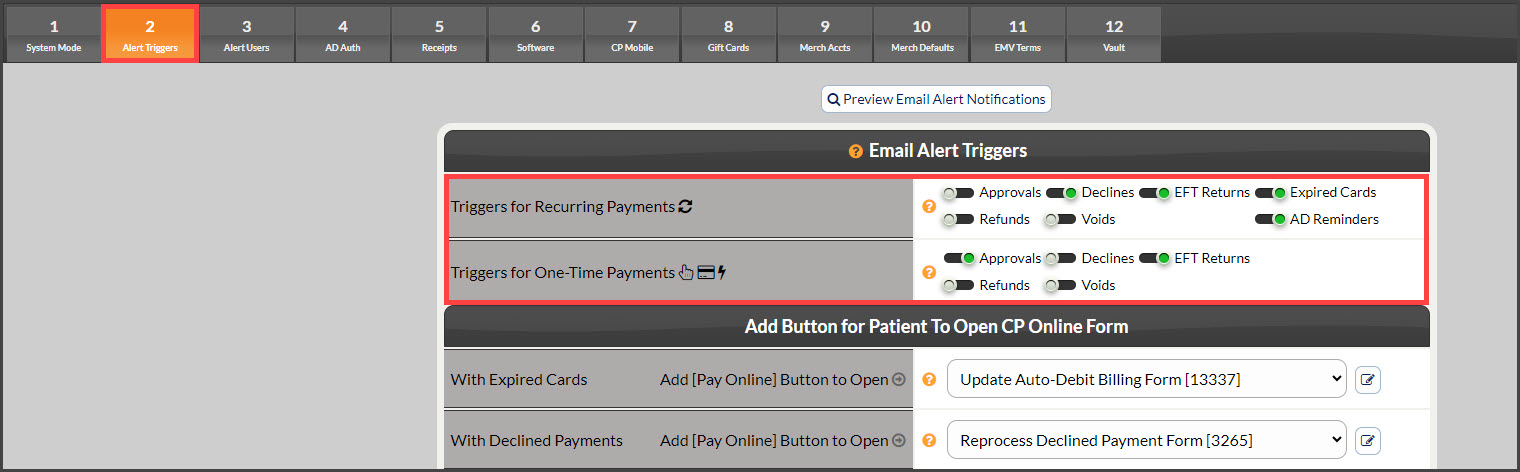
- Check the ADS Settings Step 2 to be sure that all the appropriate boxes are turned on to allow emails to be sent for declined payments. Note: The toggles for Declines in the "One-Time Payments" section are not checked because it's most likely that when a declined payment takes place at the Front Desk it gets handled right then and there. We don't want an automated email being sent that might confuse the patient about whether they made the payment or not.
A few reasons why you may need to follow up with your patients to collect on declined payments are:
-
Their scheduled auto-debit payment was declined - This email is automated by default. Check ADS settings
-
An EFT payment came back as Returned for a one-time payment - This email is automated by default. Check ADS settings
-
A payment was run after the patient left for the day and was declined
- They have already been sent an email but the patient has not taken action
Before sending any emails to your patients and having them pay your office online, be sure to move through all of the steps below.
Getting started:
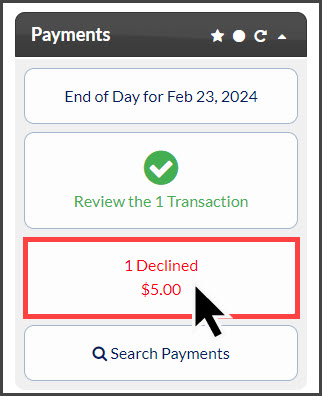
Step 1: From the [Dashboard], click on the [Declined] button, located under the "Payments" section.
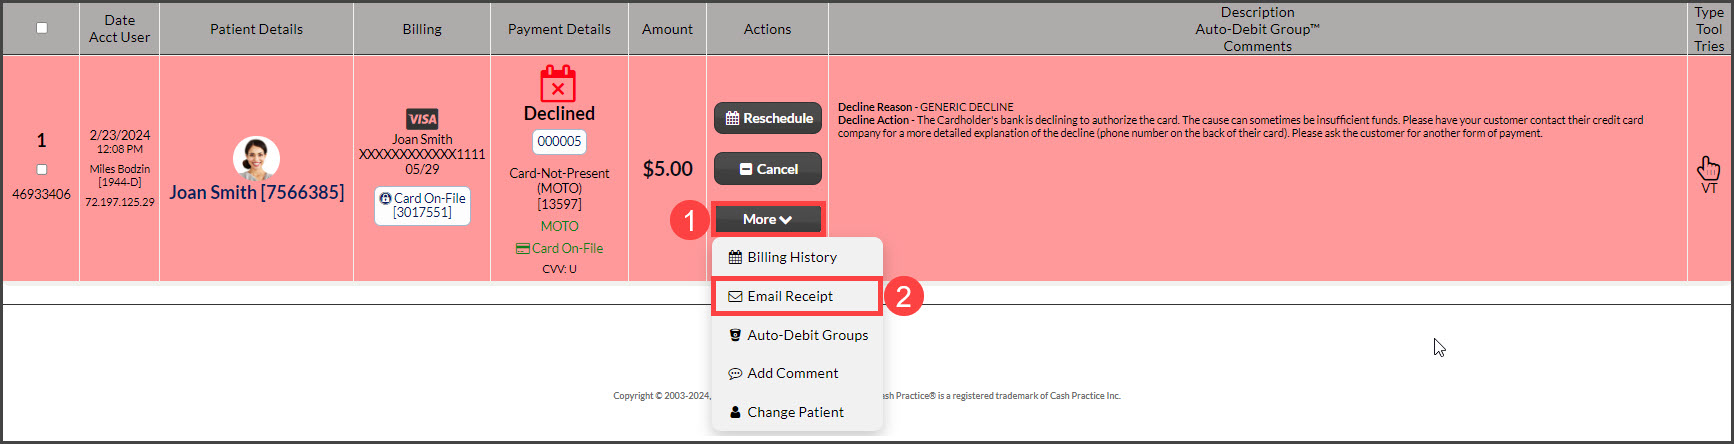
Step 2: Select the [More] drop-down menu and click on the [Billing History] option to review the patient's billing history to determine whether or not they have paid the declined transaction.

From the example image below, I can see that my patient has not made a payment through my Cash Practice® account since the decline took place. At this time we would recommend also checking the patient's ledger in your EHR to ensure they haven't made a payment with cash or check over the counter that may have not been recorded here. Click HERE for more information on how to record a Cash payment inside Cash Practice.

Step 3: After checking the billing history, and the patient ledger, with no sign of payment, either review the reason it declined under the [Description/
Auto-Debit Group™/Comments] column or click on the decline error code located under the word "Declined" to confirm the reason why it could not be processed, through the "Auto-Debit System® Error & Decline Codes" manual.

Or

Step 4: Once you have investigated why the transaction declined and determined an email should be triggered, click on the [More] drop-down menu, then select the [Email Receipt] button.
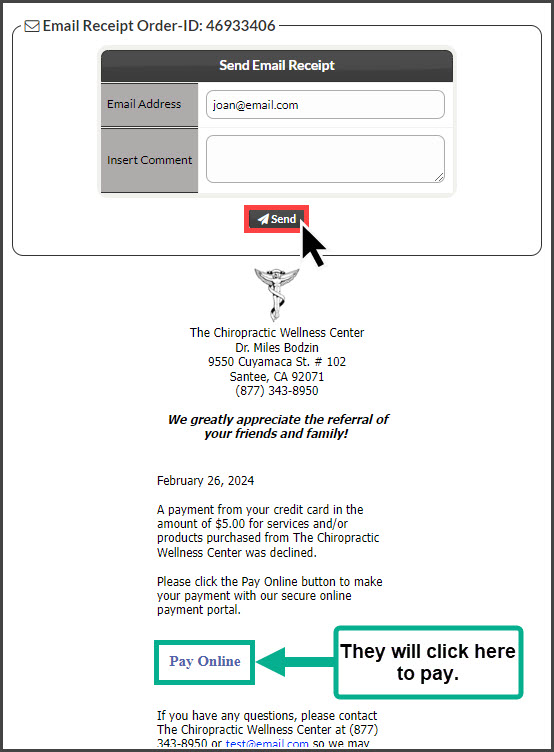
Step 5: Confirm that the patient's email address is entered in the "Email Address" field and feel free to leave a comment. You may even include why it declined so your patient is aware. Then click on the [Send] button. This will email your patient requesting them to process the payment online.
Step 6: The page will refresh with a message saying that it was successfully sent. Close the page by clicking the red X bubble in the bottom right corner.

Step 7: Next, close out of the window by clicking on the [X] in the bottom right corner. The page will then refresh, with a comment listed with the date and time the email was sent as well as the email address.
