We recommend that you create a wide variety of care plan templates. For example, the most common types of templates created are:
- Corrective Care plans
- Wellness Care plans
- Plans with insurance
- Family plans
- Blocks of service & more!
Step 1: Click on the [Systems] Menu→ [Care Plan Calculator®] →[Add New Care Plan].

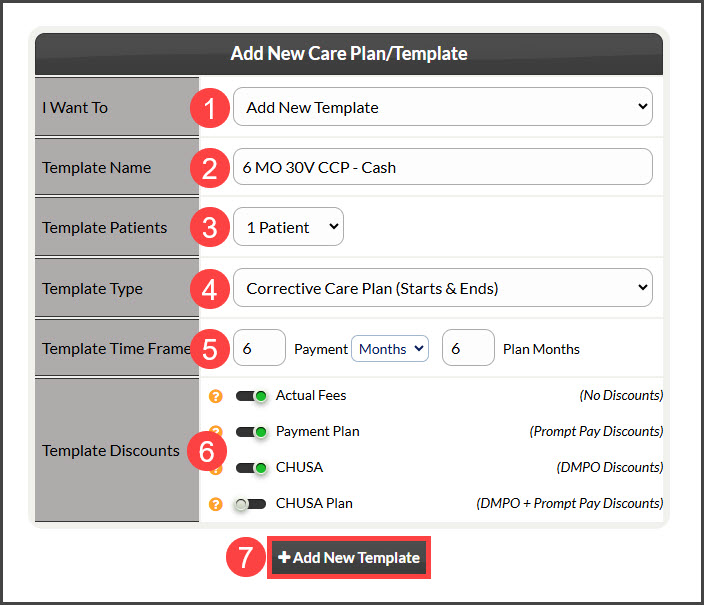
Step 2: Add New Template
This section will expand as sections are filled or selected.
- From the “I Want To” section, select the Action as [Add New Template].
- Template Name: Enter a plan name using characters A-Z, a-z, and 0-9. You can either give a generic name such as "6 months 46 visit". Choose a name that identifies the template so it can be easily found when you have a large list of templates. NOTE: The name is NOT seen by the patient. It is only viewable by account users, therefore the template name should be as descriptive as possible.
- Template Patients: Select the number of plan members. Up to seven members of a family can be on one plan.
- Template Type: Choose from a Corrective Care Plan or Wellness Care Plan.
- Corrective Care Plan (Starts & Ends): For new patients. It is characterized by having a start and end date.
- Wellness Care Plan (Auto Renews): For established patients and is characterized as being ongoing.
- Block of Service: This plan is for patients who need an open-ended timeline for completing care. This only gives the option to pre-pay.
- Template Time Frame:
- Payment Months: enter the number of months for the payment to be made. This represents the period of time the patient has to pay for the service.
- 1 Month: Recurring payment Option 1 Only
- 2 Months: Recurring Option and Prepayment Opt 3 only
- 3 Months +: All Payment Options Available
- 1 Week: Recurring payment Option 1 Only
- 2 Weeks: Recurring Option and Prepayment Opt 3 only
- 3 weeks +: All Payment Options Available
- Plan Months: ENTER ONLY IF different than Payment Months. Enter the number of months the service plan covers. This represents the period of time the patient is committing to use the services. This number does not affect the payment calculation.
- Payment Months: enter the number of months for the payment to be made. This represents the period of time the patient has to pay for the service.
- (OPTIONAL) For offices using a Discount Medical Plan Organization (DMPO) like ChiroHeathUSA - select what discounts will be displayed on the template/plan
- Click the [Add New Template] button and click [OK].
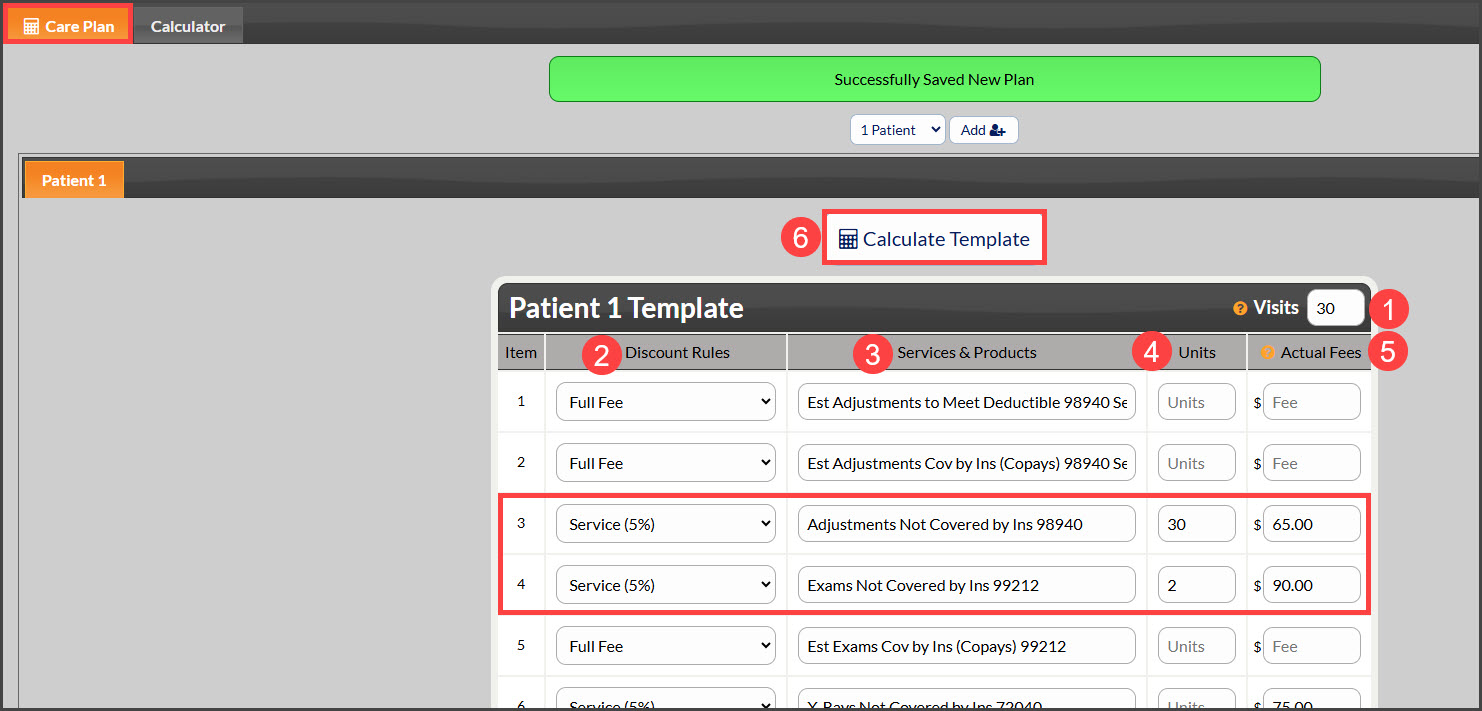
Step 3: Care Plan
- Visits (Required): Enter the total visits the patient will be receiving over the treatment period. This will calculate the Ave$/ visits column.
- Discount Rules: Select Discounting Rules for each service/product.
- Service & Products: Enter the service/product you want to include. (If not already defaulted into the CPC setup)
- Units: Enter the number of units for each service/product. Lines with no units are not included in the plan. You can edit the service/product descriptions and fees. (If not already defaulted into the CPC)
- Actual Fees: Enter the Fee for the Service and Product (if not already defaulted into the CPC).
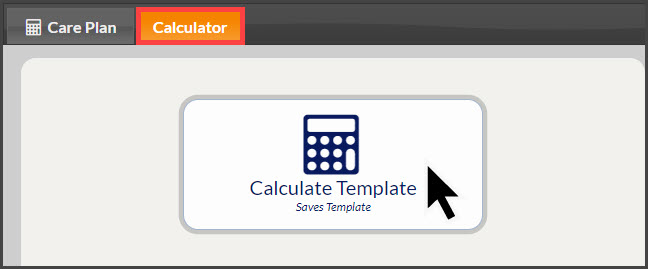
- When finished, click the [Calculate Template] button at the top and bottom of the page.
Step 4: Calculator
The page will be refreshed, and the plan preview will be displayed. Here you have the option to:
***If you're using CHUSA in your plan, you will need to [Allocate Visits] before you can use the template.***

- Use Template: This allows the immediate use of the template for a patient.
- Add a comment, Duplicate (copy) Template, or view/print the GFE (Good Faith Estimate) Worksheet
- View or modify the Template Settings
- Template Name: Choose a name that identifies the plan so it can be easily found when you have a large list of plans
- Template Title: (OPTIONAL) If left blank, the plan will have a title automatically created, such as the "Twelve Month Corrective Care Plan". If you prefer to have your own plan title, enter it here
- Template SubTitle: (OPTIONAL) Add a phase or additional language beneath the Template Title
- Template Type: Choose between Corrective, Wellness, or Block of Service. To edit plan type names and plan introductions, click the pencil button
- Template Time Frame: Payment Months/Weeks and Plan Months/Weeks
- Template Payment Frequency: Select the frequency of payments to be made for Recurring (Option 1) & Initial + Recurring (Option 2)
- Template Visit Allocation: Buttons open the Price Transparent Visit Allocator for each patient on your plan
- View or modify the Service & Product Settings
- Template Option Default: Select the payment option you would like as the default selection for the calculation shown in the Services & Products sections of the care plan. This setting will also preselect the payment option in the Care Plan Enroller, which can be changed at the time of enrolling the patient.
- Template Savings: Choose the way you want to display any Savings. You can show the dollar amount saved, percent saved, both, or none
- Template Details: You can vary the amount of detail that's included in the plan calculation. Although you can include more details, we recommend you use the Display Included when printing the plan for a patient as it is the simplest to explain to patients. For those who need the calculation details, use Totals Only or Totals with Details
- Template No Charge Text: When items are included at No Charge, this text will indicate the no charge
- Template Discounts: Toggle ON to show the Actual Fees on your plans. We recommend this be set to ON so you can show the actual value of the services and products being offered on the plan. You can enter the title you want to refer to your Fees on the plan. Examples include Pay-Per-Visit Fees, Fees, Actual Fees, Full Fees, etc
- Template Credit/Balance: Enter the amount of the credit/balance you want to apply to the plan and make the correction selection. Add a description, and then select how the credit/balance will be applied
- View or modify the Payment Option Settings
- Payment Options: Toggle ON or OFF the Payment Options as well as modify the names and corresponding discounts of each
- Payment Option Details: Toggle ON to display added details with the Payment Options. When presenting plans to your patients, you may find it helpful in some cases to have it ON and in others to have it OFF.
- Payment Options Reversed: Toggle ON if you want to display the payment options in reversed order as Option 3, Option 2, and Option 1.
- Payment Option Avg $/Visit: Toggle ON to include the Avg $/Visit Column in the Payment Options Table. When building plans, we recommend this is ON so you can ensure your Avg $/Visit is not less than your Target Collection Level (TCL). This is to make sure you are not discounting your plans too much. Otherwise, you run the risk of not maintaining your Desired Percent Overhead.
- Round: Recurring To Dollar:
- ON: All recurring payments will be rounded down to the nearest dollar (No Cents).
- OFF: All $ calculations are rounded to the penny ($0.01). Select this method if you want exact calculations.
- Initial: Write-Off to Dollar
- ON: Initial payments will be rounded down to the nearest dollar (No Cents).
- Display Initial Write-Off:
- ON: The amount written off the Initial Payment will be displayed on the Template.
- OFF: It is best practice to not display the write-off as it is typically a small amount between $0.01 - $0.99.
- Display Initial Write-Off:
- ON: Initial payments will be rounded down to the nearest dollar (No Cents).
- View or modify the Content Settings: Slide ON or OFF the following sections:
- Payment Option Add-Ons
- Family Plans
- Custom Content
- Third-Party Financing
- Terms of Agreement
- Additional Visits
- Early Termination
- View or modify the Preselected System Assignments
- Patient Groups: Upon a patient being enrolled into a future plan from this template, assign patients to groups to better organize them and create searchable lists. This is especially helpful for offices with the Drip-Education System for future targeted marketing emails
- Drip-Ed Campaigns: Upon a patient being enrolled into a future plan from this template, this patient can be assigned to an email campaign. if keeping in line with the Loyal Patient Journey, this would be the "Step 6 - New Patient Six Week Lesson Plan"
- Auto-Debit Groups: Upon a patient being enrolled into a future plan from this template, they can be assigned to up to 5 groups in order to categorize/track revenue
If any changes are made to the template the [Calculate Template] button will be activated and MUST BE CLICKED to apply and save template updates.