Step 1: From the Dashboard, hover over the [Patients] menu near the top-left → click on [Patient Settings].

Step 2: Here you can edit or update the Patient Settings.
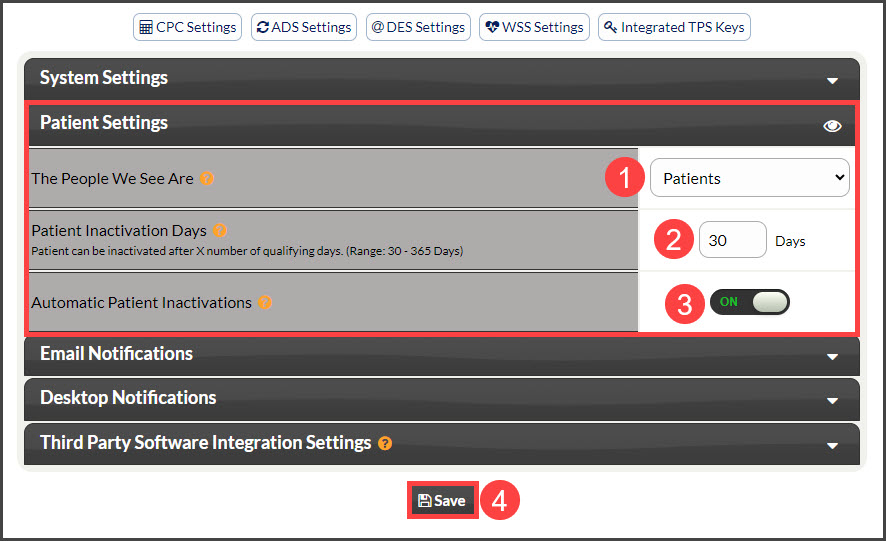
1. The People We See Are: This selection will be used to refer to your people throughout the entire Cash Practice application. The options are:
- Patients
- Contacts
- Customers
- Members
- Patients
- Practice Members
2. Patient Inactivation Days: This section allows your team to narrow down the days of activity that qualify someone to be inactivated. For example, if you've reached the patient max and want to only search for those people who haven't had any activity within the last 90 days, this is where you can designate and enhance the search list generated for inactivation. Detailed instructions on how to inactivate patients in mass are HERE.
3. Automatic Patient Inactivations: OFF by default, turn this setting ON if your office would like to automatically inactivate patients after a minimum of 30 days of inactivity. Our system will check all patient accounts daily and inactivate those that qualify. Patients will not be inactivated if they have an active auto-debit, active email campaign, care plan created, or Wellness Score run for them and any additional activity within the last 30 days. Click HERE for details. Keep in mind, patients can also be "Reactivated" at any point.
4. Click [Save] to save all changes.