The Cash Practice® Auto Debit Groups™ is a powerful feature that allows you to categorize your payments into groups. For example, it allows you to track your Chiropractic Services, Massage Services, Products, Gym Memberships, etc. The instructions below outline a few different ways Auto-Debit Groups™ can be assigned when processing or scheduling payments
Virtual Terminal:
Step 1: Click on the Virtual Terminal icon from the top right side of your Cash Practice account.

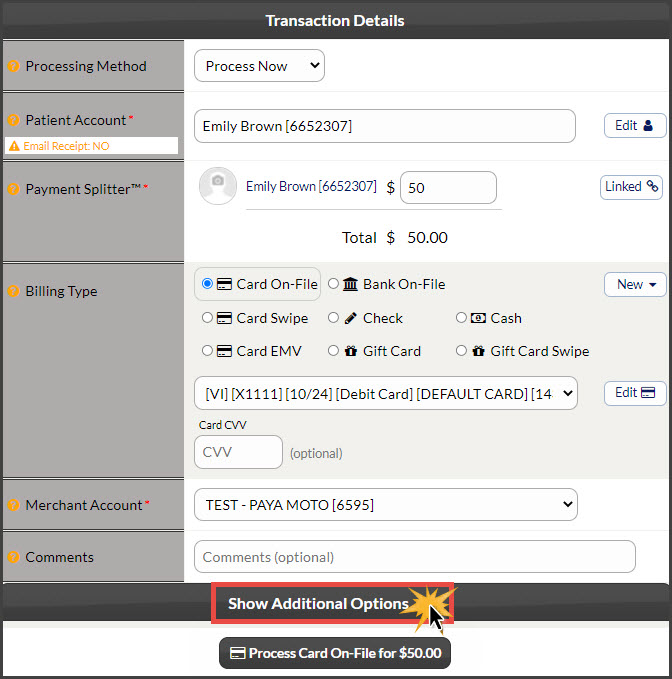
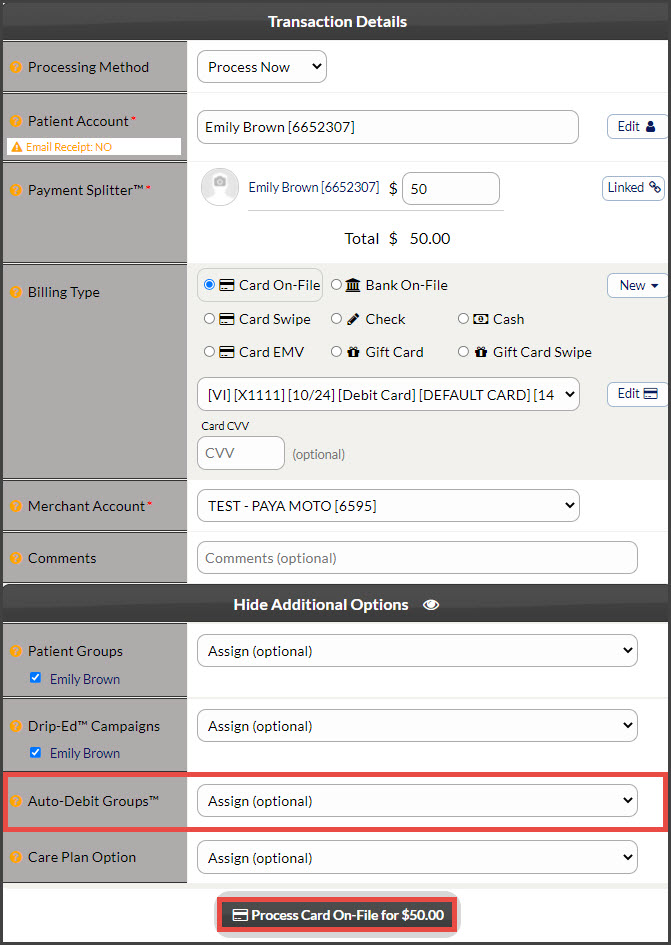
Step 2: First, enter all of the necessary information for processing a transaction with the Virtual Terminal. To assign an Auto-Debit Group™, select the drop-down menu shown in the example below titled "Show Additional Options". Select the desired group, add any additional optional information, and click the [Next Step] button. Proceed with clicking the [Process] button at the bottom of the screen. Once the transaction has been submitted, it will be assigned to the selected Auto-Debit Group®.
Step 1: Click on the Simple Swiper icon from the top right side of the CashPractice.com website.

Step 2: When the screen loads, simply slide the card through your USB card swiper.
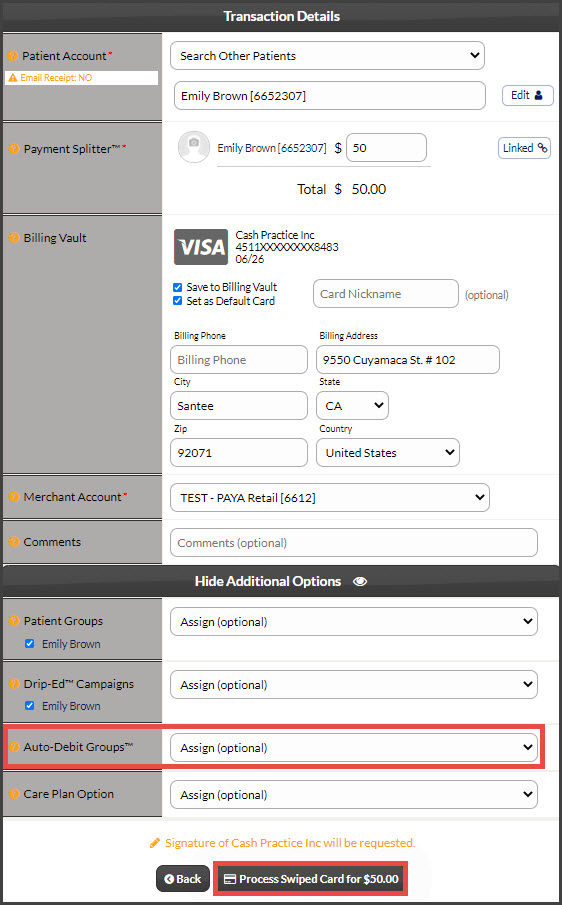
Step 3: First, enter all of the necessary information for processing a transaction with the Simple Swiper™. To assign an Auto-Debit Group™, select the drop-down menu shown in the example below titled "Show Additional Options". Select the desired group and add any additional optional information. Proceed with clicking the [Process] button at the bottom of the screen. Once the transaction has been submitted, it will be assigned to the selected Auto-Debit Group®.

Auto-Debit Scheduler™:
Step 1: Click on the Auto-Debit Scheduler™ icon from the top right side of the CashPractice.com website.

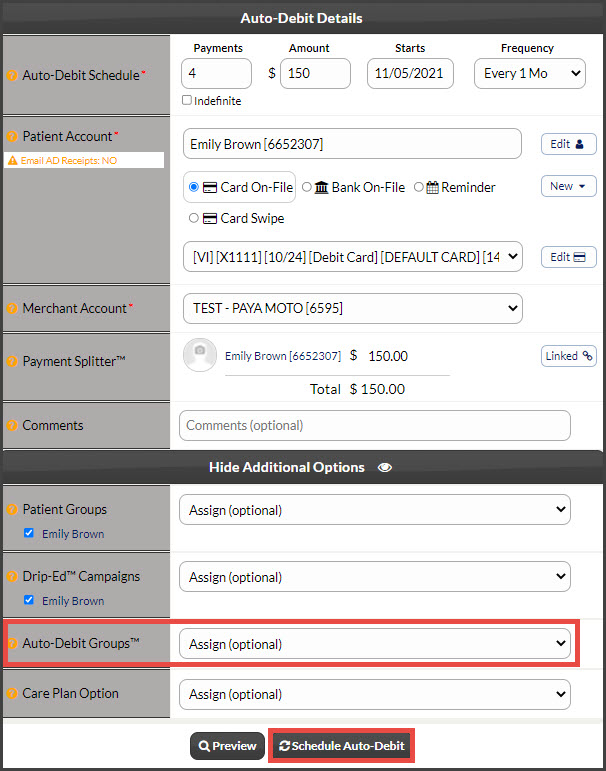
Step 2: First, enter all of the necessary information for processing a transaction with the Auto-Debit Scheduler™. To assign an Auto-Debit Group™, select the drop-down menu shown in the example below titled "Show Additional Options". Select the desired group and add any additional optional information. Proceed with clicking the [Schedule Auto-Debit] button at the bottom of the screen. Once the transactions start to run, they will be assigned to the selected Auto-Debit Group®.

Cash Plan Auto-Debit Scheduler™:
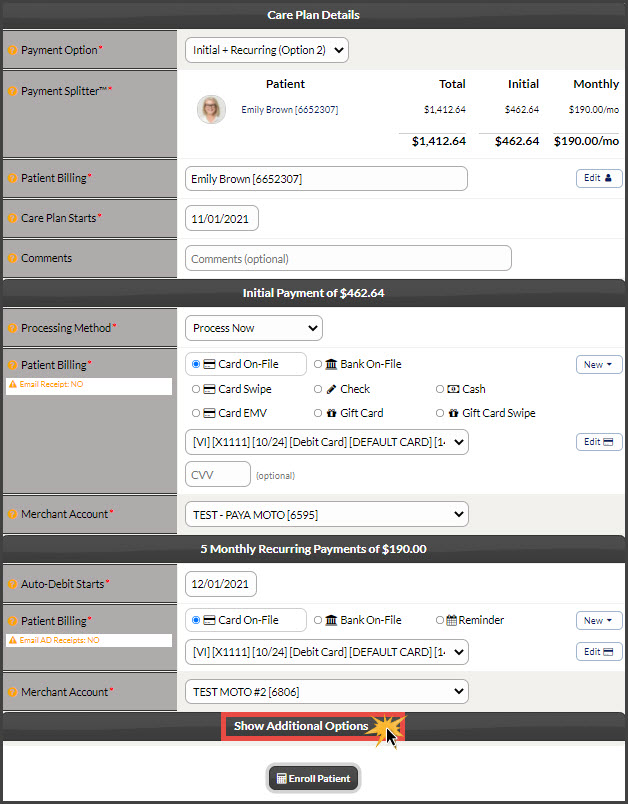
To learn how to access and schedule an auto-debit from a care plan, follow the instructions HERE.
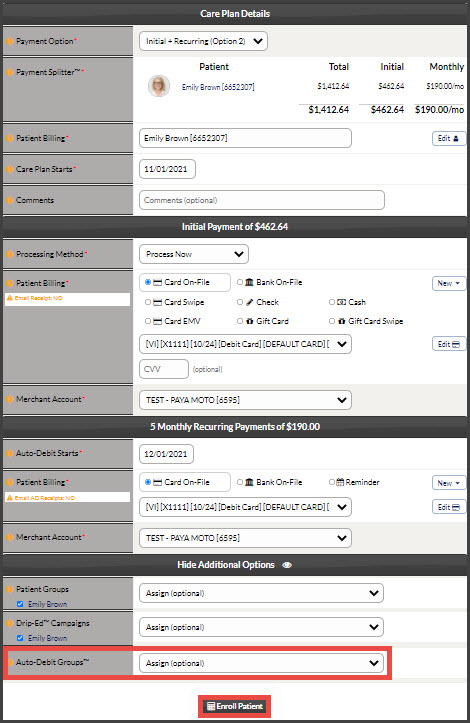
Step 1: First, enter all of the necessary information for scheduling an auto-debit from a care plan. To assign an Auto-Debit Group™, select the drop-down menu shown in the example below titled "Show Additional Options". Select the desired group and add any additional optional information. Proceed with clicking the [Enroll Patient] button at the bottom of the screen. Once the transactions start to run, they will be assigned to the selected Auto-Debit Group®.