Getting started:
Step 1: Hover over [Systems] → click on [Drip-Education® ] → [Campaigns & Broadcasts].

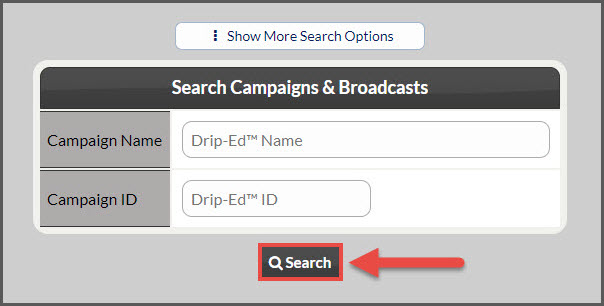
Step 2: Use the search options page to refine the search for the campaign you are looking for → click the [Search] button.

Step 3: Click on the [Edit] button for the email you wish to edit.

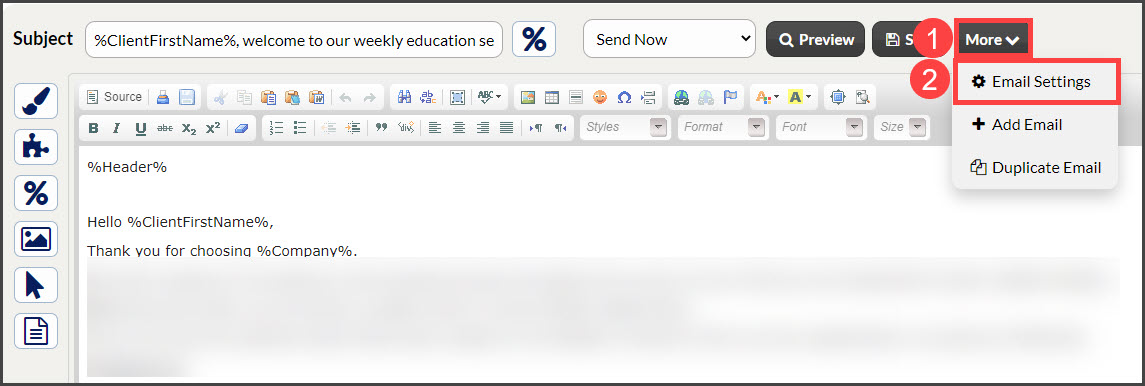
Step 4: From the Editor → click the [More] button → [Email Settings].
Step 5: Here you can edit any of the [Email Settings].
- From Name: The email will appear that it's coming directly from the assigned member's name. The Drip Ed System will automatically replace the variable before the patient receives it.
- If you would like to change the member name for this email, do so here OR if you would like to apply this change to all emails in the campaign series→ click the [Apply To All] button.
- From Email: The email will appear that it's coming directly from the assigned member's email. The Drip Ed System will automatically replace the variable before the patient receives it.
- If you would like to change the email address for this email, do so here OR if you would like to apply this change to all emails in the campaign series→ click the [Apply To All] button.
- Reply-To Email: The email will appear that it's coming directly from the assigned member's email. The Drip Ed System will automatically replace the variable before the patient receives it. The assigned member email will be the email used when a patient replies to the email campaign.
- If you would like to change the reply to the email address for this email, do so here OR if you would like to apply this change to all emails in the campaign series→ click the [Apply To All] button.
- Alternate Destination Email: If you would like to send the email to a different email address enter it here. Leave it BLANK if you want the email to go to the patient.
- On Open Assign Patient To (OPTIONAL)
- Group: Select a group from the drop-down if you want the patient automatically assigned to this patient group when a patient opens the campaign email,
- Campaign: Select a campaign from the drop-down that you want the patient automatically assigned to when a patient opens the campaign email.
Step 6: Once all changes are complete, hit the [Save Settings] button.


