
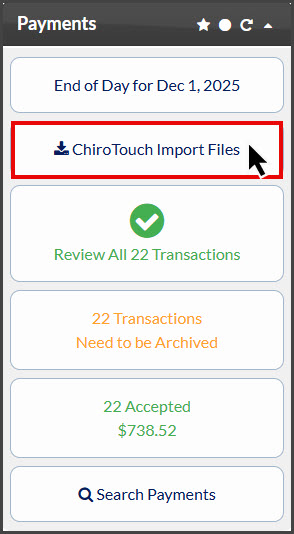
Step 1: From the Dashboard, click on the [ChiroTouch Import Files] button under the "Payments" section.
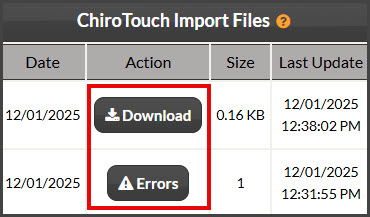
Step 2: The report will display either a [Download] button, an [Errors] button, or both. If the list displays an [Errors] button, click on that one first to take action. If the list does not display an [Errors] button, skip to the [Download] bullet point below.
-
[Errors] - This report means you have at least one transaction with a missing ChiroTouch ID number. Click on the [Errors] button to take action.
-
This will open a report showing you the transaction(s) missing a ChiroTouch ID. To resolve, click on the flashing [Missing ChiroTouch ID] button, enter the specific patient's ID into the [ChiroTouch-ID] field in their patient record, scroll down, and click [Save]. Once it is successfully saved, it will display a green alert at the top of the patient's profile. Close out of the pop-up window in the top right corner and add other missing ChiroTouch IDs if applicable. If there are no more IDs missing, close out of the report that was dising the transactions so that you are brought back to the report showing the [Download] button and continue with the next bullet below.
-

-
[Download] - This report contains transactions that are ready to be imported into ChiroTouch. Simply click on the [Download] button to download the file to your computer (it will be saved to your "Downloads" folder on your computer by default). From here, you will proceed with the normal process of importing your transaction report into ChiroTouch. For instructions on importing, continue to Step 3.
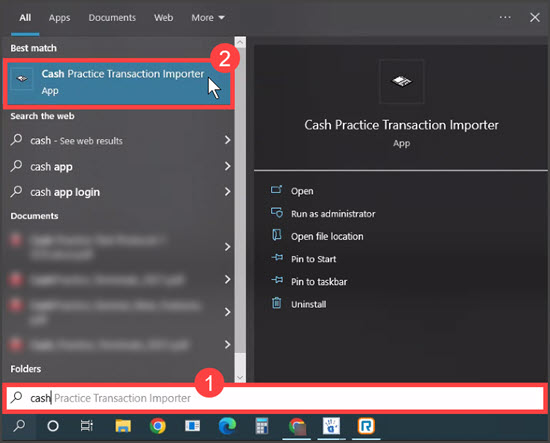
Step 3: Open the [Cash Practice® Transaction Importer]. This tool can be located on your computer by accessing your [Start Menu] → typing in the word "Cash" → then selecting [Cash Practice® Transaction Importer].
If the tool does not come up this way, from your [Start Menu], go to [All Programs] → locate the [ChiroTouch®] folder → click [Utilities] → and select the [Cash Practice® Transaction Importer].
Note: The more you use this tool, it will automatically create a shortcut in your Start menu. You can also drag the Transaction Importer tool to your home screen for easy access or pin it to your taskbar.
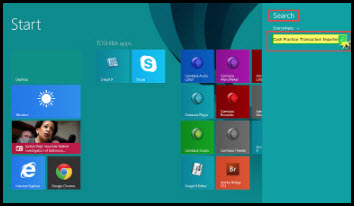
Windows 8 Users: In the [Search] tool → enter Cash Practice® Transaction Importer.
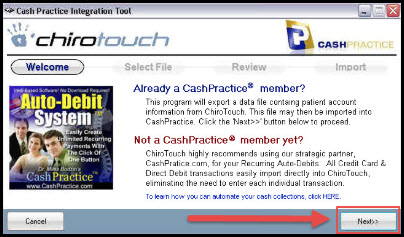
Step 4: Once the Cash Practice® Transaction Importer opens, click the [Next] button.
Step 5: Select [Import Payment Transactions] and [Next].

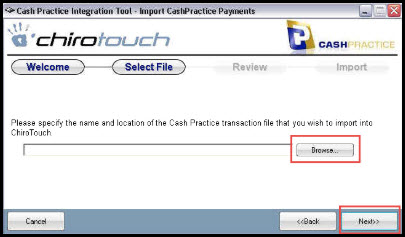
Step 6: Click the [Browse] button to locate the Transaction Report in your "Downloads" folder (or wherever you saved it). Then proceed to the [Next] step. Select the file you wish to download and click [Open].

Step 7: Under each tab labeled Accepted, Refunded, Returned, & Voided, you can view the transactions about to be imported. Go to the [Next] step.
Note: Under the [Duplicate] tab, any transactions already posted into ChiroTouch® will be listed. Do not panic....the [Duplicate] transaction will not double post. It's simply showing you the transactions that will not be uploaded since they are already posted. Most likely these were one-time transactions that were processed directly within ChiroTouch®.

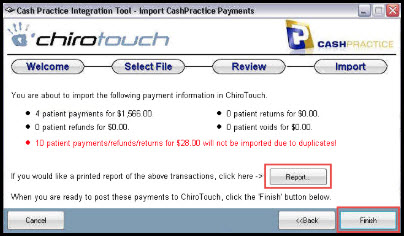
Step 8: Click the [Finish] button.
Optional: Before clicking on the [Finish] button, click the [Report] button to print a report of the transactions that have been posted to the corresponding ledgers.
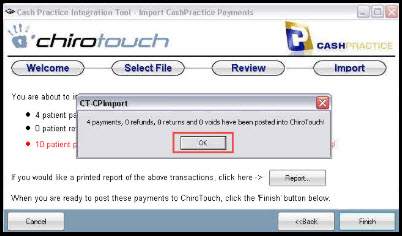
Step 9: Click [OK] to confirm the importing activity that just took place. You can now log into ChiroTouch® Front Desk and view a patient ledger if you'd like to see the magic that just happened!
NOTE: Files are automatically deleted after 30 days, but you can always generate your report the original way, with the Posted Payment Report Generator.