
Is the wrong patient account attached to a payment?
Uh-oh...you processed a transaction for Patient A, but attached it to Patient B's account! We understand mistakes can happen, which is why we have made it to where you can easily fix the mistake.
You now have the ability to re-assign processed payments to the correct patient account, should this happen. The ability to re-assign transactions is a permission that the account Administrator can perform and give permission to selected account users. Click HERE for instructions on managing the account user permissions.
Getting Started:
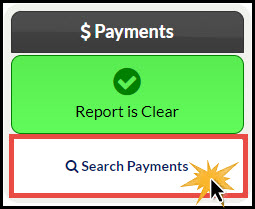
Step 1: Click on the [Search Payments] button on the right side of the Dashboard, under the "Payments" section.
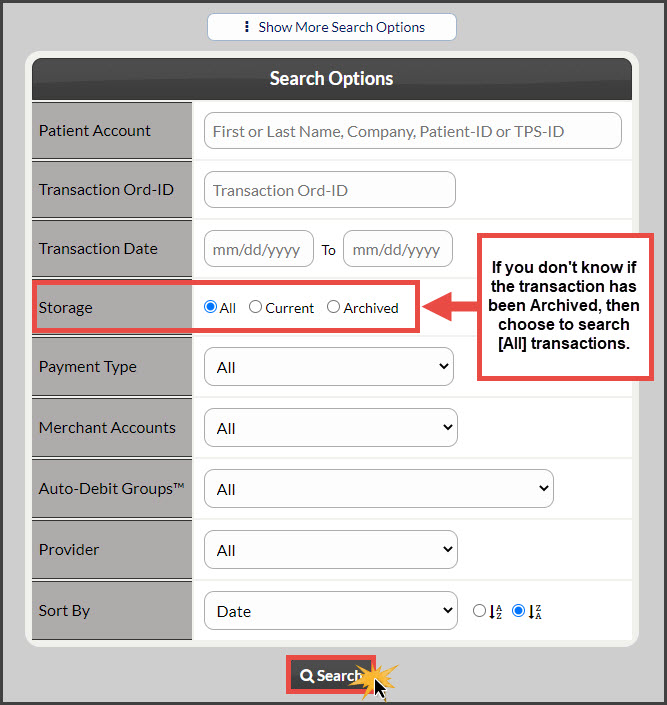
Step 2: Enter the search criteria and click [Search].
At a minimum, enter details for the transaction you are looking for; such as [Patient Account] or Transaction Date From→To. If the payment was archived, change the [Storage] field to [All] or [Archived]. This will pull up all of your transactions for your search range that may have been archived.
Step 3: Locate the transaction that needs to be re-assigned and click the [More] button→ [Change Patient]. The [Re-Assign Patient] window will open.
NOTE: You will NOT see a [Change Patient] button if the transaction has been refunded OR if you use PayDC as your EHR.
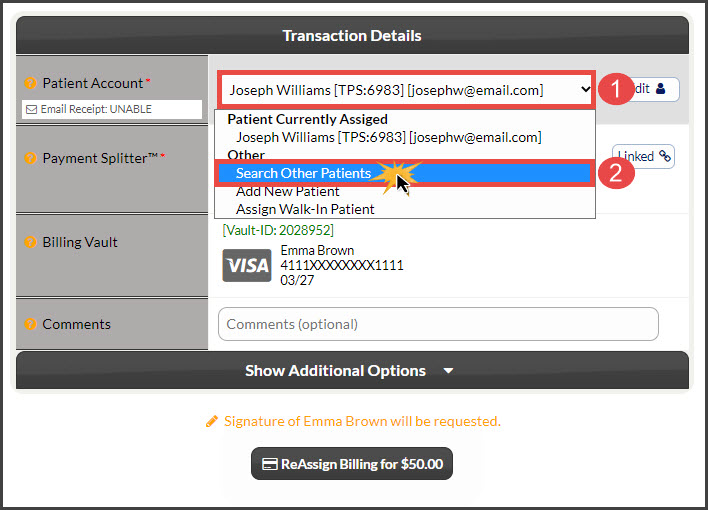
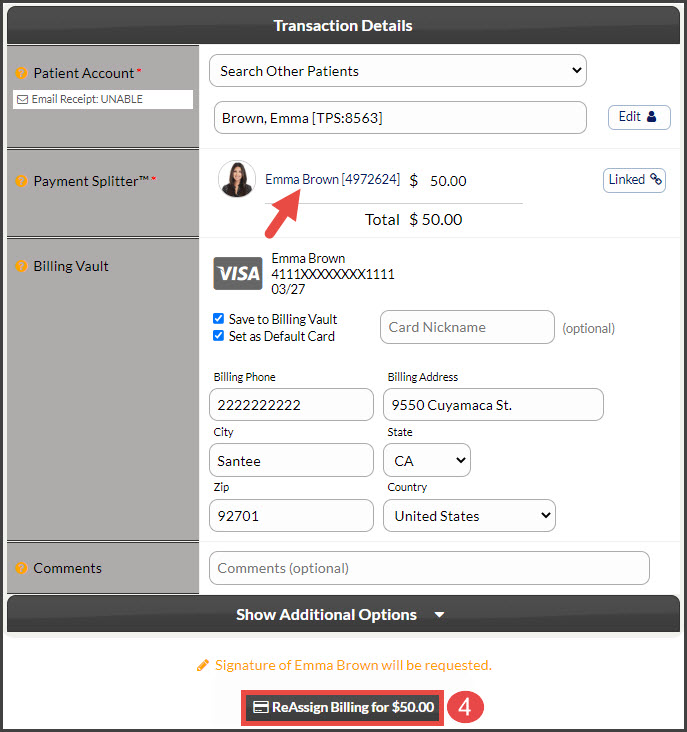
In the example below, Emma Brown's credit card was processed under Joseph Williams' patient account. We need to un-attach Emma's billing history & billing information from Joseph's account by clicking the [More] button and re-assigning the transaction to Emma Brown's account. In a separate step (step 5) we will need to delete Robert's credit card from Mary's account & manually edit the ledgers of our billing software.

Step 4: From the [Re-Assign Patient] window,
- Select the drop-down menu for the person currently assigned
- Then select "Search Other Patients". (If the patient name does not display, you will need to add them in and choose "Add New Patient" instead)
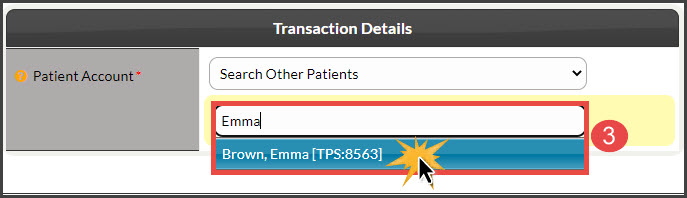
- Enter the first or last name of the patient → and select their name from the menu
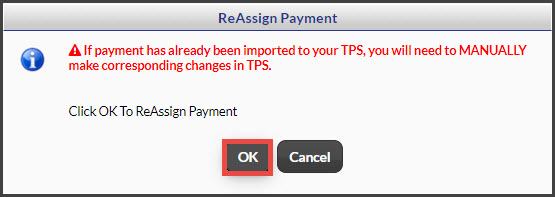
- The page will refresh slightly → click [Re-Assign Billing for X]

Step 5: DELETE PATIENT BILLING THAT WAS SAVED TO THE WRONG PATIENT ACCOUNT!! Be sure to review the patient account where the incorrect transaction was processed and remove the other patient's billing information. Click HERE for instructions on deleting credit card information from a patient account. (If you do not delete the billing, this mistake will happen again.)
Step 6: MANUALLY EDIT THE LEDGERS OF YOUR BILLING SOFTWARE. Be sure to edit your patient's ledgers to reflect the changes you have made.