If you already have the [Good Faith Estimate Content] section turned on in your Care Plan Calculator [CPC settings], continue with the instructions below to add the NPI and Tax ID. If you do not have that section turned on, please follow the instructions (further below) that take you through the CPC Settings route.
To get started, follow the sequence below.
- A: Hover over your [User Profile], located in the top-right corner of the Dashboard
- B: Hover over your name
- C: Click on [My Profile]

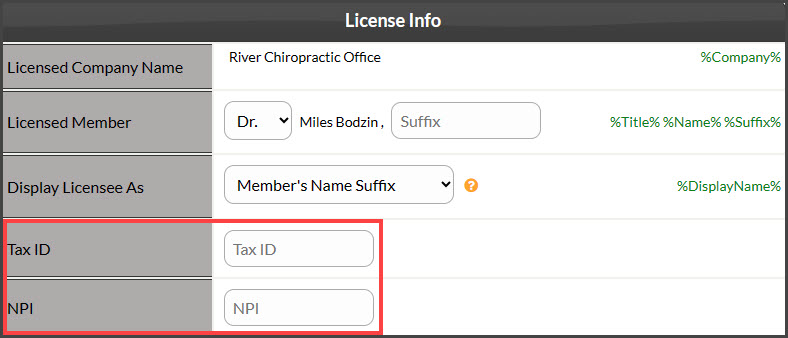
Step 1: Scroll down to the [License Info] section, enter your Tax ID and NPI, and click [Save] at the bottom of the page.
From the CPC Settings:
To get started, follow the sequence below.
- A: Hover over [Systems]
- B: Click [Care Plan Calculator®]
- C: Click [Setup]
- D: Select [CPC Settings]

Step 1:
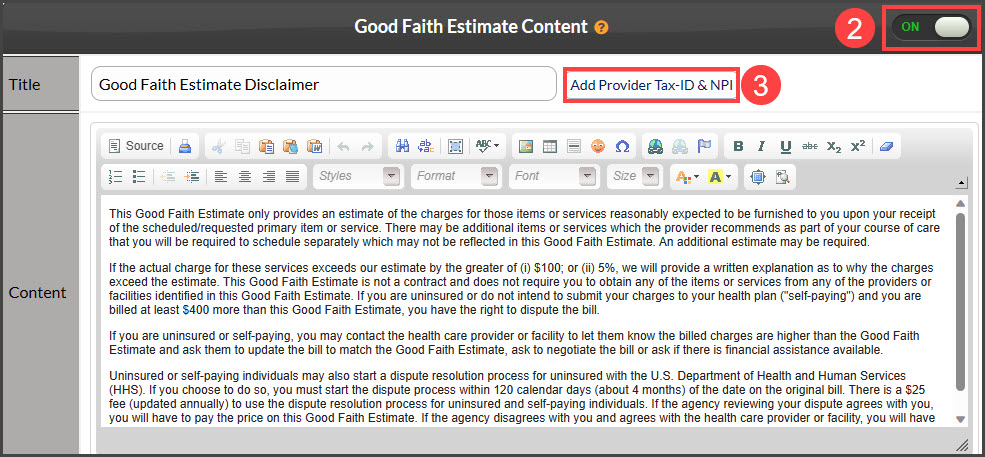
- Click on [Step 9 - Plan Content]
- Scroll down to the [Good Faith Estimate Content] section and toggle the button [ON] if it is not on
- Select the [Add Provider Tax-ID & NPI] button

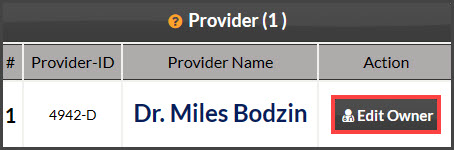
Step 2: Click the [Edit Owner] button.
Note: If your Cash Practice account includes space for multiple providers, you will have the opportunity to add their NPI and Tax ID as well.
Step 3: Scroll down to the [License Info] section, enter your Tax ID and NPI, and click [Save] at the bottom of the page.
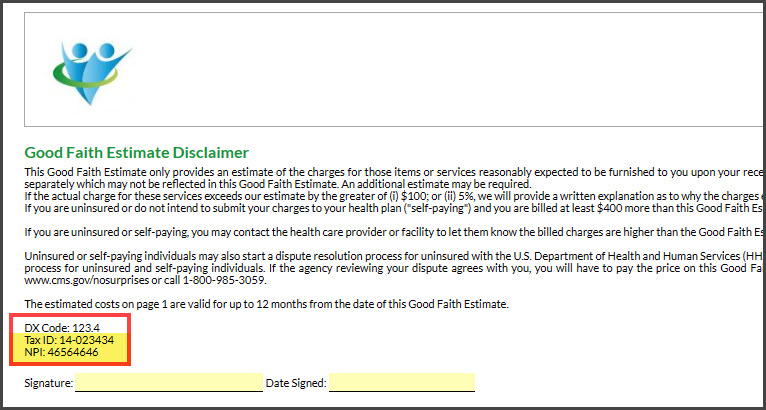
Note: The Tax ID and NPI will display under the "Good Faith Estimate Disclaimer" on page 4 of a printed care plan.