With multi-ledger systems like Eclipse®, it can be difficult to remember what case number a transaction is supposed to be processed for. And sometimes mistakes are made, but we're here to help! For those patients who have more than one ledger, be sure to have already added the number of cases along with their "Default" case number to their Patient Record. Once this has been completed, you are now ready to define the transaction.
Getting started:
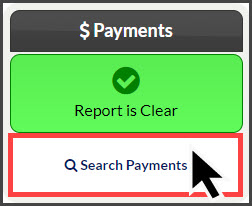
Step 1: From your Dashboard, click on the [Search Payments] button, located under your "Payments" section.
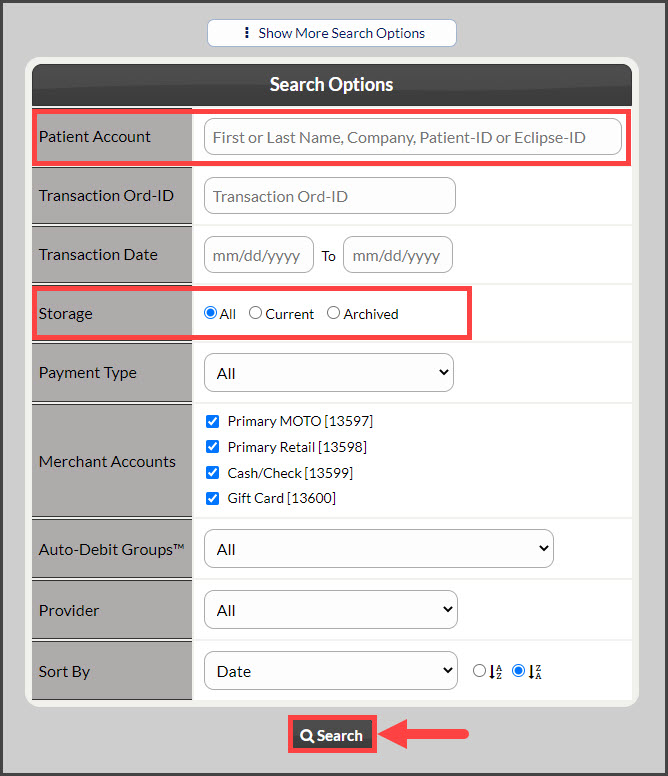
Step 2: From the "Search Options" page, enter your search criteria, select [All] for "Storage," and then click on the [Search] button.
Step 3: Once your report loads and you locate the transaction, select the [More] button under the [Actions] column → click on the [Change Patient] option.
*Note: If the [Change Patient] option is not here then you do not have permission to complete the action. Please reach out to the owner of the account to assist you, or have them turn this on by clicking on the Instructions HERE. This will be under Auto-Debit System® → [PPR: Re-Assign Payments]
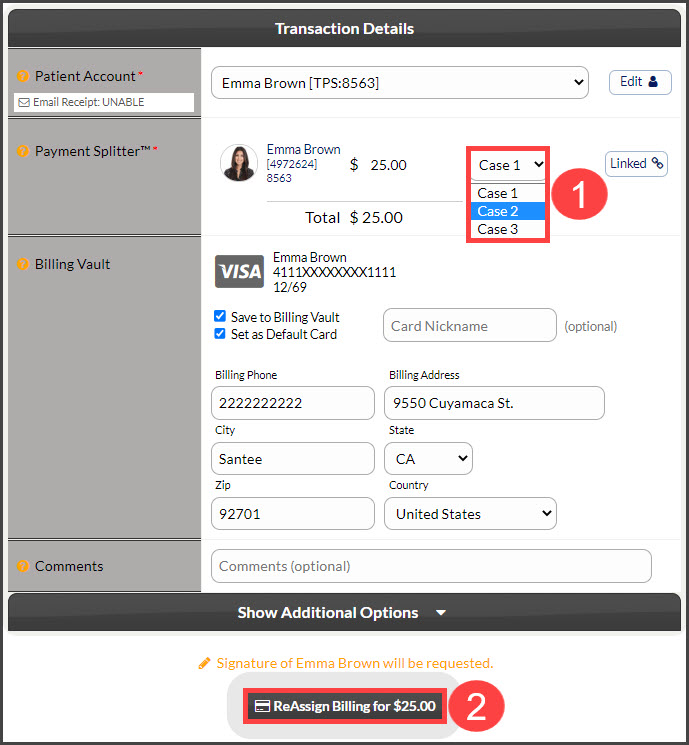
Step 4: Select the case number you want to re-assign the transaction to and click on the [Re-Assign Billing for $X] button.
Step 5: The system will then reload a copy of the receipt, which you can close out of, in the top-right corner.
The system will automatically add a comment on the change. You could also click on the [More] drop-down menu and select [Change History] to review the changes made.


