
Effective 2019 - Present:
To process transactions within the app, our Retail merchant account is required and has merchant fees associated with it. There is a $5/mo gateway access fee added to your subscription dues. These fees are waived with memberships that are $199/mo and up. In the event you cancel your CP Mobile™ Gateway (for Android and Apple devices), there will be a $25 fee each time reactivate the gateway.
NOTE: If you updated the app and had previously purchased a CP Mobile™ swiper before January 2024, this device will not work with the new app. A new device will need to be purchased.
January 2024 - Present Steps:
Getting started:
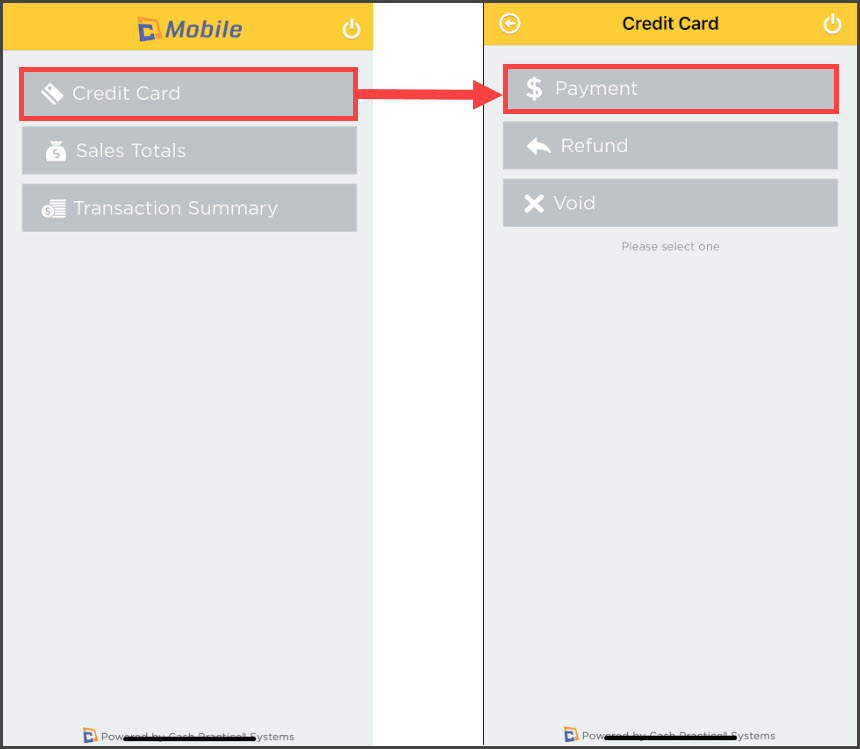
Step 1: Once you have signed in, from the CP Mobile™ home screen, select [Credit Card] → [Payment].
Step 2: Enter the Amount. You may also add a note (optional) that will show up as a comment in your Payments Report on the Cash Practice® website. Select the [Manual Entry] button.

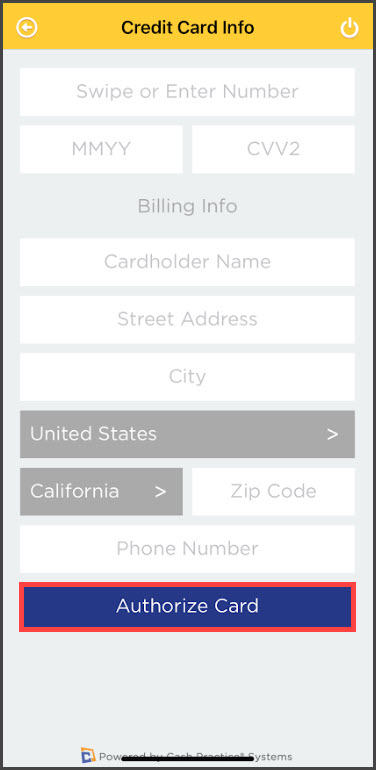
Step 3: Key enter all the required credit card information and click the [Authorize Card] button.
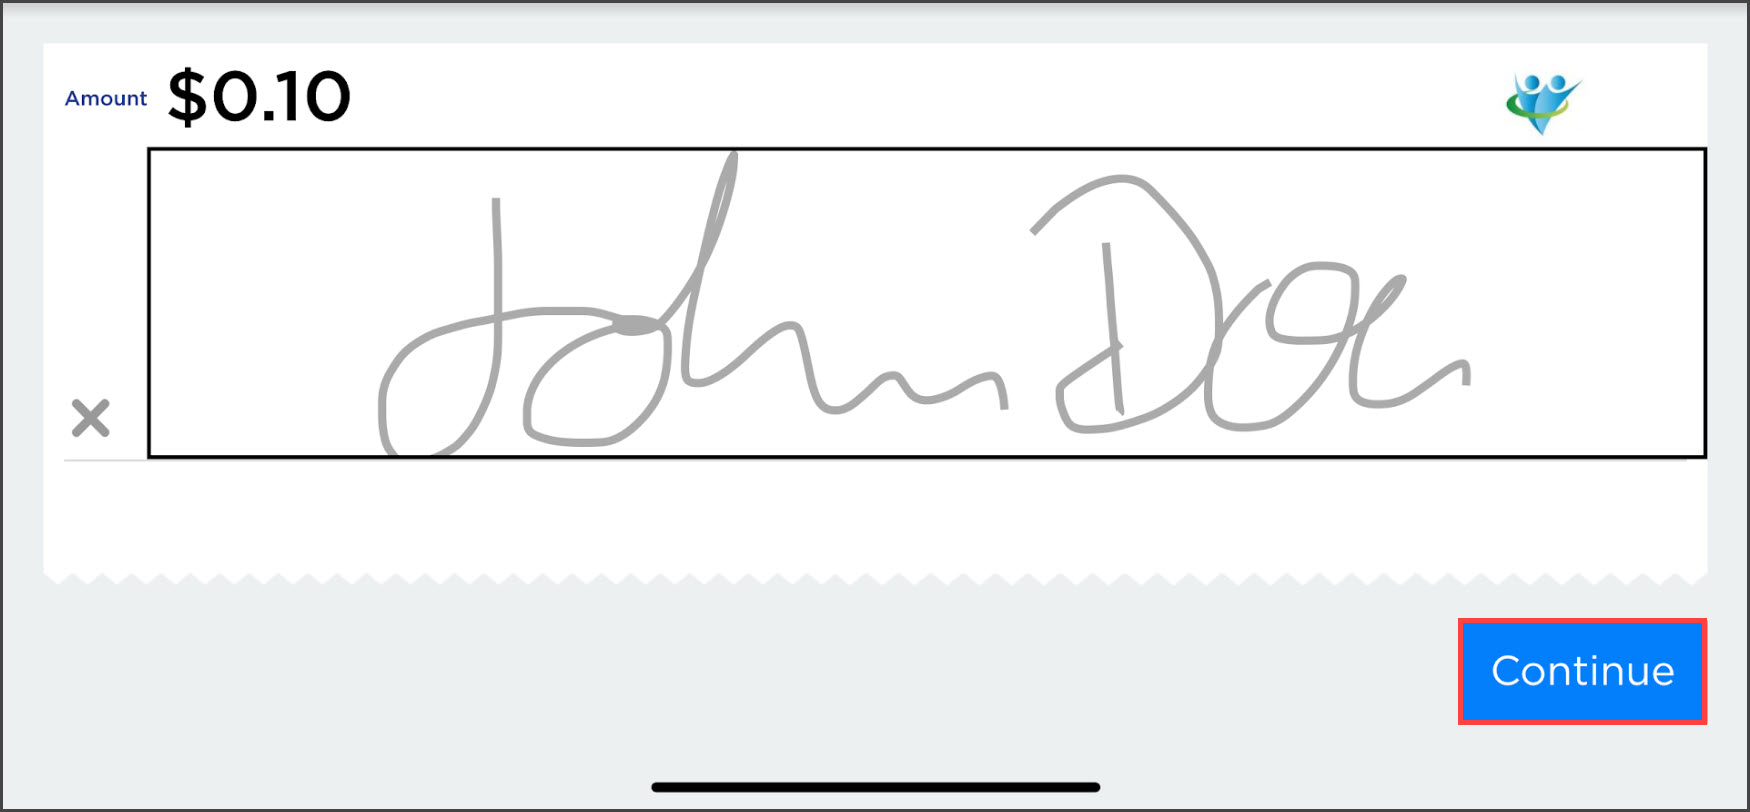
Step 4: Once approved, the signature screen will appear. Here, the customer can sign their name. To erase the signature, click the X on the far left of the signature line. After signing, click the [Continue] button.
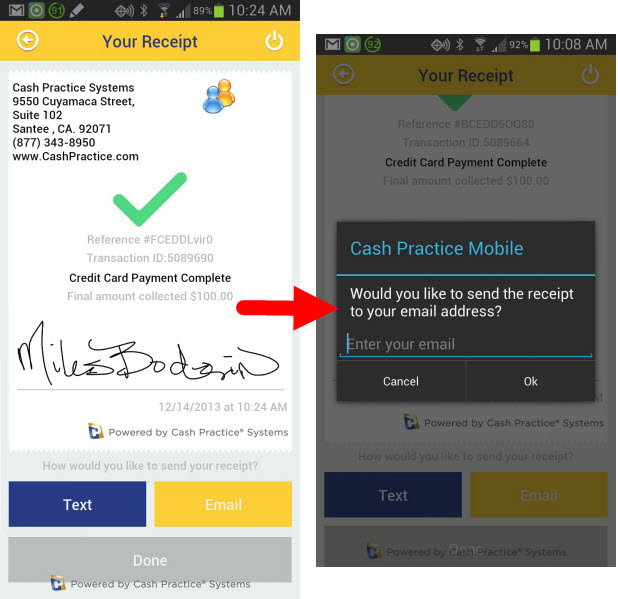
Step 5: After you click [Continue], you will be taken to the *receipt. From here you can Text or Email the receipt to the customer. Once you are finished, click the [Done] button.

Before January 2024 - The app has not been updated:
Getting started:
Step 1: Once you have signed in, from the CP Mobile™ home screen, select Credit Card.

Step 2: Now you can select $ Payment.

Step 3: Enter the Amount. You may also add a note (optional) that will show up as a comment in your Cash Practice® Systems Posted Payments Report. Select the [Continue] button.

Step 4: Key enter all the required credit card information and click the [Authorize Card] button.

Step 5: Once approved, the signature screen will appear. On this screen, the customer can sign their name. To erase the signature, click the X on the far left of the signature line.

After signing, click the [Continue] button.

Step 6: After you click Continue, you will be taken to the *receipt. From here you can Text or Email the receipt to the customer. Once you are finished, click the [Done] button.
* Note:
- Receipts cannot be texted to a customer from an iPad or any device that does not have FULL texting abilities. This would include Android tablets and iPads that only have iMessage.
- Receipts can be printed directly from the CashPractice.com account if needed. Please see the linked instructions HERE.