Important: To create a professional and trustworthy experience for your patients, we highly recommend you customize your online forms. By uploading your company logo and adjusting the colors to match your website's branding, you can build confidence and assure patients that their billing information is being submitted in a safe and secure environment.
Getting Started:
Step 1: From the Dashboard, click on the [Generate Pay Now Link] icon in the top-right corner of your Dashboard.

Step 2: Click on [Pay Now Link History].

Step 3: Use the search options to define which Pay Now Links you have sent. Then click [Search].
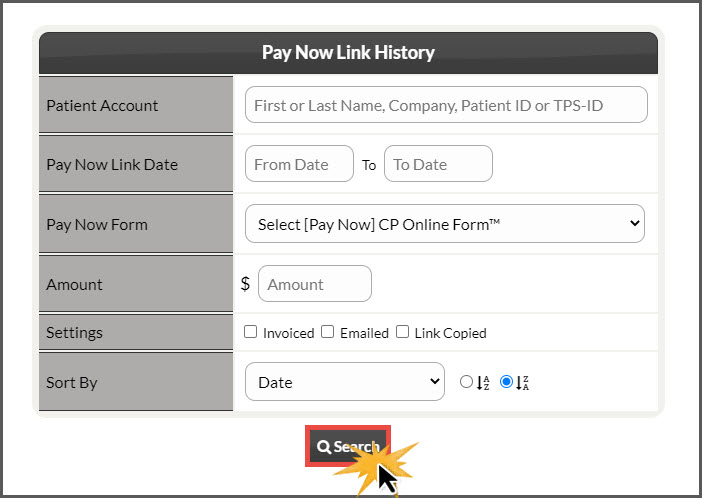
Step 4: Displayed will be A list of your search results.
- Date: This shows the date the online form link was sent as well as which user sent it
- Profile: Your patient's profile picture will be displayed (if they have one saved in their patient record)
- Patient: This will display which patient record was sent the online form
- CP Online Form: This shows which online form was sent to your patient
- Amount: How much money was requested in the online form, prior to being sent to your patient
- Icons:
- PDF: This lets you know if a PDF was attached to the email
- Envelope: This tells you if the online form was sent via email from the Pay Now feature. Click on the envelope icon to review the email sent
- Link: This lets you know if the "Pay Now Link" was copied (this may occur if you want to copy the link into your own email provider or texting service).
- Paid: This will display the date and time your patient submitted the payment online
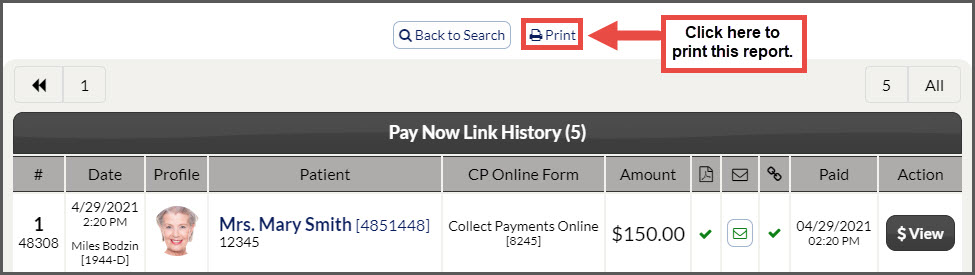
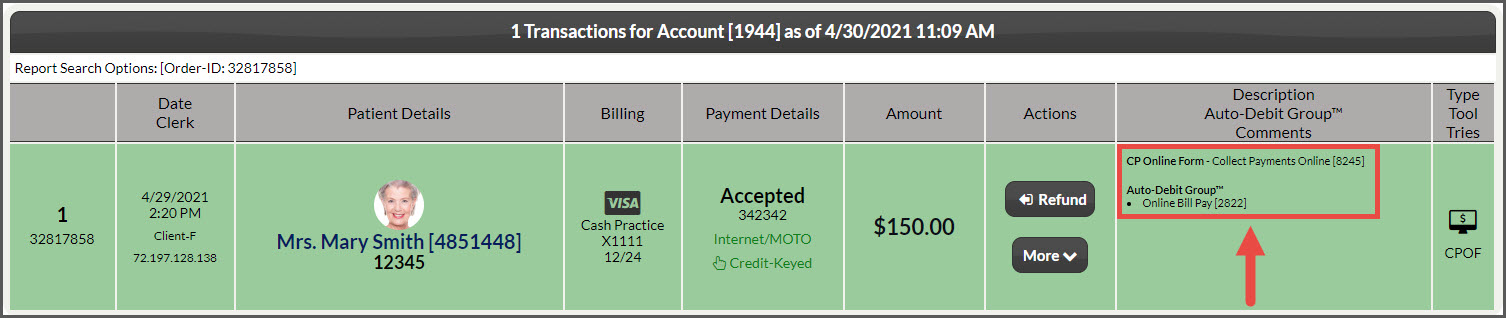
- Action: The [View] button located under the "Action" column shows a preview of the transaction as it would appear on your Posted Payments Report
Example: